What if you could transform your daily shower routine into a moment of pure water purification? Imagine stepping under water that’s free from chlorine, heavy metals, and other impurities. This isn’t science fiction – it’s possible with a simple DIY project that anyone can tackle.
Most people never think about what’s flowing over their heads when they turn on their shower. But the truth is, our showers might be exposing us to more contaminants than we realize. That’s where activated carbon comes in – a natural material that’s been used for decades to remove impurities from water. The good news? You can harness this power yourself with a few simple materials and some basic tools. This guide will walk you through everything you need to know to create your own effective shower filter.
Why Activated Carbon Works So Well
Activated carbon isn’t just another fancy material – it’s actually a miracle of chemistry. Think of it like a sponge, but one that’s been specially treated to have millions of tiny pores. These pores act like microscopic traps, capturing contaminants that would otherwise pass through your shower water. The process is called adsorption – essentially, the carbon attracts and holds onto impurities without changing the water’s chemical composition.
This method works particularly well against chlorine, which is why many people notice an immediate difference after installing an activated carbon filter. Chlorine tends to give water that distinctive smell and can cause dry skin and hair. But here’s something interesting: activated carbon also removes heavy metals like lead and mercury, though it’s less effective against bacteria and viruses. It’s not a complete solution, but it’s a powerful first step toward better water quality.
What You’ll Need to Get Started
Building your own shower filter doesn’t require expensive equipment or professional skills. Here’s what you’ll want to gather:
• Activated carbon granules – This is the heart of your filter. Look for food-grade or pharmaceutical-grade carbon for best results.
• A plastic bottle or container – A 2-liter soda bottle works great, or you can use a larger container if you prefer.
• Fine mesh or coffee filter – To prevent carbon from washing out during use.
• Shower hose adapter – This connects your existing shower setup to the new filter.
• Optional: A small funnel or tube for easier filling
The beauty of this project is its simplicity. You can even repurpose items you already have around the house. For instance, an old water bottle or a clean plastic jug can work perfectly. The key is ensuring your container is food-safe and can hold enough carbon to make a difference.
Step-by-Step Installation Process
Ready to get your hands dirty? Here’s how to put everything together:
Prepare your container – Clean your plastic bottle thoroughly with soap and water. Remove any labels or residue.
Add the carbon – Pour your activated carbon into the bottle. Fill it about 3/4 full for best results.
Create a filter layer – Place your fine mesh or coffee filter over the opening of the bottle. This prevents carbon from escaping.
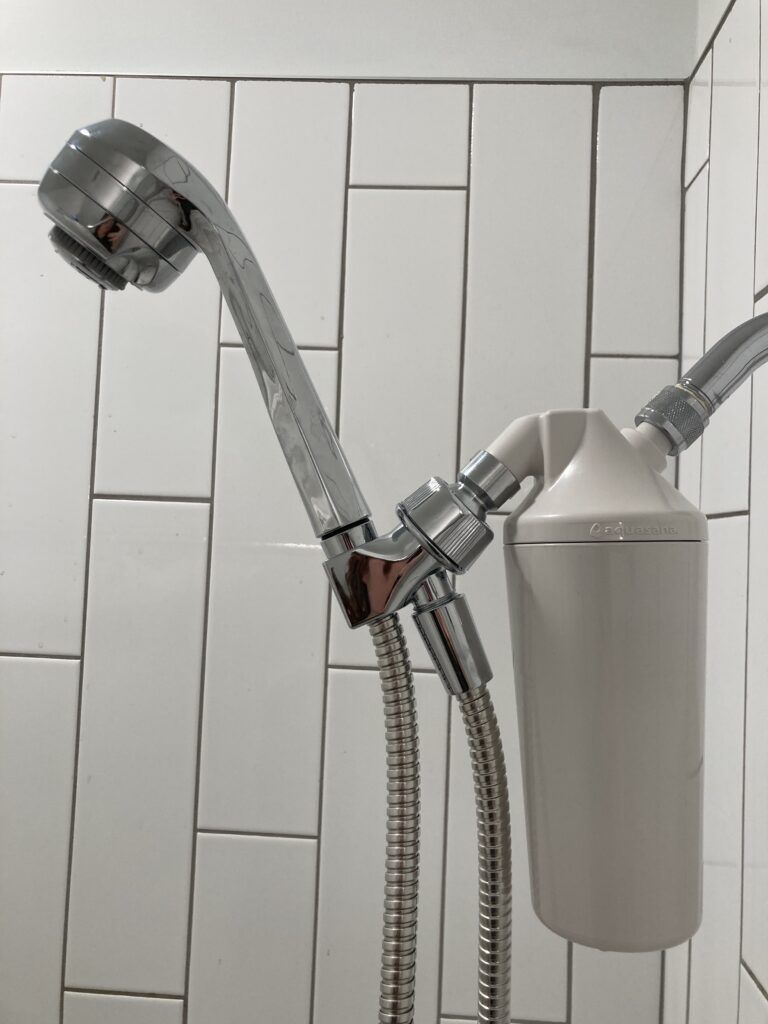
Attach your shower hose – Connect your shower hose to the filtered water outlet. Make sure all connections are tight and secure.
Test the system – Turn on your shower and let the water flow through the filter for a few minutes before using.
Some people find it helpful to place a small towel underneath to catch any drips. The whole process usually takes less than twenty minutes, and the results can be quite noticeable.
Maintenance and Replacement Schedule
Like any filter system, your DIY activated carbon filter needs regular care to keep working effectively. The frequency depends on several factors, including how often you shower and the quality of your local water supply.
• Monthly checks – Inspect your filter for signs of wear or clogging. If you notice unusual odors or changes in water flow, it’s time for attention.
• Carbon replacement – Most experts recommend replacing activated carbon every 3-6 months. However, if you live in an area with very hard water or high chlorine levels, you may need to change it more frequently.
• Cleaning routine – Rinse your container with clean water periodically. Some people also run a vinegar solution through the filter once a month to help remove buildup.
Remember, carbon filters work by trapping contaminants, so they eventually become saturated. When that happens, the filter stops being effective, and you’ll notice a decline in water quality. Don’t wait until it’s too late – keep track of when you last changed your filter.
Real-Life Benefits You Can Expect
Many people who’ve tried this DIY approach report some surprising improvements in their daily lives. Here are some common experiences:
• Softer skin and hair – Without chlorine and other harsh chemicals, your skin and hair often feel smoother and more hydrated.
• Reduced odor – If your shower water smells strongly of chlorine or has a metallic taste, you’ll likely notice a significant improvement.
• Better respiratory health – For those sensitive to chlorine vapors, breathing easier during showers becomes a real benefit.
• Cost savings – While there’s an initial investment, many people find they save money on skin care products and hair treatments over time.
These benefits aren’t just anecdotal either – research supports the effectiveness of activated carbon in removing certain contaminants. Of course, results vary from person to person based on their individual water conditions and health status.
Safety Considerations and Limitations
While building your own shower filter can offer many advantages, it’s important to understand what it can and cannot do. Here are some key points to consider:
• Not a medical device – This system is designed for water filtration, not medical treatment. It won’t eliminate all pathogens or chemical pollutants.
• Water pressure concerns – Adding a filter can slightly reduce water pressure, which some people might notice.
• Compatibility issues – Not all shower systems work equally well with DIY filters. Check your existing setup before beginning.
• Local regulations – In some areas, installing modifications to your home’s plumbing might require permits or approval.
Before starting, consider consulting with a plumber or water quality specialist if you’re unsure about your specific situation. Also, remember that while activated carbon is excellent for removing many contaminants, it’s not effective against bacteria, viruses, or dissolved minerals like calcium and magnesium that cause hard water.
Building your own shower filter with activated carbon is more than just a DIY project – it’s a practical way to take control of your water quality. Whether you’re looking to improve your skin and hair health, reduce exposure to chlorine, or simply enjoy a cleaner shower experience, this approach offers real benefits. The process is straightforward enough for anyone to try, and the potential improvements to your daily routine make it worth considering.
Of course, no system is perfect, and it’s important to understand both the capabilities and limitations of activated carbon filtration. But for many people, especially those with moderately contaminated water supplies, this DIY solution provides a cost-effective alternative to expensive commercial filters. The next time you turn on your shower, remember that you have the power to make that water cleaner, safer, and more pleasant. Why not give it a try?