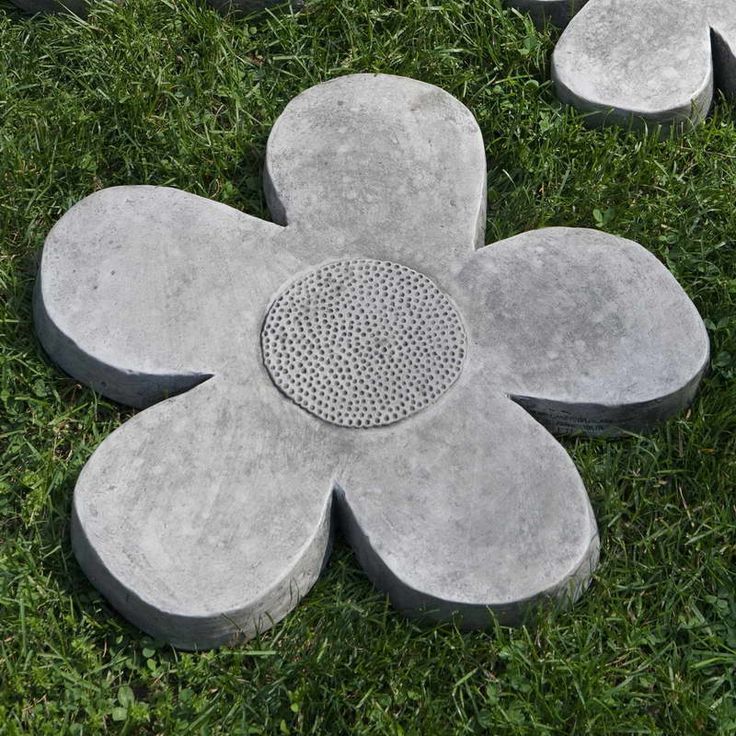
Hey everyone, it’s me, back with another project that’s all about bringing a little beauty into your everyday life. Today, we’re diving headfirst into the wonderful world of DIY stepping stones, specifically using those gorgeous dahlia molds. Trust me, it’s way easier than you might think, and the results… well, they’re simply stunning. Get ready to turn your plain garden path into a real showstopper. And, as always, this is all about sharing what I’ve learned and hopefully inspiring you to get creative, and give this a shot. Let’s get started, shall we?
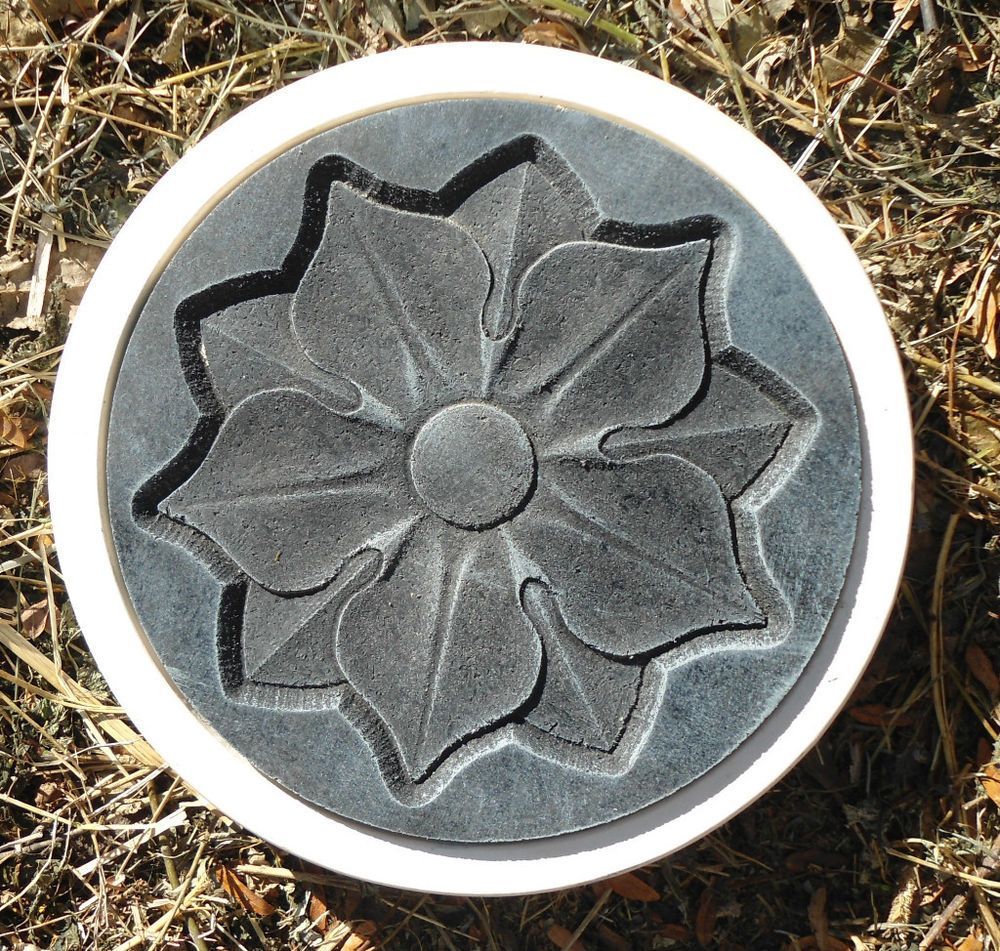
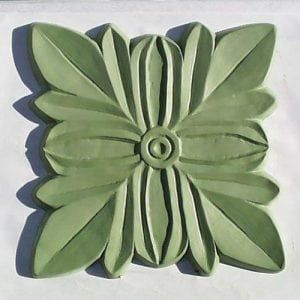
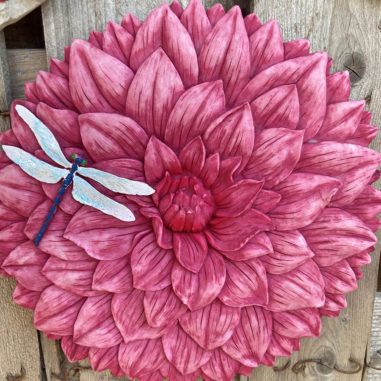
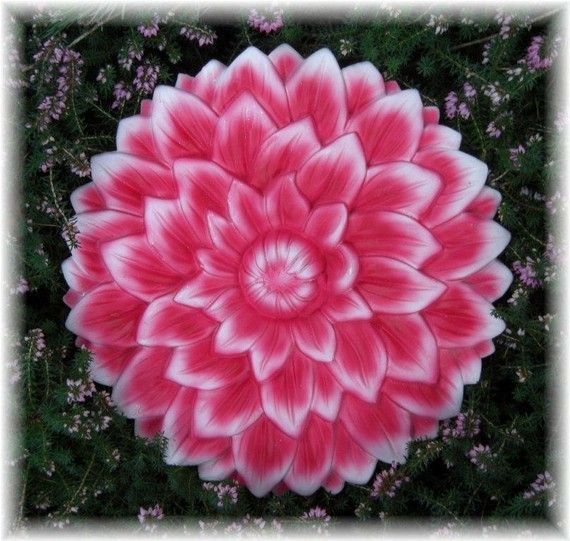
Stepping stones are a fantastic way to add some charm and functionality to your garden, backyard, or any outdoor area. They offer a pathway, keep your feet clean, and, let’s be honest, they look amazing. But why dahlia molds? Because dahlias are just inherently beautiful. Their intricate petal patterns translate beautifully into concrete, giving your stepping stones a unique, textured, and elegant look. Plus, dahlia molds are relatively easy to find and use, making this project accessible for beginners and experienced DIYers alike. I’ve been playing around with this for years, and I’m so excited to share my knowledge with you. I’ve learned a lot along the way, including what works, what doesn’t, and some handy shortcuts that save time and effort. Let’s break it down, step-by-step.
Gathering Your Supplies: The Essentials You’ll Need
Before we get our hands dirty, let’s make sure we have everything we need. This is the fun, but also the most important part. Being organized will make the whole process a lot smoother and enjoyable. Here’s what you’ll require:
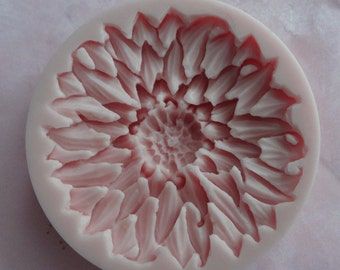
- Dahlia Molds: Obviously! You can find these at most craft stores, online, or even at some hardware stores. Consider the size and design you want. I like a variety of sizes and designs for visual interest.
- Concrete Mix: I usually go for a quick-setting concrete mix. It’s easier to work with and sets faster. Check the instructions on the bag for the correct water-to-concrete ratio.
- Water: You’ll need this to mix the concrete. Have a bucket or container ready.
- Mixing Container: A sturdy bucket or a wheelbarrow works best. Don’t use your best mixing bowls; concrete is messy!
- Mixing Tool: A trowel, a stick, or even a drill with a mixing attachment will work. Whatever you have on hand.
- Protective Gear: Gloves (essential!), a dust mask (concrete dust is not your friend), and eye protection.
- Release Agent (Optional but recommended): Cooking spray or a commercial concrete release agent will help your stepping stones pop out of the molds easily.
- Trowel or Putty Knife: For smoothing the concrete surface.
- Optional Embellishments: Colored concrete dye, small pebbles, glass beads, or anything else you like to add to the concrete. Get creative and have fun with it!
Mixing the Concrete: Getting the Consistency Right
Okay, let’s get mixing. This is where things can get a little messy, so make sure you’re in a well-ventilated area.
- Prepare the Mold: If you’re using a release agent, spray it generously all over the inside of your dahlia mold. This will prevent the concrete from sticking. If you don’t have a release agent, you can still make it work, but it might be a little tougher to get the stone out.
- Mix the Concrete: Pour your concrete mix into your mixing container. Gradually add water, following the instructions on the concrete bag. The goal is to get a consistency similar to thick pancake batter. Too much water and your stones will be weak; too little and it’ll be hard to work with.
- Mix, Mix, Mix: Mix thoroughly until all the dry ingredients are wet and there are no lumps. This can take a few minutes. Be sure to scrape the sides and bottom of your mixing container.
- Consider the Color: If you’re using colored concrete dye, now is the time to add it. Follow the manufacturer’s instructions for the correct amount. Mix it in well to achieve a uniform color.
Pouring and Shaping: Creating Your Dahlia Masterpieces
Now comes the fun part – pouring the concrete into the molds!
- Pour the Concrete: Carefully pour the concrete mixture into your dahlia molds. Fill them to the top, or slightly overfill, to account for any settling.
- Remove Air Bubbles: Gently tap the sides of the mold to help release any trapped air bubbles. You can also use a toothpick or skewer to poke around and get rid of the bubbles. This will prevent unsightly holes in your finished stones.
- Smooth the Surface: Use your trowel or putty knife to smooth the surface of the concrete. You want a nice, even finish. If you’re adding any embellishments, sprinkle them on top now and gently press them into the concrete.
- Let it Set: This is the hardest part – patience! Let the concrete set according to the instructions on your concrete mix. Usually, it takes at least 24-48 hours, but it depends on the weather conditions. Keep the molds in a shaded area to prevent them from drying out too quickly, which can cause cracking.
Demolding and Curing: The Big Reveal and Long-Term Care
Once the concrete has set completely, it’s time for the moment of truth – demolding!
- Careful Removal: Gently flip the mold over and tap it firmly. If you used a release agent, the stepping stone should come out easily. If it’s sticking, try wiggling the mold or using a rubber mallet to gently tap the sides. Be patient; you don’t want to break your beautiful creation.
- Inspect and Finish: Once the stepping stone is out, inspect it for any imperfections. You might need to use a file or sandpaper to smooth any rough edges.
- Curing (The Secret to Durability): Curing is a very important step. It’s the process of allowing the concrete to harden properly, which makes it stronger and more durable. You can cure your stepping stones by keeping them moist for several days. You can do this by covering them with plastic sheeting and spraying them with water daily. The longer you cure them, the stronger they will be.
- Sealing (Optional, but recommended): Sealing your stepping stones will protect them from the elements, staining, and wear and tear. There are many concrete sealers available at hardware stores. Follow the manufacturer’s instructions for application. This is a great step for making them last.
Design Ideas and Embellishments: Let Your Creativity Bloom
One of the best parts about this project is that you can really make it your own. Here are some ideas to get your creative juices flowing:
- Color Variations: Use different colors of concrete dye to create unique patterns and effects. You could make each dahlia a different shade or create a gradient effect.
- Embedded Treasures: Add small pebbles, glass beads, or even broken pieces of tile to the wet concrete before it sets. This adds texture and visual interest.
- Personalized Stones: Add your initials, a date, or a special message to your stepping stones using stencils or stamps while the concrete is still wet.
- Mix and Match: Combine different sizes and designs of dahlia molds to create a varied and interesting pathway.
- Themed Pathways: Create a themed pathway, such as a woodland path or a seaside garden, by incorporating relevant embellishments.
Remember, there are no rules! Experiment and have fun with it. That’s the whole point of DIY, right?
Troubleshooting and Tips for Success: Avoiding Common Pitfalls
Even the most experienced DIYers run into problems sometimes. Here are some tips to help you avoid common pitfalls and ensure your stepping stones turn out beautifully:
- Cracking: This is often caused by the concrete drying out too quickly or not being properly cured. Make sure to keep your stepping stones moist during the curing process, especially in hot or windy weather.
- Air Bubbles: Tap the molds vigorously after pouring the concrete to release trapped air. You can also use a skewer to poke around and remove air bubbles.
- Uneven Surfaces: Ensure your molds are placed on a level surface before pouring the concrete. Use a trowel or putty knife to smooth the surface of the concrete.
- Weak Concrete: Use the correct water-to-concrete ratio. Too much water will weaken the concrete. Measure carefully.
- Mold Sticking: Use a release agent, or if you don’t have one, be very careful when demolding. You may need to gently tap the mold or use a rubber mallet.
- Safety First: Always wear protective gear (gloves, mask, and eye protection) when working with concrete.
Most importantly, don’t be afraid to experiment and learn from your mistakes. Every project is a learning opportunity, and even if something doesn’t turn out perfectly, you’ll still have created something beautiful with your own two hands.
So there you have it – a step-by-step guide to crafting stunning stepping stones using dahlia molds. I hope this inspires you to get out there, get creative, and transform your outdoor space into something truly special. This project is fun, rewarding, and surprisingly easy, even if you’re a complete beginner. Remember, the most important thing is to enjoy the process and let your creativity flow. I can’t wait to see what you create. Be sure to share your creations with me! Happy crafting, everyone, and happy gardening. And remember, it’s not about perfection, it’s about the joy of making something beautiful and unique. Cheers, and I’ll see you in the next project, and and don’t forget to subscribe for more DIY adventures.