
Imagine this: You’re relaxing in your shower, the water is flowing perfectly, but suddenly you notice water seeping around the connections. It’s frustrating, messy, and expensive. What if there was a simple way to prevent this? We’ll walk you through foolproof techniques that will keep your bathroom dry and your peace of mind intact.
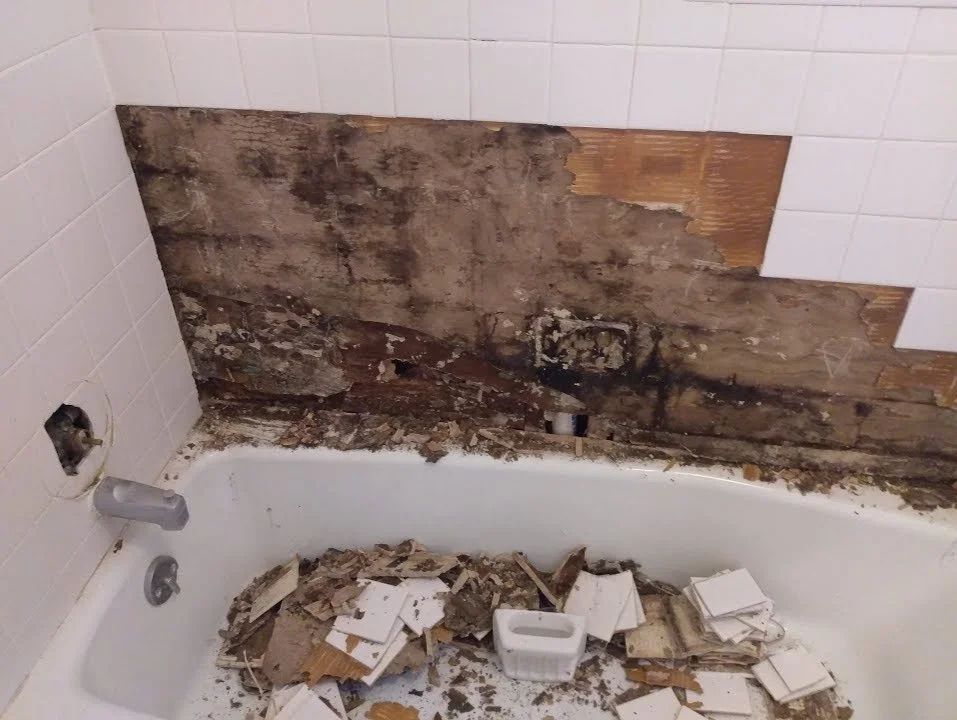
Water leaks around shower connections aren’t just annoying – they can lead to serious problems like mold growth, structural damage, and higher utility bills. Many people think sealing showers is complicated, but it’s actually quite straightforward when you know the right methods. Whether you’re doing a DIY project or just trying to stop that persistent drip, understanding how to properly seal shower connections makes all the difference. This guide will show you exactly what you need to do, step by step.
Understanding Shower Connection Points
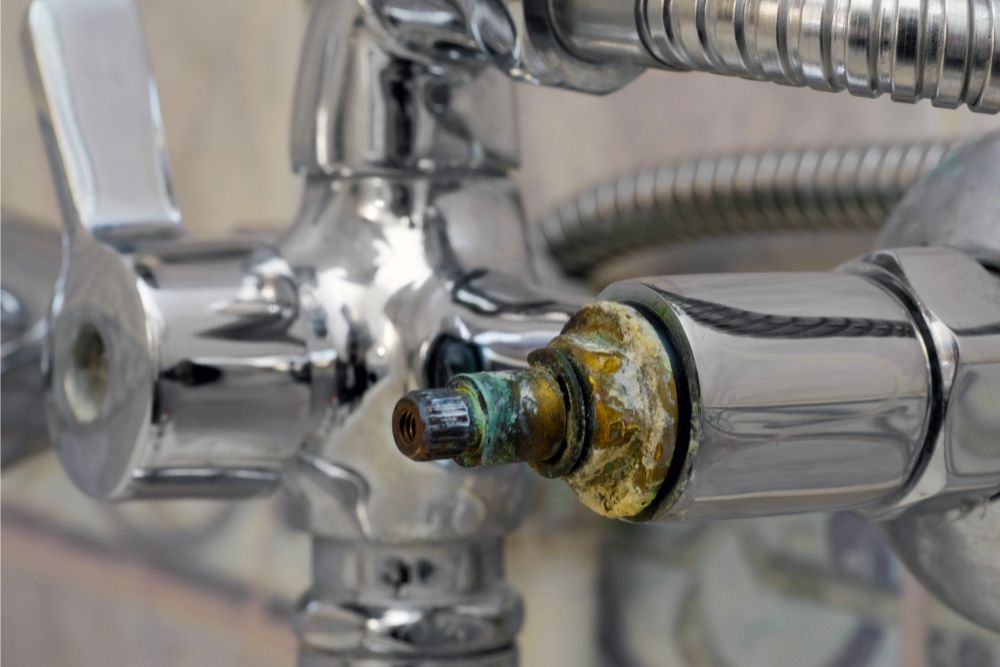
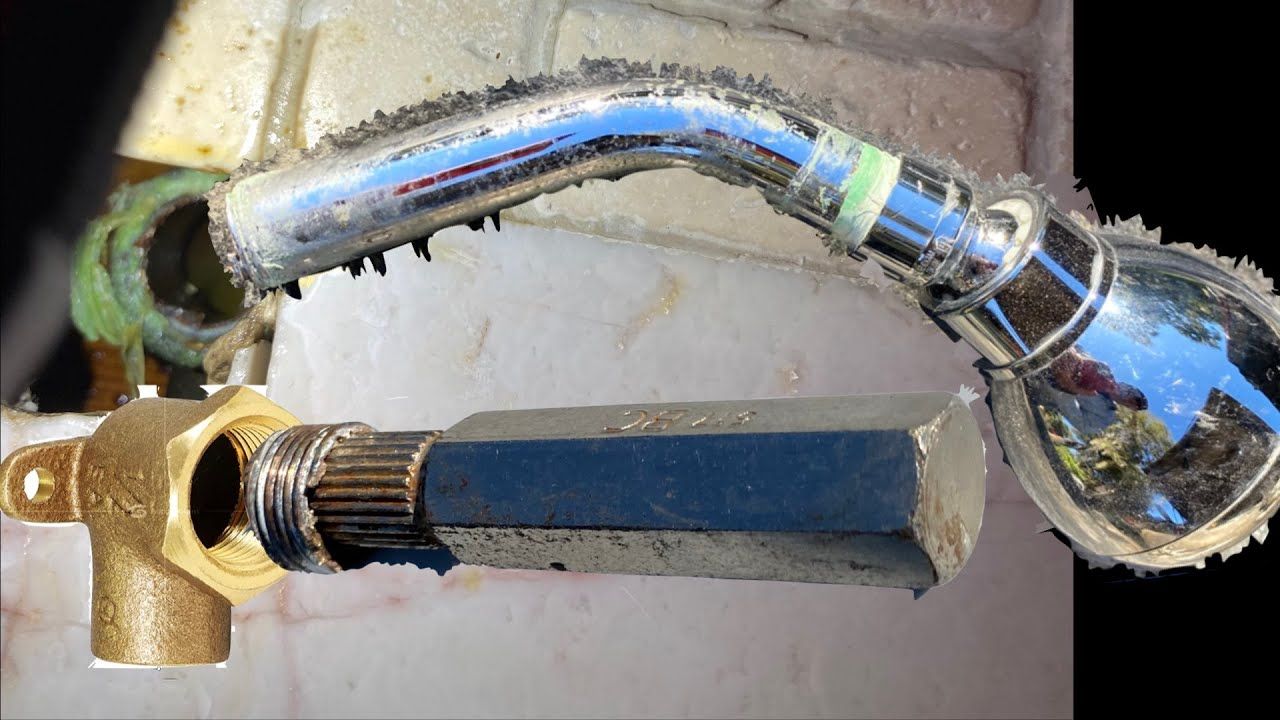
Before diving into sealing techniques, it’s important to know where exactly water can escape. The main connection points include the shower head itself, the pipe connections, and any fittings where pipes meet fixtures. These areas often have small gaps that allow water to leak out. Think of them as weak spots in your plumbing system. The shower head attachment point is probably the most common source of problems, especially if the threads are worn or the seal isn’t tight enough. Also watch out for the connections between the wall pipes and the shower arm – these are equally prone to leaking. Pay attention to any visible signs like water stains, rust spots, or even tiny drops of moisture. These telltale signs mean something needs attention. Sometimes the problem isn’t obvious until you’ve been using the shower for a while. Regular checks can catch issues before they become major headaches.
Essential Tools and Materials
Getting the right supplies makes everything much easier. You’ll want to gather some basic tools first. A wrench or pliers will come in handy for tightening connections. A utility knife helps remove old materials. You might also need a tape measure to get proper sizing. For materials, silicone caulk works great for sealing gaps around fixtures. It’s flexible and waterproof, making it ideal for bathroom environments. Pipe thread sealant paste or Teflon tape is essential for threaded connections. These products create a barrier that prevents water from escaping through the threads. A clean cloth or paper towels are necessary for cleaning surfaces before applying sealants. Some people prefer to use plumber’s putty, which is another effective option for creating watertight seals. Make sure you have the right size tools too – a 1/2 inch wrench is usually sufficient for most connections. Don’t forget to check if you need replacement parts like washers or O-rings. Having everything ready ahead of time saves lots of frustration later.
Preparation Steps Before Sealing
Proper preparation is crucial for successful sealing. Start by turning off the water supply to the shower. This might seem obvious, but it’s surprising how many people skip this step. Turn off both hot and cold water valves. If you can’t locate the valves, shut off the main water supply to your home. Once the water is off, turn on the shower to drain any remaining water from the pipes. This removes pressure and makes working safer. Clean the area thoroughly with a damp cloth. Remove any soap scum, mineral deposits, or old sealant. These substances interfere with new sealants. Check for any loose fittings or damaged parts. Tighten any connections that feel wobbly. If you see cracks in the pipe or fixture, consider replacing rather than just sealing. Take your time during this stage – rushing leads to poor results. A clean, dry surface ensures better adhesion of sealants. Sometimes a little sandpaper helps remove stubborn buildup. This simple step can make a big difference in how well your seal holds up over time.
Applying Thread Sealant Correctly
Thread sealant is your best friend for preventing leaks at threaded connections. Start by wrapping Teflon tape around the male threads of the fitting. Wrap it clockwise, about three to four times. This creates a tight seal that prevents water from seeping through the threads. Some people prefer pipe thread sealant paste, which goes on thicker and stays in place better. Apply a thin layer to the threads, making sure to cover all surfaces evenly. Don’t overdo it – too much sealant can squeeze out and create a mess. When connecting parts together, hand-tighten first, then use a wrench to give it a final quarter turn. This ensures everything sits properly without over-tightening. Watch for any signs of leakage after installation. If water still escapes, you may need to add more sealant or check if the parts are compatible. The key is using the right amount and technique. Remember, a little goes a long way with these products. Always test the connection before turning the water back on.
Using Silicone Caulk for Gap Seals
Silicone caulk works wonderfully for sealing gaps around fixtures and connections. It’s particularly useful for areas where pipes meet walls or where shower components attach. Start by cleaning the area thoroughly. Remove any old caulk or debris that could prevent proper adhesion. Apply a thin, continuous bead of caulk along the gap. Press it firmly into place with your finger or a caulk smoothing tool. Work quickly since silicone dries fast. Make sure to fill the entire gap completely. For best results, apply the caulk in a smooth, even line. Don’t worry about making it perfect – it will cure and form a strong seal. Allow it to cure fully according to manufacturer instructions, typically 24 hours. Some people find that applying a second coat after the first has dried gives extra protection. The flexibility of silicone means it can handle movement and temperature changes without cracking. This makes it ideal for bathroom conditions where humidity fluctuates constantly. You’ll notice the difference immediately when you turn the water back on.
Testing and Maintaining Your Seals
Once you’ve sealed everything, it’s time to test your work. Turn the water back on slowly and check for any signs of dripping or seepage. Pay close attention to all connection points. If you see water escaping, you might need to reapply sealant or tighten connections further. Sometimes a quick recheck is all it takes to fix the issue. Regular maintenance keeps everything working smoothly. Check connections every few months, especially if you notice any changes in water pressure or unusual sounds. Look for water stains or rust spots that could indicate future problems. A simple visual inspection can save you from bigger issues later. Consider keeping a small toolkit handy for quick fixes. Having replacement washers or sealants on hand means you can address problems quickly. Don’t wait until water starts leaking heavily to take action. Early detection and correction are much easier and cheaper than dealing with major water damage. Make it part of your routine to inspect your shower connections periodically. This simple habit can extend the life of your plumbing and prevent unexpected disasters.
Common Mistakes to Avoid
Even experienced DIYers sometimes make errors that lead to leaks. One of the most frequent problems is using too much sealant. This can cause excess material to squeeze out and create a mess. Another mistake is not cleaning surfaces properly before applying sealants. Any dirt or residue will prevent good adhesion. People also often rush the process, skipping preparation steps or not allowing enough curing time. Over-tightening connections can damage threads or fittings, leading to leaks. Using the wrong type of sealant for a particular application is another pitfall. For example, using regular caulk instead of silicone in high-moisture areas. Not checking compatibility between old and new parts can also cause issues. Some fittings require specific types of sealants or tapes. Finally, forgetting to test connections after sealing can result in problems going unnoticed until it’s too late. Learning from these common errors helps ensure better results next time. Take your time, follow instructions carefully, and don’t hesitate to ask for help if you’re unsure about anything.
Sealing shower connections doesn’t have to be a nightmare. With the right approach, tools, and materials, anyone can master this skill. The key is understanding where leaks commonly occur, preparing properly, and using the correct sealing methods. Remember that prevention is always better than dealing with water damage later. Taking a few minutes to properly seal connections now can save you countless hours of repairs and potential messes. Whether you’re fixing a minor leak or doing a full bathroom renovation, these techniques will serve you well. Don’t let a dripping shower ruin your day. Follow these steps, stay patient, and enjoy a leak-free shower experience. Your bathroom will thank you for the extra care and attention. The investment in proper sealing pays dividends in comfort and peace of mind.
![Reasons Your Water Shuts Off During Shower [Diy Troubleshooting Tips] regarding Preventing Water Damage from Threaded Shower Fittings](https://dahomengarden.com/wp-content/uploads/2025/10/reasons-your-water-shuts-off-during-shower-diy-troubleshooting-tips-regarding-preventing-water-damage-from-threaded-shower-fittings.jpg)


