Have you ever stared at your bathroom shower and thought, ‘I really need a new handheld head’ but didn’t want to deal with the whole old fixture removal process? You’re not alone. Many people face this exact challenge, and we’ve got some good news. You don’t have to tear out your entire setup to get a new handheld shower head. There’s actually a much easier way that keeps your current shower head in place while adding the convenience of a new handheld option.
Let’s be honest – upgrading your bathroom shower can feel like a major project. Especially when it involves replacing a fixture that’s already installed. But what if you could simply add a new handheld shower head without touching your existing setup? That’s exactly what many homeowners want to do, and it’s completely possible with the right approach. We’re going to walk you through how to install a new handheld shower head without removing your old one. It’s not just convenient – it’s often faster and less messy than traditional methods. Imagine being able to enjoy better water pressure, different spray patterns, or even a more ergonomic design without the headache of demolition. This isn’t some fancy trick or special tool required – it’s straightforward plumbing know-how that anyone can master with a little guidance.
Why You Might Want to Add a Handheld Shower Head
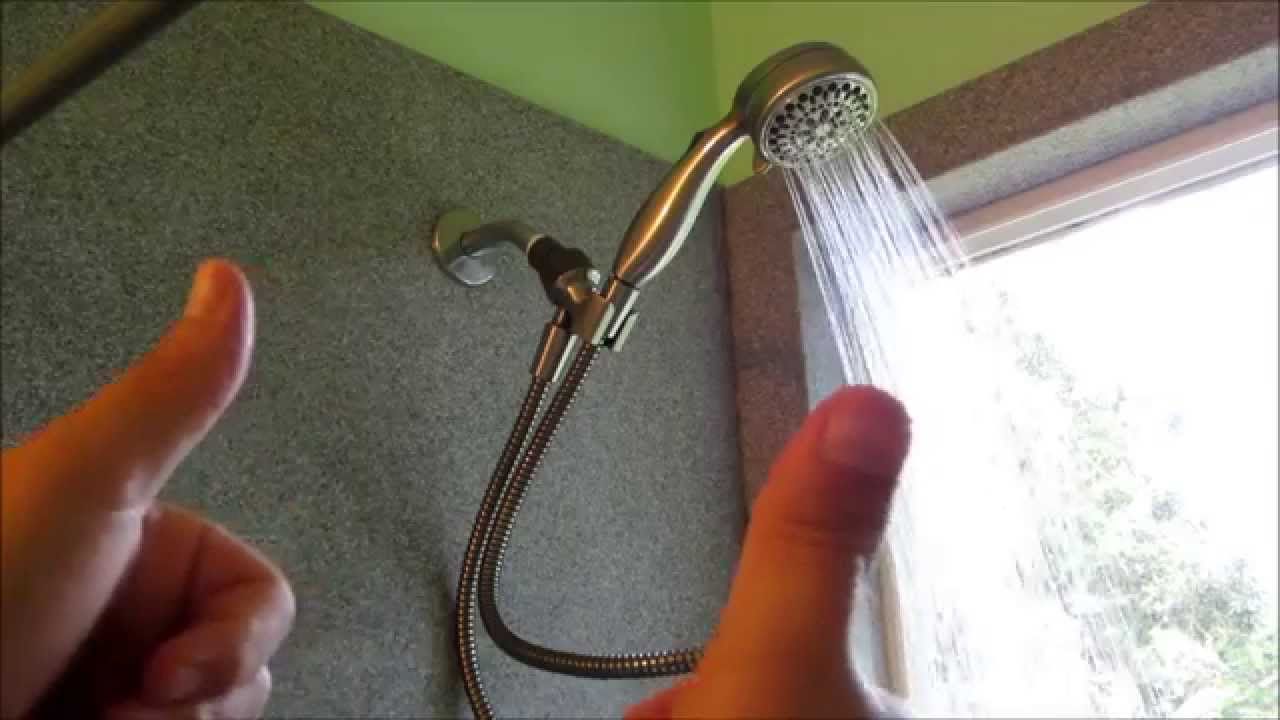
Before diving into the installation process, let’s talk about why someone might want to add a handheld shower head to their existing setup. First off, handheld options offer incredible flexibility. They’re perfect for bathing babies, cleaning the shower, or simply getting a better angle for washing your back. Plus, they often provide better water pressure since they don’t have to compete with other fixtures. If you’re dealing with a fixed shower arm that’s not quite reaching where you’d like, a handheld gives you the freedom to move around. You might also find that newer models have features like massage settings, temperature control, or even built-in filters. These upgrades can transform your daily routine from mundane to luxurious. Some people even add them to make their showers more accessible for elderly family members or those with mobility issues. The best part? You don’t have to completely redo your bathroom to take advantage of these benefits.
What You’ll Need for the Installation Process
Getting ready for this installation is easy. Here’s what you’ll typically need:
• A new handheld shower head
• Adjustable wrench or pliers
• Teflon tape or pipe thread sealant
• Clean cloth or towel
• Screwdriver (flathead or Phillips)
Some people also find it helpful to have a bucket underneath to catch any water that might drip during the process. The tools you need are probably already in your toolbox. If you’re not sure about the type of connection your existing shower has, take a quick look at the shower arm. Most modern setups use standard threaded connections, which makes this method work perfectly. If you’re using an older system with different threading, you might need to adjust your approach slightly. The key is to make sure you’re compatible with the threads on your current setup. Don’t worry too much about having all the right tools – most of these items are commonly found around most households.
Understanding Your Existing Shower Setup
Before you start, it’s important to understand how your current shower is connected. Most standard shower arms have a male-threaded end that connects to the water supply lines. You’ll want to check if your setup uses standard 1/2-inch threads, which is the most common size. If you’re unsure, measure the diameter of the threaded portion of your shower arm. If you see a nut or cap covering the connection point, that’s usually where you’ll be installing your new handheld. The beauty of this method is that it works with existing connections. You’re essentially creating a dual setup – keeping your regular shower head while adding the handheld option. This means no need to cut or reconnect pipes, no mess from water damage, and no risk of damaging your existing plumbing. It’s like adding a new accessory to your existing system rather than rebuilding it entirely.
Step-by-Step Installation Process
Ready to get started? Here’s how to install your new handheld shower head:
First, turn off the water supply to your shower. You can do this at the main valve or by turning off the individual shutoff valves.
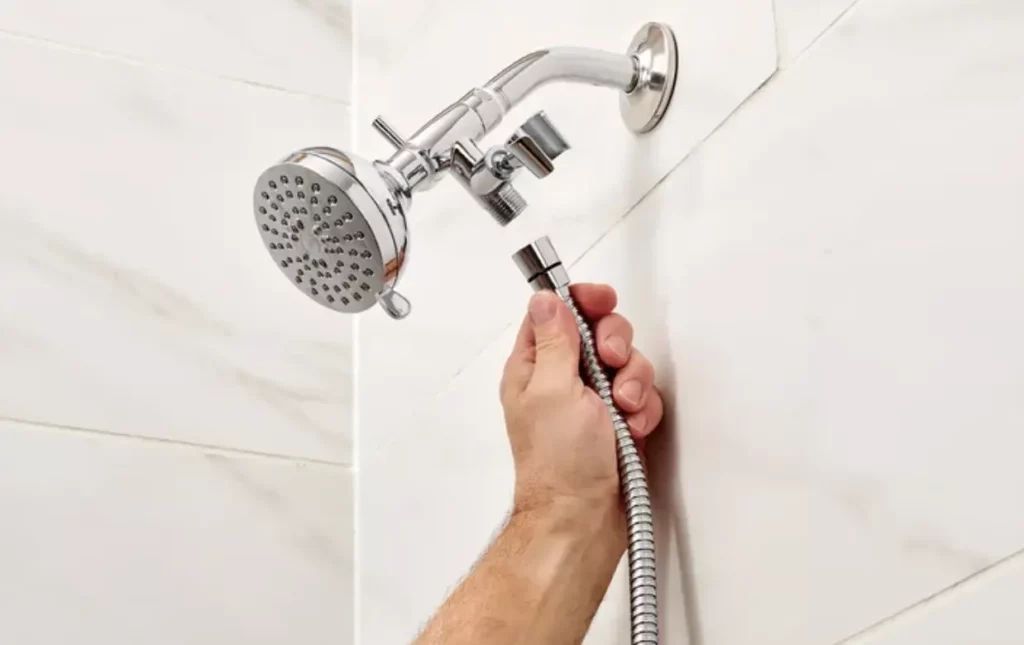
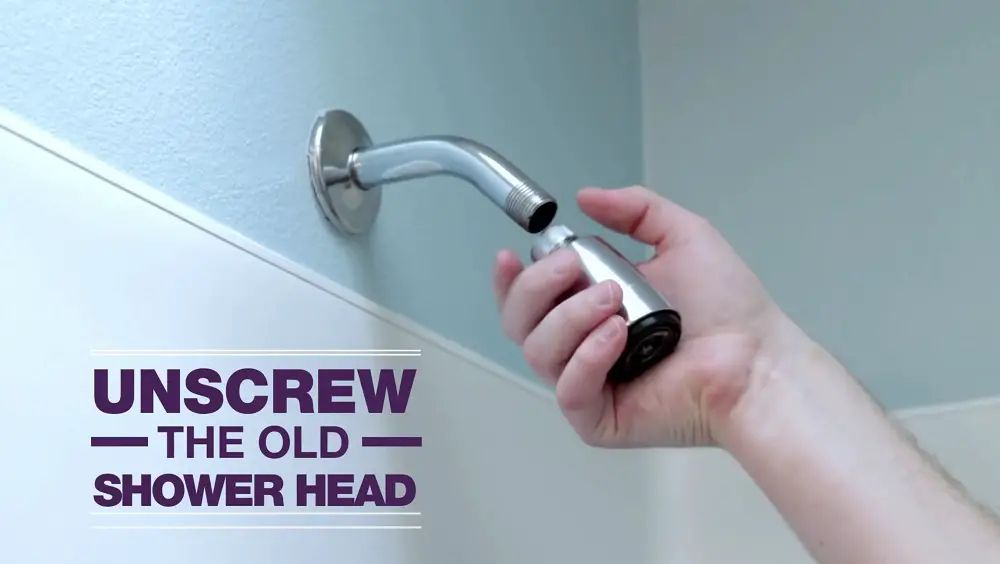
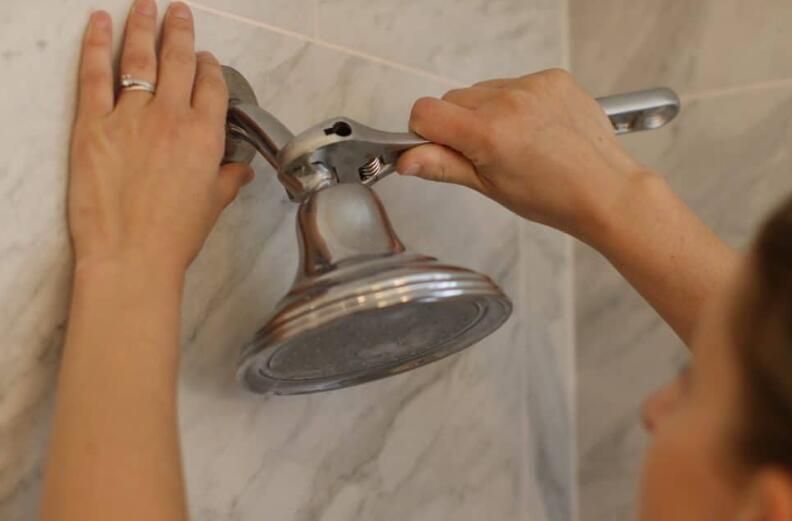
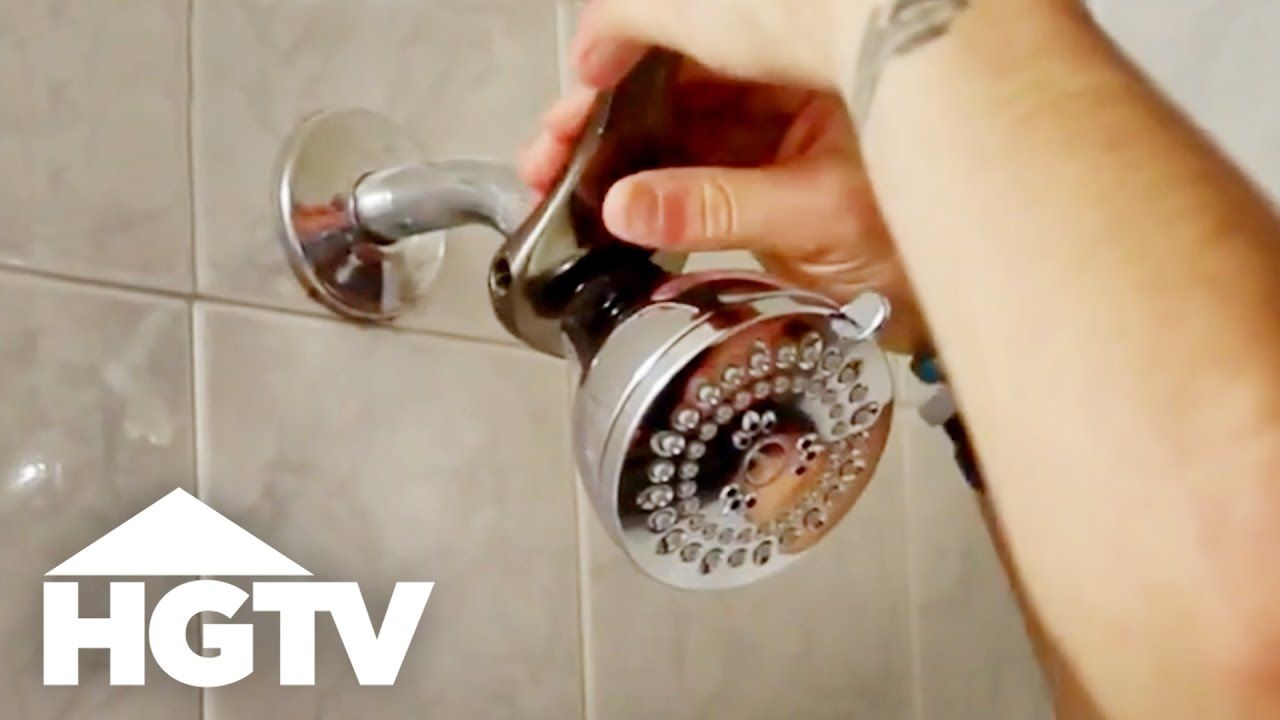
Remove your existing shower head carefully. Use an adjustable wrench to loosen the connection, but be gentle to avoid damaging the threads.
Clean the threads on the shower arm with a cloth to remove any old gunk or debris.
Apply a thin layer of Teflon tape or pipe thread sealant to the threads of the shower arm.
Attach the new handheld shower head by screwing it on clockwise until tight.
Test the connection by turning the water back on slowly.
Check for any leaks around the connection point.
This process might take about ten minutes if you’re careful and methodical. The key is patience. Rushing through this can lead to problems with the connection or even small leaks. Remember to tighten just enough to make it secure but not so much that you strip the threads. If you’re not comfortable with the idea of removing your existing shower head, there are alternative methods using adapters that can help you keep both fixtures in place.
Common Issues and How to Fix Them
Even with careful installation, you might run into a few challenges along the way. Here are some typical problems and solutions:
• Leaking connections: If you notice water dripping from where the new head connects, try tightening the connection slightly more or reapplying Teflon tape. Sometimes a fresh coat helps seal things properly.
• Incompatible threads: If your new handheld doesn’t seem to fit, double-check the threading specifications. Some older systems use different sizes than what’s common today.
• Water pressure issues: If the new head feels weak, check that you haven’t accidentally closed the water supply too much during installation. Also verify that your new head isn’t clogged with mineral deposits.
• Loose mounting: If the handheld seems unstable, make sure you’re tightening it properly. Some models come with additional mounting hardware that might need adjustment.
Don’t panic if something doesn’t go perfectly the first time. These situations are usually easy to fix once you identify the root cause. Take a deep breath and go back through each step carefully.
Tips for Success and Best Practices
To ensure your installation goes smoothly, consider these helpful tips:
• Always turn off the water before starting any work
• Take photos before you begin so you remember how things were connected
• If you’re unsure about compatibility, bring the old part to a hardware store for comparison
• Consider using a pipe wrench instead of a regular wrench for better grip
• Don’t overtighten – it’s better to have a slightly loose connection than one that’s stripped
• Test everything before you leave the bathroom
These small practices can save you from frustration later. Some people even find it helpful to practice on a similar connection before tackling the actual installation. It’s always better to be prepared and know what to expect. And remember, if you’re uncomfortable with the process, it’s perfectly fine to call a professional plumber. Your safety and satisfaction matter more than saving a few dollars.
Adding a new handheld shower head without removing your existing one is definitely achievable, and it’s a great way to upgrade your bathroom experience without the hassle of full renovation. The process isn’t complicated, and with a few basic tools and some patience, you can enjoy the benefits of a new fixture in no time. Whether you’re looking for better water pressure, improved functionality, or just want to try a different style, this approach offers flexibility and convenience. You’re not limited to just one type of shower head anymore. You can have both the traditional setup and the handheld option, giving you choices based on your needs throughout the day. So next time you think about upgrading your shower, remember that you don’t have to tear everything apart to get what you want. Sometimes the simplest solution is the best one, and this installation method proves that. Give it a try – you might be surprised at how easy it really is.