Bathroom ceilings are often overlooked when it comes to home maintenance, but they’re actually one of the most vulnerable areas for mold growth. Whether you’re doing a fresh coat or tackling a mold problem, understanding the right approach can save you from costly repairs and health issues down the road.
Let’s face it – bathrooms are tough on paint. High humidity, temperature changes, and moisture create the perfect storm for mold to take hold. You might think you’re just painting a ceiling, but really you’re fighting nature itself. The truth is, most bathroom ceiling problems stem from poor preparation or using the wrong materials. That’s why getting it right from the start matters more than you might think. When you’re dealing with a ceiling that’s already showing signs of mold, the stakes get even higher. But don’t worry – there are proven methods to keep your bathroom ceiling looking fresh and mold-free for years to come.
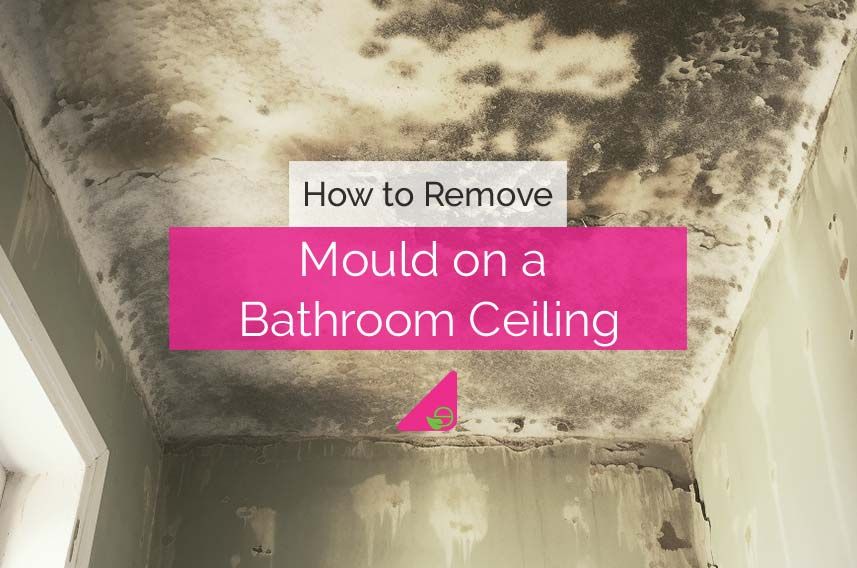
Understanding the Mold Threat in Bathrooms
Mold thrives in damp environments, and bathrooms are practically designed for its survival. The combination of steam from showers, humidity from daily activities, and inadequate ventilation creates conditions that make mold growth almost inevitable. Even if you don’t see visible mold, microscopic spores can be lurking in corners and crevices waiting to multiply. What makes bathroom ceilings particularly problematic is their tendency to collect water droplets and moisture that can seep through paint layers over time. This is especially true in older homes or spaces with poor ventilation systems. The key is recognizing that mold isn’t just an aesthetic issue – it can cause respiratory problems and trigger allergies in sensitive individuals. When you’re painting a bathroom ceiling, you’re essentially creating a barrier against these microscopic invaders. Understanding the biology of mold helps you choose the right products and techniques.
Choosing the Right Paint and Materials
Not all paints are created equal, especially when it comes to bathroom environments. You’ll want to select products specifically designed for high-moisture areas. Look for paints labeled as "mold-resistant" or "anti-microbial," which often contain additives that inhibit mold growth. These aren’t just fancy marketing terms – they actually work. The base material matters too. Latex paints tend to perform better in bathrooms than oil-based alternatives because they breathe better and resist peeling. For ceilings, consider using a semi-gloss or eggshell finish rather than flat paint. These finishes are easier to clean and less likely to trap moisture. Don’t skimp on primer either – a good quality mold-inhibiting primer creates the foundation for long-lasting results. Quality materials will cost more upfront but save you from frequent repainting and potential health issues.
Proper Surface Preparation is Everything
This step often gets rushed or skipped entirely, but it’s the difference between a successful project and a recurring headache. Start by cleaning the ceiling thoroughly with a mixture of mild detergent and water. Remove any loose paint, dirt, or grime that could prevent proper adhesion. If you’re dealing with existing mold, you’ll need to kill it first before painting. Use a solution of bleach and water or specialized mold removal products. Let everything dry completely before proceeding. Sand any rough spots to create a smooth surface for paint application. This might seem tedious, but it’s crucial for preventing future problems. Think of it like preparing a garden bed before planting – the better the ground, the healthier your plants will grow. Sometimes old paint needs to be stripped entirely before new coating can adhere properly.
Ventilation and Moisture Control Strategies
Good ventilation is probably the most important factor in preventing mold on bathroom ceilings. If you can’t install a powerful exhaust fan, you’ll need to be extra diligent about other methods. After each shower or bath, leave the door open to allow air circulation. Run the fan for at least 20 minutes after use, even if you don’t see obvious moisture. Consider installing a timer on your exhaust fan so it runs long enough to remove humidity effectively. Keep humidity levels under 60% in your bathroom. Using a dehumidifier during humid months can make a big difference. Some people find that opening windows when weather permits helps with air exchange. Remember, moisture is the enemy of painted surfaces. Every effort you make to reduce moisture will extend the life of your ceiling paint and prevent mold from taking hold.
Application Techniques That Work
The way you apply paint can determine whether it lasts or fails quickly. Use a high-quality roller with a medium nap for ceilings, as it applies paint evenly without leaving texture that’s hard to clean. Apply thin, even coats rather than thick applications that might trap moisture underneath. Allow proper drying time between coats – typically 4-6 hours for latex paint. If you’re painting over existing paint, check that the old layer is clean and sound. For best results, apply paint in the morning when temperatures are cooler and humidity levels are lower. Work systematically from one corner to another, maintaining consistent pressure and overlap. Avoid painting in direct sunlight or high heat, as this can cause the paint to dry too quickly and potentially crack. Some painters prefer using a brush for edges and corners, then switching to a roller for larger areas.
Maintenance Tips for Long-Term Success
Even the best paint job needs attention over time. Regular visual inspections can catch small problems before they become major issues. Check for water stains, peeling paint, or any discoloration that might indicate moisture problems. Clean the ceiling regularly with mild soap and water to remove soap scum and mineral deposits. These buildups can create conditions favorable to mold growth. Address any plumbing issues immediately – dripping faucets or leaking pipes are common culprits. Keep the bathroom well-ventilated even between painting projects. If you notice any signs of mold returning, don’t ignore them. Early intervention is much easier than complete repainting. Consider having your bathroom inspected by a professional every few years to catch hidden problems. Creating a routine maintenance schedule makes keeping your ceiling mold-free much easier.
Common Mistakes to Avoid
Many people make the mistake of thinking that painting a bathroom ceiling is simple. It’s not just about applying color – it’s about creating a protective barrier. One of the biggest errors is skipping primer, especially when dealing with stained or previously painted surfaces. Another common blunder is using regular interior paint instead of moisture-resistant options. People also tend to rush the process, not allowing enough drying time between coats. Using low-quality brushes or rollers can lead to uneven coverage and poor durability. Some homeowners try to save money by painting over existing mold without proper treatment, which usually leads to the problem returning quickly. Don’t assume that because you’ve painted before, you know how to handle bathroom ceilings. Each space presents unique challenges that require different approaches. Planning ahead and following proper procedures will save you from costly mistakes.
Painting a bathroom ceiling may seem like a straightforward DIY project, but it’s really about understanding the environment you’re working in. When you combine the right materials, thorough preparation, and ongoing maintenance, you create a barrier that keeps mold at bay for years. The investment in quality products and careful technique pays dividends in both appearance and health. Remember, a bathroom ceiling isn’t just a surface to cover – it’s a critical part of your home’s defense against moisture and mold. By following these practices, you’re not just painting walls, you’re protecting your family’s health and your home’s value. The key is patience, attention to detail, and treating the job seriously. With proper care, your bathroom ceiling will remain fresh and mold-free for many years to come.