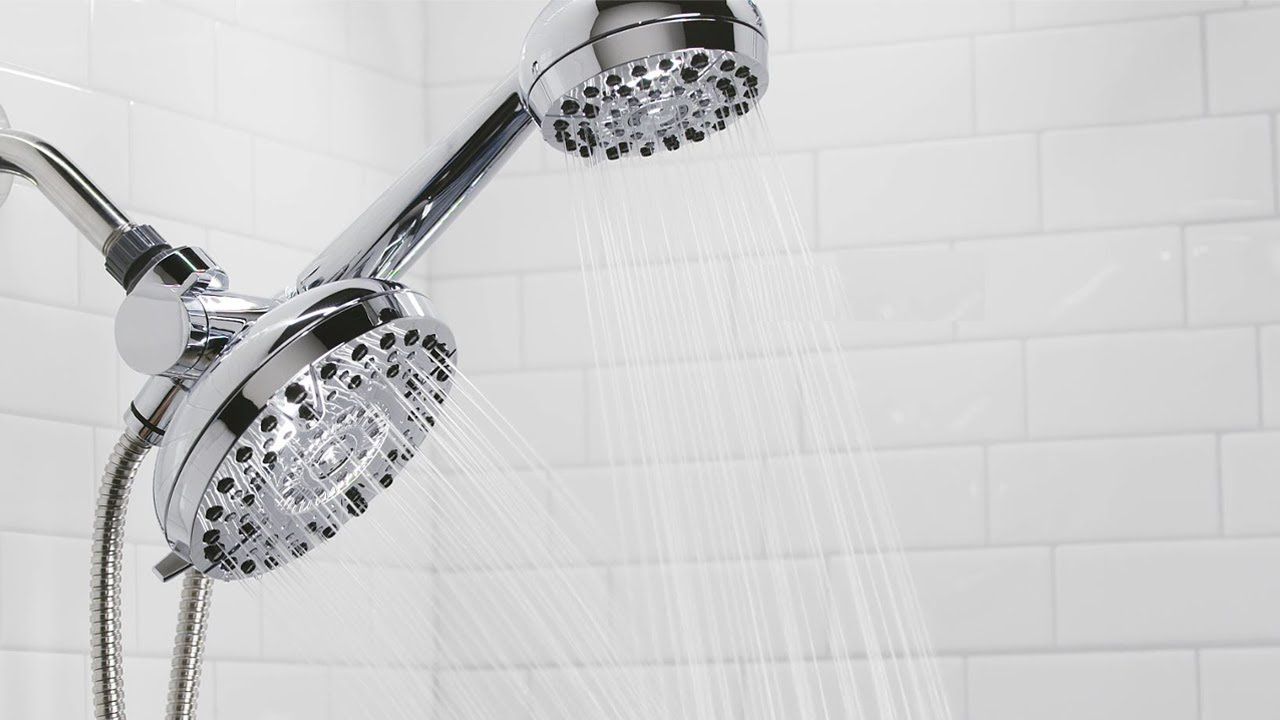
Picture this: stepping into your bathroom and having two separate shower heads working together. You could have a relaxing rain shower experience while someone else enjoys a powerful jet stream. Sounds amazing, right? But what if you don’t want to rip out your whole plumbing setup just to make it happen? That’s exactly what we’re going to explore today.
Let’s face it – upgrading your bathroom can feel like a massive undertaking. The thought of tearing out walls, rerouting pipes, and dealing with messy construction often keeps people stuck with outdated fixtures. But what if you could add a second shower head without all that drama? It’s totally doable, and we’re going to walk you through exactly how to make it happen. This isn’t about expensive renovations or complicated installations. We’re talking about smart solutions that work with what you already have.
Understanding Your Current Setup
Before diving into installation, it’s crucial to understand what you’re working with. Most homes have a single shower valve that controls water flow to one fixture. You’ll want to examine your existing shower setup carefully. Check if you have a single handle or separate hot/cold controls. Look for the type of connections – are they threaded, compression, or push-fit? Sometimes, you might even find a diverter valve already installed. Understanding your current configuration helps determine how to best integrate that second shower head. The key is knowing what’s already there and how it works. Some older homes might have basic setups that are easier to work with than modern complex systems. Take your time examining everything before making any decisions.
The Magic of Diverter Valves
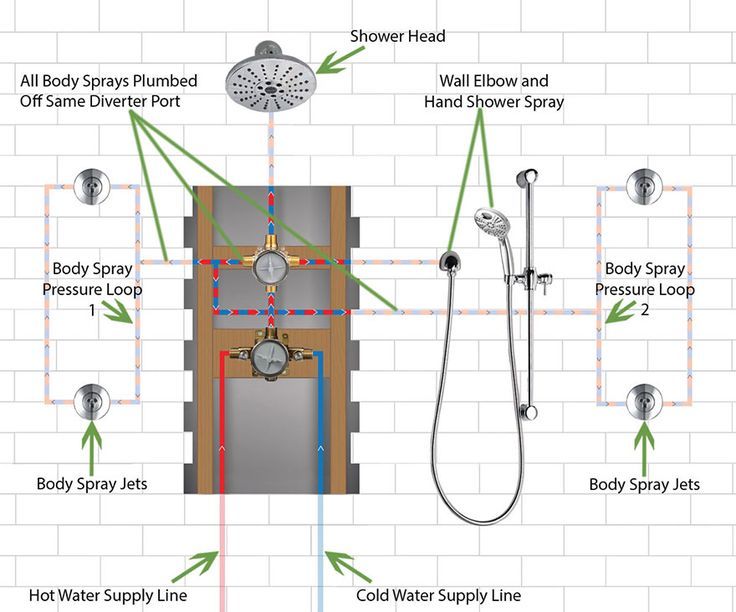
Here’s where things get interesting. A diverter valve is essentially a switch that redirects water flow from one outlet to another. Think of it like a traffic light for your water pipes. These little devices can be installed in various places within your plumbing system. They allow you to control whether water flows to your main showerhead or to a secondary one. Installing one is usually straightforward, especially if you’re adding a second shower head to an existing setup. You can position it near the shower valve or even inside the wall. The beauty is that it works with your existing pipes and fixtures. Many people think they need new plumbing, but a simple diverter valve solves most problems. It’s like having a remote control for your water flow. Once installed, you can choose which shower head to use based on your preference.
Choosing the Right Components
Not all shower heads are created equal, and selecting the right components makes all the difference. When choosing a second shower head, consider factors like water pressure, flow rate, and style. Some dual shower setups use two separate heads, while others combine them into one unit. You’ll also need to think about compatibility with your existing system. Check if your new shower head will fit the same threads as your old one. Look for models that support both low and high pressure situations. Consider whether you want a fixed or adjustable setup. Some people prefer handheld options that can move around freely. Make sure to measure the space carefully too. A few inches can make a big difference in how everything fits together. Quality matters here – cheap components may save money upfront but cause headaches later.
Installation Process Overview
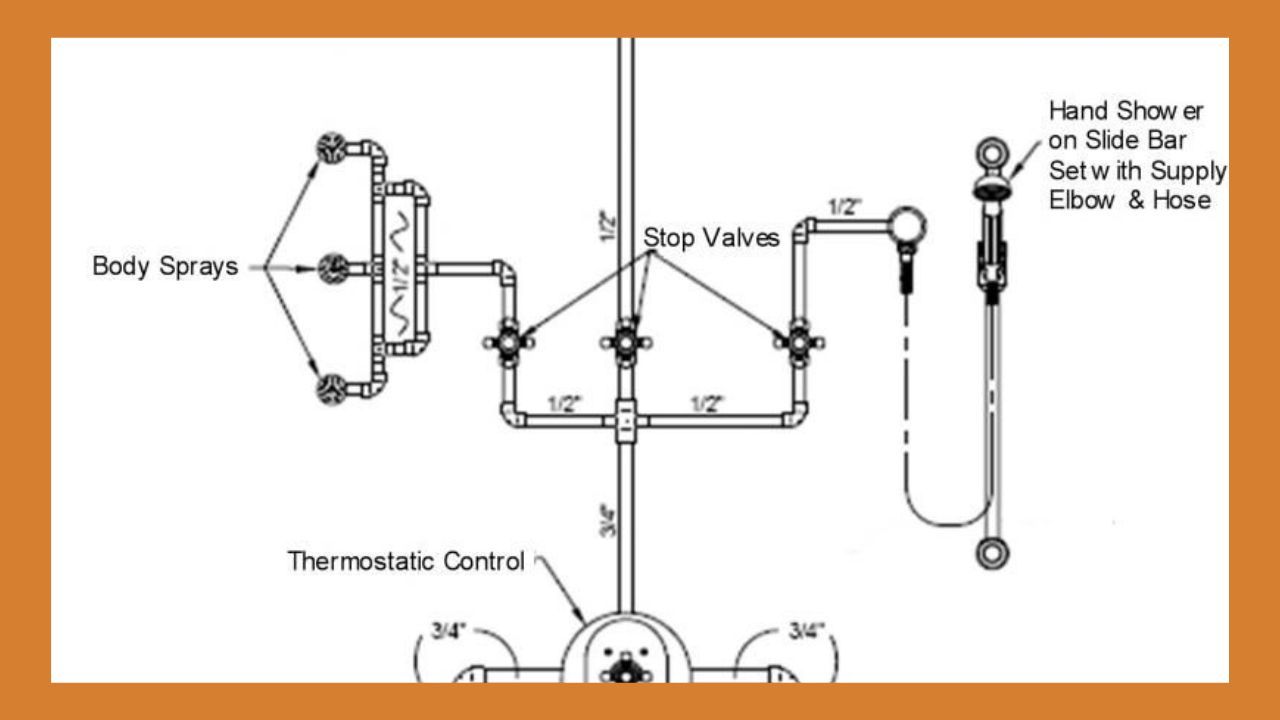
The actual installation process breaks down into manageable steps. First, you’ll need to shut off the water supply to your shower area. This is critical for safety and preventing damage. Next, remove the existing shower head carefully. You might need special tools depending on how it’s attached. Then comes the fun part – installing the diverter valve. This typically involves connecting it between your existing valve and the first shower head. After that, attach your new shower head to the diverter. Make sure all connections are tight but not over-tightened. Test everything thoroughly before calling it done. Don’t forget to check for leaks after turning the water back on. This process can take anywhere from thirty minutes to a couple of hours depending on your comfort level and the complexity of your setup. Patience pays off here.
Common Challenges and Solutions
Even with careful planning, some issues can pop up during installation. One common problem is mismatched thread sizes. If your new shower head doesn’t fit perfectly, you might need adapter fittings. Another challenge is water pressure balance. Sometimes adding a second head can reduce pressure to one or both fixtures. In these cases, you might need to adjust valves or even upgrade certain components. Leaks are always a concern, but they’re usually fixable with proper tightening or resealing. Some people struggle with finding the right spot for the diverter valve. Working around existing pipes and walls can be tricky. If you encounter resistance, don’t force it. Sometimes you need to modify your approach rather than fight the system. Having extra tools on hand helps overcome unexpected obstacles. Learning from others’ experiences can prevent many of these problems.
Maintenance and Long-term Care
Once you’ve successfully installed your dual shower heads, proper maintenance keeps everything running smoothly. Regular cleaning prevents mineral buildup that can clog spray holes. Most shower heads benefit from monthly cleaning with vinegar solution. Check all connections periodically for signs of wear or loosening. A quick visual inspection every few months catches small problems before they become big ones. Watch for changes in water pressure or temperature consistency. These might indicate issues that need attention. Remember that your diverter valve needs occasional care too. Some models require periodic lubrication or replacement. Keeping spare parts handy makes future repairs easier. Understanding how your system works helps you troubleshoot issues quickly when they arise. Good habits now prevent costly repairs later.
Adding a second shower head to your existing setup doesn’t have to mean a complete bathroom overhaul. With the right approach and understanding of your plumbing system, you can enjoy dual shower functionality without major disruption. The key lies in working with what you already have rather than against it. Whether you’re looking for a spa-like experience or simply want more flexibility in your daily routine, this upgrade offers real benefits. The investment in time and effort pays off in increased comfort and enjoyment. Don’t let fear of complexity stop you from improving your bathroom experience. With careful preparation and the right components, you can transform your shower into something truly special. The journey from single to dual shower heads is simpler than you might think.
![Plumbing For Dual Shower Heads [Installation & Considerations] inside Install Dual Shower Head Combo On Existing Pipe](https://dahomengarden.com/wp-content/uploads/2025/10/plumbing-for-dual-shower-heads-installation-considerations-inside-install-dual-shower-head-combo-on-existing-pipe.png)