We’ve all been there – your toilet starts leaking around the base, and panic sets in. The thought of removing the entire fixture seems overwhelming. But what if we told you there’s a way to fix that leak without lifting a single screw? It’s true, and it’s actually quite doable with the right approach.
Toilets are one of those fixtures that can make or break your home’s comfort. When they start leaking, it’s not just an inconvenience – it’s a potential disaster waiting to happen. Water damage, mold growth, and ruined flooring can all follow a faulty wax ring. Many homeowners assume they must remove their toilet entirely to fix the issue, but that’s not always necessary. This guide will show you how to replace a wax ring without removing your toilet, saving you time, effort, and potentially money. Whether you’re a seasoned DIYer or someone who’s never touched plumbing, this approach is surprisingly manageable.
Understanding the Wax Ring Problem
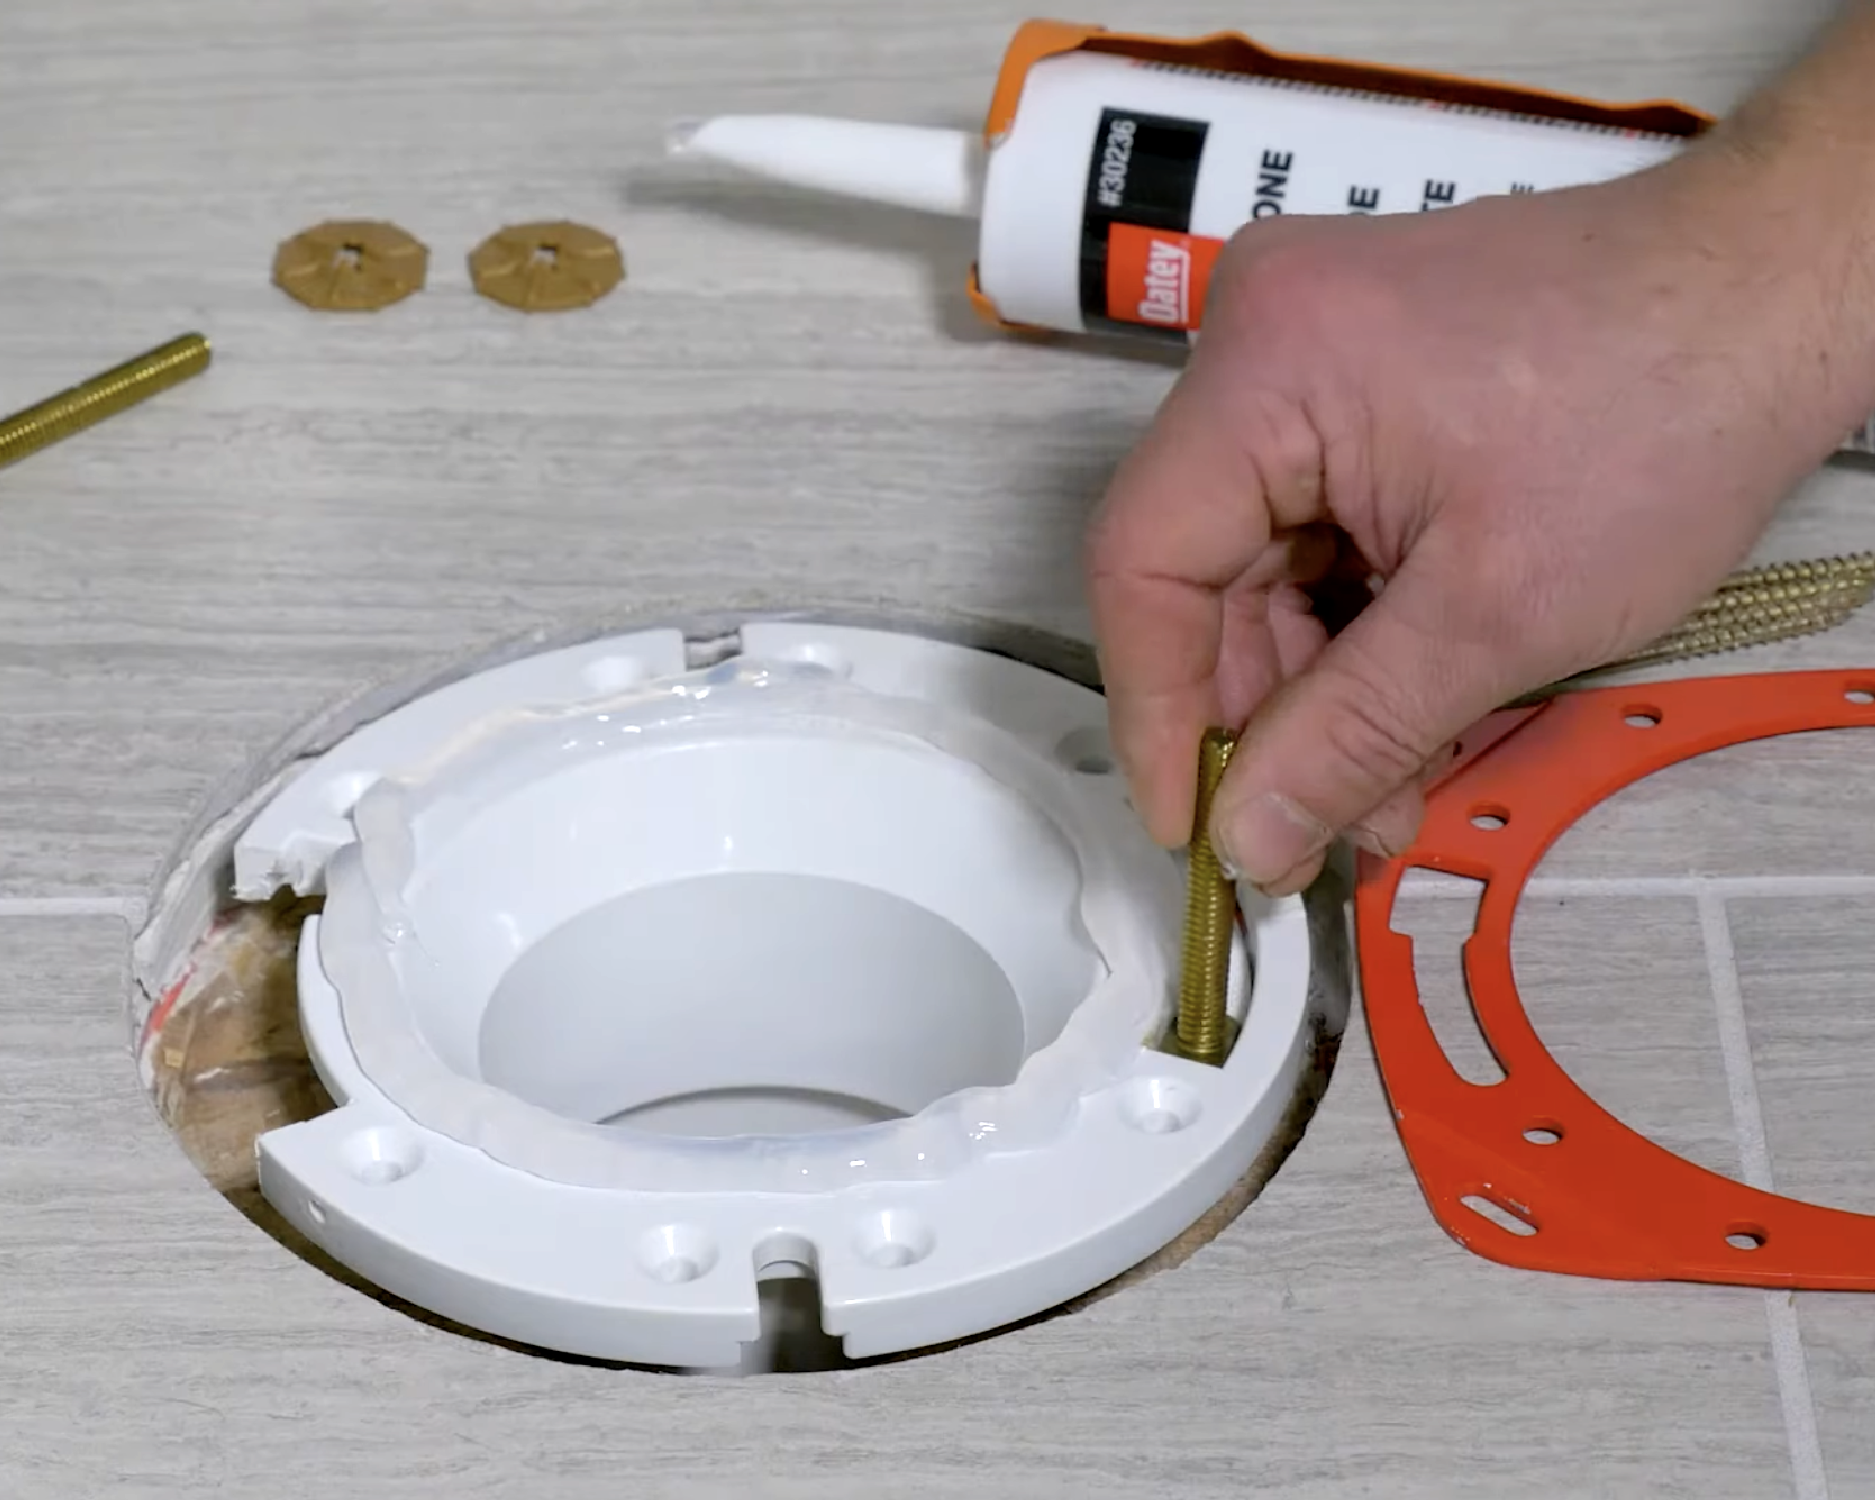
The wax ring sits between your toilet and the flange on the floor. It creates a watertight seal when you install the toilet. Over time, this seal can deteriorate due to age, movement, or poor installation. Sometimes the ring becomes compressed, cracked, or misaligned, causing water to seep out from underneath. The classic sign? Water pooling around the base of your toilet. You might notice a foul smell, soft spots in the floor, or even visible water stains. Don’t wait too long – the longer you let it go, the more damage it can cause to your bathroom floor and subfloor.
What You’ll Need for This Task
Before diving in, gather these essential items:
• New wax ring (or closet bolt kit)
• Adjustable wrench
• Screwdriver set
• Towels or rags
• Bucket
• Plumber’s putty (optional)
• Safety glasses
You might also want a small flashlight to see into tight spaces. Most importantly, turn off the water supply to the toilet before starting. The valve is usually located behind or near the base of the toilet. Give it a quarter turn clockwise to shut off the flow. Having these supplies ready makes the process much smoother than scrambling around later.
Preparation Steps Before You Begin
Start by clearing the area around your toilet. Remove any items from the immediate vicinity and lay down towels to catch any drips. Next, disconnect the water supply line carefully. You’ll need an adjustable wrench to loosen the nut connecting the line to the toilet. Place a bucket underneath to catch any remaining water. Then, flush the toilet to drain most of the water from the tank and bowl. Let the bowl empty completely before proceeding. Some people find it helpful to cover the drain opening with a rag to prevent anything from falling down the pipe during the repair.
Accessing the Base of Your Toilet
Now comes the tricky part – accessing the bolts that hold the toilet to the floor. These are typically hidden under the base of the toilet and may be covered by a decorative cap. Look for a small round cap or a plastic cover that you can pop off with a flathead screwdriver. Once removed, you’ll see two nuts that secure the toilet to the flange. If you’re dealing with a very old toilet, these nuts might be stuck and require some gentle persuasion. Use a penetrating oil if they’re rusted or seized. The goal isn’t to completely remove them yet, just to get access to the tightening mechanism.
Lifting the Toilet Just Enough
This is where many people get nervous. You don’t need to lift the whole thing high – just enough to get under the rim. Gently rock the toilet back and forth while lifting slightly. The goal is to create space between the toilet and the floor, not to pull it completely off. If it feels stuck, don’t force it. You might damage the porcelain or crack the wax ring further. Instead, try using a small pry bar or even a wooden block to gently lever it up. Remember, you’re just creating room to work, not doing a full removal.
Replacing the Wax Ring Safely
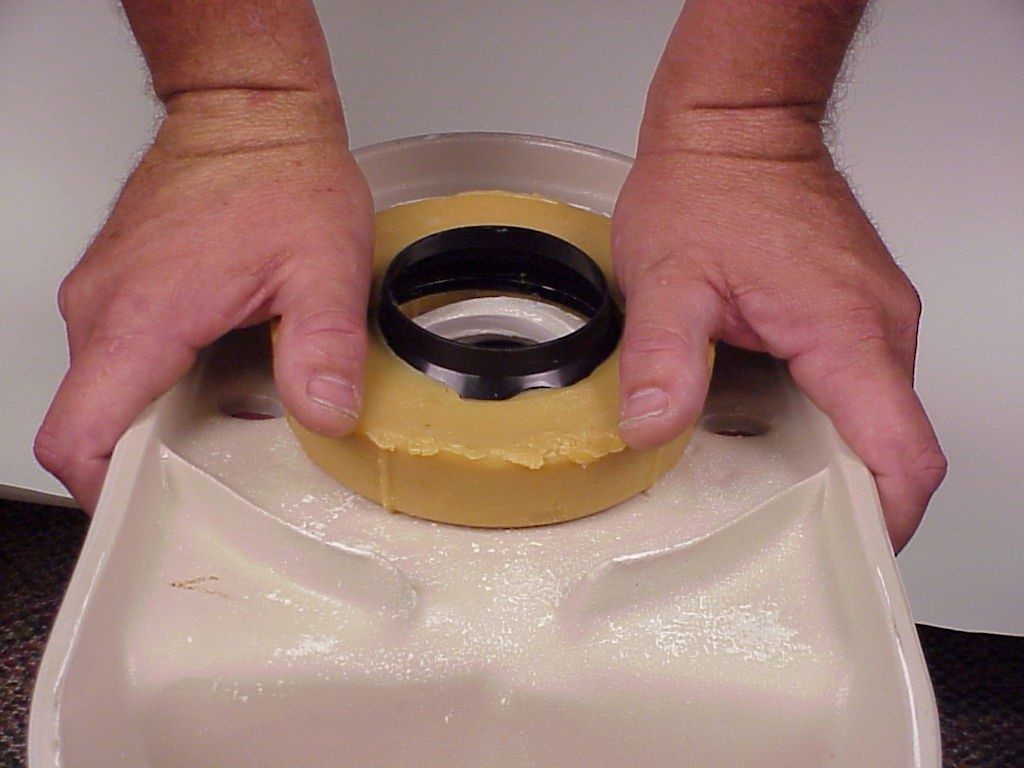
Once you have space, carefully slide out the old wax ring. It might be crumbly or sticky, depending on how long it’s been in place. Check that the flange is clean and undamaged. Any debris or old sealant can interfere with the new ring’s performance. Clean the area thoroughly with a damp cloth and let it dry completely. Place the new wax ring properly – it should sit centered on the flange. If you’re using a rubber gasket instead, make sure it’s properly aligned. Some people prefer to use plumber’s putty, though the modern wax rings are designed to work alone. The key is ensuring a tight fit.
Reinstalling Your Toilet Properly
This step requires patience and attention to detail. Lower the toilet slowly and carefully, making sure it aligns with the bolts. Don’t rush it – it’s better to take your time and ensure proper positioning. The toilet should sit evenly on the floor with no wobble. Tighten the nuts gradually, alternating sides to ensure even pressure. Don’t overtighten – you want a secure fit but not so tight that you crack the porcelain. Finally, reconnect the water supply line and test the system by turning the water back on. Give it a few minutes to fill and check for leaks.
Common Mistakes to Avoid
• Forcing the toilet off the floor – this can crack the porcelain or damage the wax ring
• Not cleaning the flange properly – debris can compromise the seal
• Using too much force when tightening the nuts – leads to cracks and leaks
• Skipping the water shut-off step – you’ll end up with a messy situation
• Installing a ring incorrectly – misalignment causes immediate problems
Remember, this is a delicate balance between getting enough clearance and maintaining structural integrity. If you feel like you’re fighting the process, stop and reassess. Sometimes a different approach works better than brute force.
When to Call a Professional
There are situations where professional help is worth it. If you’re dealing with a very old toilet that’s been installed for decades, or if the floor itself is damaged, it might be time to consider a full replacement. Also, if you’re unsure about the condition of the flange or if the toilet wobbles significantly after reinstallation, a plumber can provide expert assessment. Sometimes, the problem isn’t just the wax ring – it could be a damaged flange, a broken toilet, or issues with the sewer connection. Professionals have specialized tools and experience to handle these complexities.
Maintenance Tips for Long-Term Success
• Check your toilet regularly for signs of moisture or unusual sounds
• Keep the area around the base clean and dry
• Don’t over-tighten nuts when installing or adjusting
• Consider replacing the wax ring every few years as a preventive measure
• Address any minor leaks immediately rather than waiting for bigger problems
Regular maintenance prevents major issues. A little attention now can save you hours of emergency repairs later. Think of it as taking care of a pet – consistent small efforts pay off in the long run.
Replacing a wax ring without removing your toilet is a skill that can save you both time and money. It’s not rocket science, but it does require patience and careful attention to detail. With the right preparation, the correct tools, and a calm approach, most people can accomplish this task successfully. Remember, the key is not to rush the process. Take your time, follow each step carefully, and don’t hesitate to ask for help if something doesn’t feel right. When done properly, your toilet should leak-free for years to come. You’ve now got the knowledge to tackle this common household issue confidently. Whether you’re a homeowner or someone learning basic plumbing skills, this technique is invaluable. The next time you spot that telltale puddle, you’ll know exactly what to do. And maybe, just maybe, you’ll discover that fixing your own toilet isn’t as scary as you thought.
![How To Clean Up Toilet Wax Ring? [ 7 Easy Steps And Alternatives] — Be ... with regard to Replace Wax Ring Without Removing Toilet](https://dahomengarden.com/wp-content/uploads/2025/12/how-to-clean-up-toilet-wax-ring-7-easy-steps-and-alternatives-be-with-regard-to-replace-wax-ring-without-removing-toilet.jpg)