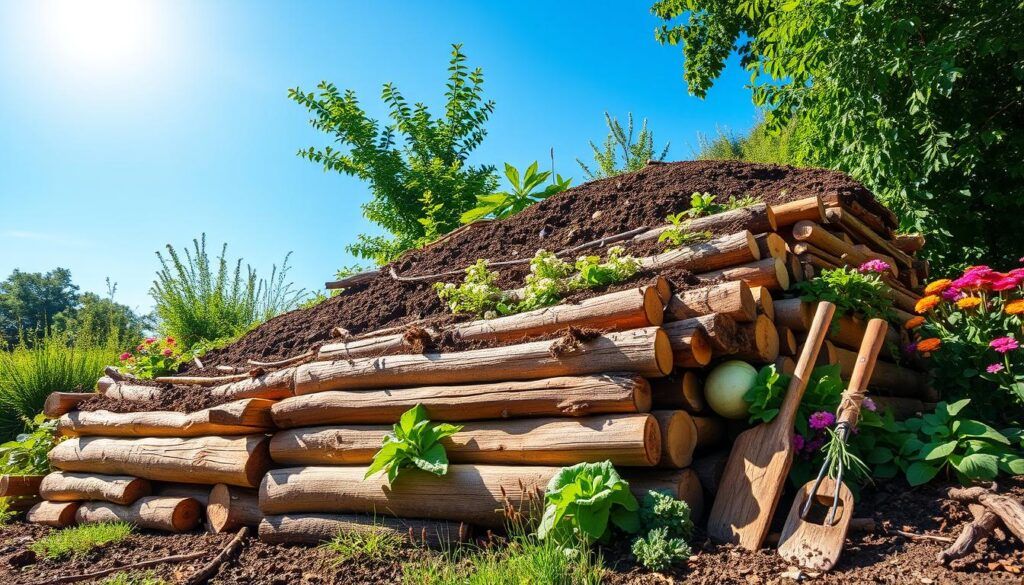
Every gardener knows that good composting begins with the right setup. But what exactly makes a difference between a thriving pile and a smelly mess? It’s not just about turning the pile or adding the right ingredients. The right tools can make all the difference in creating nutrient-rich soil that will make your plants sing. Whether you’re a complete beginner or someone looking to upgrade your current system, choosing the right equipment can turn your composting journey from a chore into a joy.
Composting at home isn’t just about gathering organic waste and waiting for magic to happen. It’s about understanding the science behind decomposition and using the right tools to make that process work for you. When we talk about composting success, we’re really talking about the marriage between proper technique and smart equipment choices. Think about it – if you had the perfect recipe for cookies but no oven, would they turn out right? Exactly. You need the right tools to make your composting dreams come true. The right tools don’t just save time and energy; they actually improve the quality of your final product. From choosing the right container to understanding when to turn your pile, each tool serves a specific purpose that contributes to your overall success.
Choosing the Right Container
The first decision you’ll face is selecting the perfect container for your composting needs. This choice sets the foundation for everything else. For those living in small spaces, a simple plastic bin with holes drilled in it works wonderfully. These bins keep pests out while allowing air circulation. If you have more room, a traditional three-bin system offers better control over the composting process. Some folks prefer tumblers because they make turning much easier and faster. Others swear by open-air piles, especially if they have plenty of yard waste. The key isn’t the type of container, but rather how well it suits your lifestyle. Consider how much space you have available, how much time you want to spend maintaining it, and whether you’re dealing with pets or wildlife in your area. A simple 30-gallon bucket can work perfectly for a single person, while a larger 60-gallon unit might be better for families. Size matters, but so does ventilation and drainage. Most successful composters find that having multiple containers allows them to rotate their materials properly. That way, one pile can be actively decomposing while another rests and matures. Think of it like a cooking pot that you’re constantly stirring – you need to keep things moving.
Understanding Aeration Tools
Aerating your compost pile is crucial for healthy decomposition. Without enough oxygen, your pile becomes anaerobic and starts smelling terrible. This is where tools like pitchforks and aerators become essential. A simple garden fork works wonders for mixing and turning compost. It’s affordable and versatile, though it requires more physical effort. Specialized compost aerators are designed specifically for this job. They’re usually longer than regular forks and have wider tines that can reach deeper into the pile. These tools help break up compacted material and allow fresh air to circulate. Many gardeners use a combination approach – a basic fork for initial mixing and a specialized aerator for deeper aeration. The frequency of aeration depends on your pile size and ingredients. Smaller piles may only need turning once a week, while larger ones benefit from twice-weekly attention. If you’re working with high-nitrogen materials like grass clippings, you’ll want to aerate more frequently. Sometimes, a simple shovel can do the trick, but specialized tools make the job easier and more effective. The goal is to create uniform air distribution throughout the pile, not just on the surface. Proper aeration speeds up decomposition and prevents the formation of bad odors. It’s one of the most overlooked aspects of composting, yet it’s fundamental to success.
Temperature Monitoring Made Simple
Many people think composting is just about mixing ingredients, but temperature plays a vital role in the process. A well-managed compost pile heats up significantly during active decomposition. This heat kills harmful pathogens and speeds up breakdown of organic matter. Thermometers designed specifically for composting help you track this heat. Digital thermometers with probes can tell you exactly what’s happening inside your pile. These devices typically cost around $10-20 and provide readings within minutes. You’ll want to check temperatures regularly, especially during the first few weeks. Ideal temperatures range from 130-160°F for effective decomposition. If your pile isn’t heating up, it might mean you need more nitrogen-rich materials or better aeration. Conversely, if it gets too hot, you might need to add water or reduce the amount of green materials. Some gardeners even use temperature data to determine when to turn their piles. The heat cycle tells you when the decomposition process is peaking. Monitoring helps prevent problems before they start. It’s like checking your car’s engine temperature – you want to know when things are running optimally. Temperature monitoring isn’t just for experts either. Even beginners can benefit from understanding when their pile is working correctly versus when it needs attention.
Moisture Control Essentials
Water is the unsung hero of composting. Too little and your pile becomes a dry, inactive mess. Too much and it turns into a soggy, smelly sludge. The secret lies in finding the right balance. A moisture meter is a handy investment for serious composters. These devices measure water content in your pile and help ensure you stay within the ideal range of 40-60%. The texture should feel like a wrung-out sponge. When you squeeze a handful of compost material, a few drops of water should appear, but it shouldn’t drip freely. If your pile feels dry, add water gradually and mix thoroughly. If it’s too wet, add dry materials like leaves or cardboard. Some gardeners use a simple test: stick your hand into the pile. If it feels like a damp towel, you’re good to go. Different materials hold different amounts of water. Carbon-rich materials like straw absorb more moisture than nitrogen-rich items like vegetable scraps. Managing moisture is particularly important during winter months when natural rainfall is less frequent. Regular monitoring prevents the common mistake of overwatering, which leads to anaerobic conditions. You might also consider installing a simple drip irrigation system for consistent watering. Remember, composting is a slow process, so patience pays off. Proper moisture levels ensure steady decomposition rather than sporadic bursts.
Material Preparation Tools
The quality of your finished compost depends heavily on how well you prepare your materials beforehand. Chopping or shredding organic matter increases the surface area exposed to microorganisms. This dramatically speeds up the decomposition process. A chipper-shredder is a fantastic investment for those who generate lots of woody materials. These machines turn branches and twigs into fine mulch that breaks down quickly. Even a basic hand-held shredder works well for smaller jobs. For kitchen scraps, a food processor can help break down tough materials like corn husks or eggshells. Simple tools like knives and garden shears handle most household prep needs. Consider the size of materials you’re adding to the pile. Finely chopped materials decompose much faster than whole items. Some gardeners prefer to layer materials in specific ratios. Carbon-rich materials like dried leaves go on bottom, followed by nitrogen-rich items like grass clippings. This layering technique improves airflow and moisture distribution. Preparing materials ahead of time also means less work when you’re ready to compost. The key is consistency – whatever method you choose, apply it uniformly to all your materials. Don’t forget to remove any non-compostable items like plastics or metals before processing. These contaminants can slow down the entire process and affect the quality of your final product.
Harvesting and Screening Solutions
The final stage of composting involves separating finished material from unfinished bits. This step often gets overlooked, but it’s critical for producing usable soil amendment. A screen or sifter is one of the most useful tools in this process. These devices separate mature compost from larger pieces that still need more time. The screening process typically involves passing compost through a mesh with 1/4-inch openings. What comes through is ready to use immediately, while larger chunks go back into the pile. Some gardeners use multiple screens to create different grades of compost. Fine material goes to the smallest mesh, while coarser pieces go to larger openings. This creates various products for different gardening applications. The screening process also reveals whether your compost is truly ready. If you see large chunks of unbroken-down material, your pile needs more time or attention. Some people use a simple garden sieve for basic screening tasks. Others invest in commercial screening equipment for larger volumes. The key is ensuring that only properly decomposed material enters your garden beds. Uneven compost can lead to uneven plant growth or even introduce weed seeds into your soil. Proper harvesting and screening give you confidence that your efforts are paying off in tangible results.
Success in home composting isn’t just about following recipes or remembering to turn your pile. It’s about making smart tool choices that support your goals and lifestyle. From selecting the right container to mastering moisture levels, each piece of equipment plays a role in your overall success. The best tools are those that fit your specific situation – whether you’re composting in a small apartment or managing a large backyard operation. Remember, investing in quality tools pays dividends in time saved and compost quality improved. Start with basics like a good container and a simple fork, then add more specialized equipment as you gain experience. Don’t let the process intimidate you – with the right approach and some helpful tools, anyone can create rich, dark compost that transforms their garden. The journey toward composting success begins with understanding what you need and choosing tools that make your life easier. Your garden will thank you for it, and you’ll find yourself looking forward to the next batch of nutrient-rich soil you’ve created.