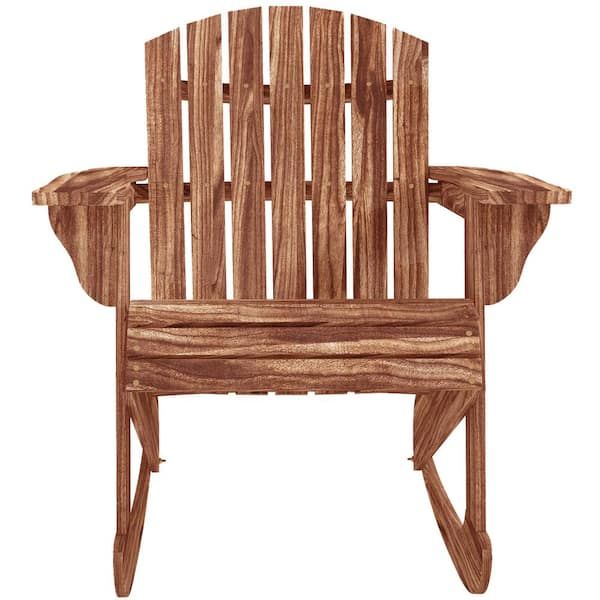
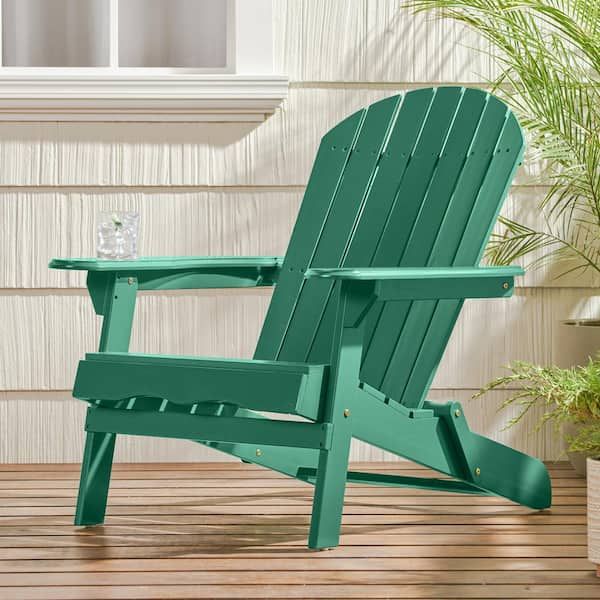
Hey everyone, it’s your friend, and outdoor furniture enthusiast, here! I’ve spent years perfecting the art of building my own outdoor furnishings, and today, we’re diving deep into one of my all-time favorites: the slatted wood Adirondack chair. This is more than just a project; it’s a chance to create a space where you can unwind, soak up the sun, and enjoy the simple pleasures of life. This guide is for everyone, even if you’ve never held a saw before. We’ll go step-by-step, making sure that building your own chair is fun, rewarding, and completely achievable. Trust me, the feeling of sinking into a chair you built with your own two hands is pretty amazing.
Why not just buy one, right? Well, there are many good reasons. First, it’s a chance to get creative, adding a personal touch that a store-bought chair can’t match. Second, building your own chair lets you choose the exact wood, finish, and hardware, ensuring it perfectly suits your style and the environment it’ll be in. Third, and perhaps most importantly, there’s a real satisfaction that comes from crafting something with your own hands. It’s therapeutic, it’s rewarding, and it’s a skill you’ll have for life. Plus, you’ll save some money along the way, and it’s a great conversation starter. Let’s get started, shall we?
Gathering Your Materials: The Essentials
Before you even think about picking up a saw, you’ll need to gather your supplies. Here’s what you’ll need, and some suggestions to get you going:
- Wood: Choose a weather-resistant wood like cedar, redwood, or pressure-treated lumber. Cedar and redwood look beautiful and are naturally resistant to rot. Pressure-treated lumber is a bit more budget-friendly, but you’ll want to apply a good finish to protect it. I’ve found that cedar gives the best smell.
- Hardware: Stainless steel screws are your best friend here. They won’t rust, and they’ll hold up beautifully outdoors. Consider using wood glue for extra strength, especially at joints.
- Tools: You’ll need a saw (circular saw or a hand saw work), a drill, a measuring tape, a pencil, a square, sandpaper, and safety glasses. A good sander can make the finishing stage much easier.
- Finish: This is where you personalize your chair. Choose an exterior-grade stain, paint, or sealant to protect the wood from the elements. Consider the local weather conditions and how much sun the chair will get.
Pro Tip: Before you buy anything, check out online plans. There are many free and paid plans available, which will give you a cut list and dimensions to make the process much easier. I strongly suggest using a plan for your first build.
Cutting the Wood: Precision is Key
Once you have your materials, it’s time to start cutting. This is where your plan comes in handy. Follow the cut list provided in your plan carefully. Measure twice, cut once! It’s a cliche, but it’s true, you don’t want to waste wood.
- Safety First: Always wear safety glasses and ear protection when using power tools. Make sure your work area is well-lit and clear of obstructions.
- Accuracy: Use a square to ensure your cuts are at perfect right angles. This is crucial for a sturdy and well-aligned chair.
- Sanding: After cutting, sand all the edges and surfaces of the wood. This removes splinters and prepares the wood for finishing. This step is important for both safety and aesthetics. I prefer a slightly rounded edge.
Example: Let’s say your plan calls for the armrests to be 48 inches long. Measure carefully, mark your cut line, and then make the cut. Repeat for all the pieces, being mindful of the dimensions provided in the plan. It’s time consuming, but worth it in the end.
Assembling the Chair: Bringing it to Life
Now comes the fun part: putting it all together.
- Start with the Frame: Begin by assembling the frame of the chair (the seat and back supports). Use wood glue and screws to secure the pieces together. Ensure everything is square and level.
- Attach the Slats: Once the frame is assembled, attach the slats to the seat and back. Space the slats evenly, using a spacer (like a piece of scrap wood) to ensure consistent gaps. Screw the slats into the frame, pre-drilling holes to prevent the wood from splitting.
- Add the Armrests: Attach the armrests to the frame, making sure they’re level and securely fastened. You can use screws from underneath the armrests, or you can use angled screws for a more secure fit.
Tip: Clamps are your friends here. They’ll hold the pieces in place while you screw them together, making the process much easier.
Finishing Touches: Protecting and Personalizing
Once the chair is assembled, it’s time to add the finish. This will protect the wood from the weather and give it a beautiful look.
- Sanding Again: Give the entire chair a final sanding to smooth out any rough spots.
- Apply the Finish: Choose your finish (stain, paint, or sealant) and apply it according to the manufacturer’s instructions. Multiple coats are usually needed for optimal protection. Let each coat dry completely before applying the next.
- Consider a Topcoat: For extra durability, you can apply a topcoat of polyurethane or a similar sealant after the stain or paint has dried.
Example: If you’re using stain, apply it with a brush or rag, wiping off any excess. Let it dry, then apply a second coat. If you’re using paint, apply two or three thin coats, sanding lightly between coats.
Troubleshooting Common Issues
Even seasoned DIYers run into problems. Here are some common issues and how to resolve them:
- Splitting Wood: If the wood is splitting when you drive in screws, pre-drill pilot holes. This is especially important for hardwoods.
- Uneven Surfaces: If the chair isn’t level, check your measurements and make sure the legs are the same length. You can use shims to level the chair if necessary.
- Loose Screws: If screws are stripping out, try using longer screws or filling the holes with wood glue and toothpicks before re-drilling.
Remember: Don’t get discouraged if you make a mistake. It’s all part of the learning process. You can always fix it.
Enjoying Your Creation: Sit Back and Relax!
Congratulations, you’ve built your own Adirondack chair! Now it’s time to enjoy the fruits of your labor. Place your chair in your favorite spot, grab a cold drink, and relax. Revel in the fact that you built something beautiful and functional with your own two hands. Share your creation with friends and family, and enjoy the satisfaction of a job well done.
Pro Tip: Consider adding cushions or pillows for extra comfort. And don’t be afraid to experiment with different finishes and designs for future chairs. Happy building, and happy relaxing!
Building a slatted wood Adirondack chair is a fulfilling project that combines craftsmanship with relaxation. It’s a project that’s within reach for most people with a little bit of time, patience, and the right tools. So, gather your materials, follow the steps, and enjoy the process. You’ll not only have a beautiful piece of furniture but also the satisfaction of knowing you built it yourself. And who knows, this might just be the start of a new hobby. Go out there and create something amazing. The world is your workshop. And, if you get stuck, don’t hesitate to ask questions. I’m always here to help, and I can’t wait to see what you create. Happy building, and enjoy your new chair!