
Have you ever stepped out onto your patio at night, looked around, and felt like something was missing? The flowers are there. The trees are there. But they feel flat. Invisible, almost. It’s a common feeling. We spend all day tending to our gardens, pruning, watering, and dreaming of how beautiful they’ll look. But when the sun dips below the horizon, that beauty often disappears into a black void. It doesn’t have to be that way.
Lighting isn’t just about seeing where you’re walking. Although, let’s be honest, tripping over a garden hose is nobody’s idea of a good evening. It’s about mood. It’s about extending the life of your home into the night. Think of it as adding another room to your house, one with no walls and a ceiling made of stars. The secret isn’t flooding the yard with bright, harsh floodlights. That’s what we did in the 90s, and frankly, it looks like a car dealership. The real magic happens when you start looking up. Literally.
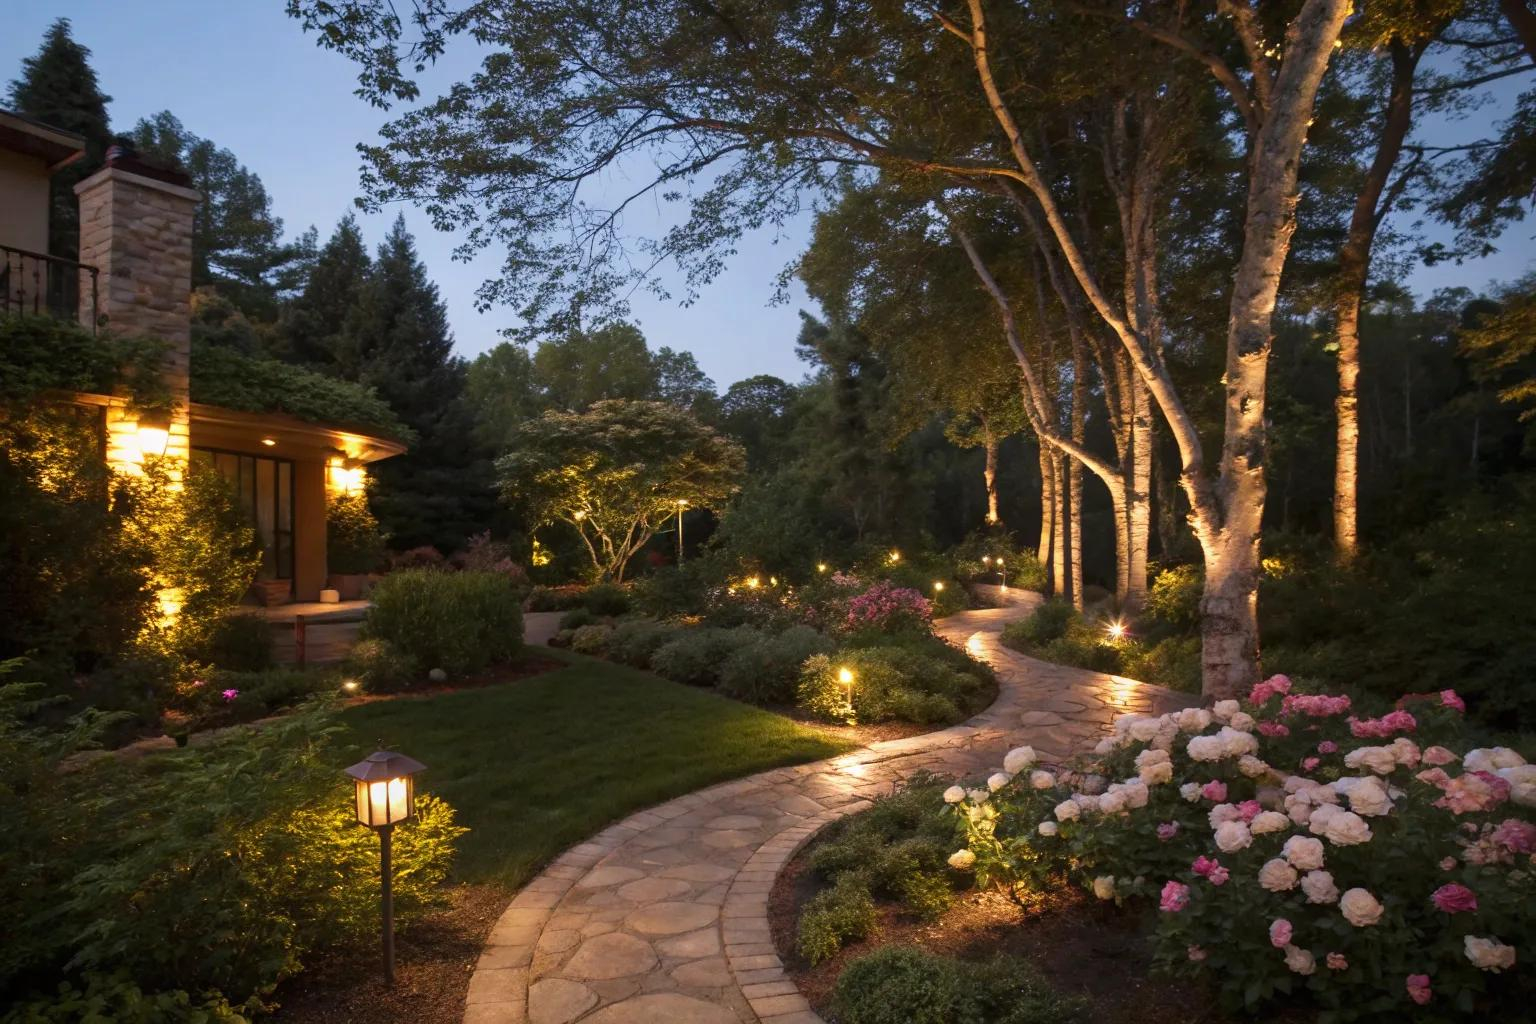
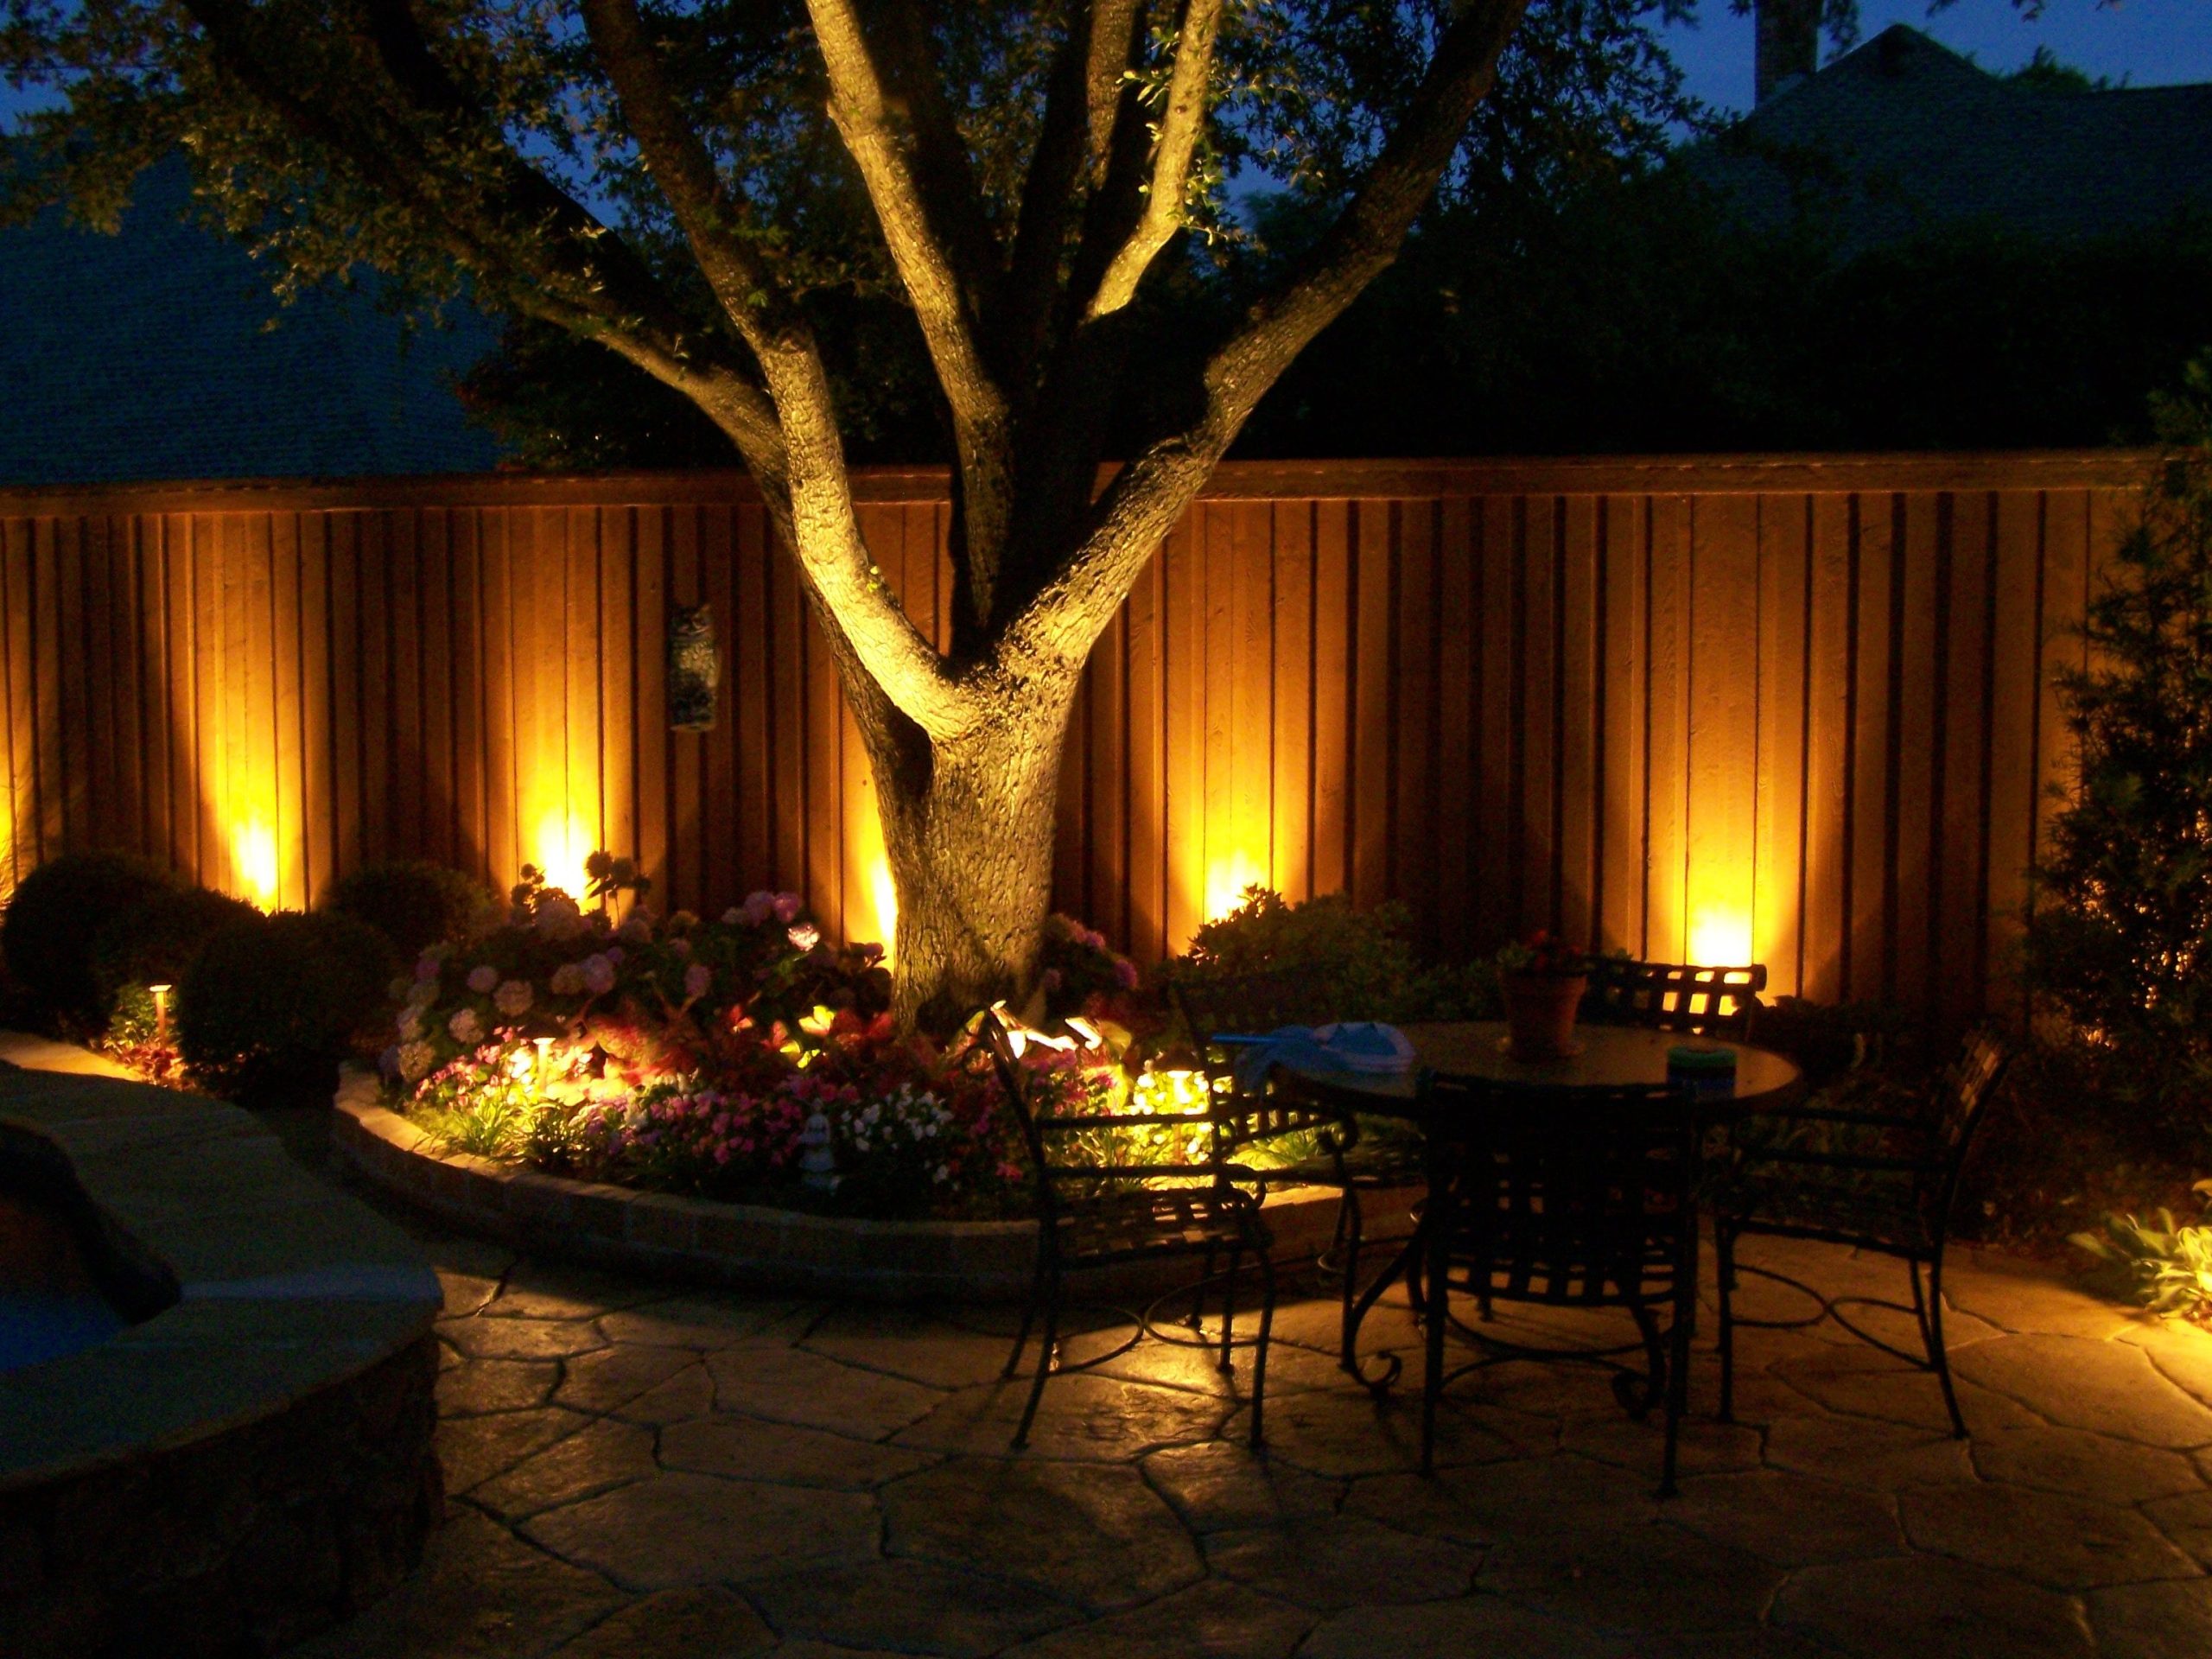
This is where uplighting comes in. It’s a technique that sounds technical but is actually quite simple. You place a light at the base of an object—maybe a tree, a statue, or a textured wall—and aim it upward. The result? Drama. Depth. A sense of mystery that pulls you outside. In 2026, homeowners are moving away from uniform brightness and toward layered, thoughtful illumination. They want spaces that feel warm and inviting, not just lit up. If you’ve been hesitant to tackle this project, don’t worry. You don’t need to be an electrician or a designer to get it right. You just need to understand a few basic principles.
The Psychology of Looking Up
Why does uplighting work so well? It’s partly biology. Humans are naturally drawn to vertical lines. When we look up, our eyes follow the light. It creates a sense of grandeur. A small ornamental tree that looks modest during the day can become a towering sculpture at night if you hit it with the right beam. It changes the perspective. Suddenly, your backyard feels bigger. More expansive.
But it’s also about focus. In the daytime, your eye darts around. You see the weeds, the mulch, the neighbor’s fence. At night, uplighting acts like a spotlight on a stage. It tells your brain, "Look here. Ignore the rest." This is crucial for smaller gardens. If you try to light everything, you end up with nothing. By choosing specific focal points, you create a narrative. You guide the viewer’s experience. It’s less about illumination and more about curation.
Think about the last time you walked through a well-lit museum or a high-end hotel lobby. Notice how the light hits the art? It’s never accidental. The same logic applies to your oak tree or that Japanese maple you’ve been nurturing for years. Uplighting highlights the texture of the bark. It shows off the intricate branch structure that gets lost in the leafy canopy during summer. It turns ordinary plants into architectural features. And honestly, isn’t that what we all want? For our efforts to be seen, even after dark.
Choosing the Right Fixtures for the Job
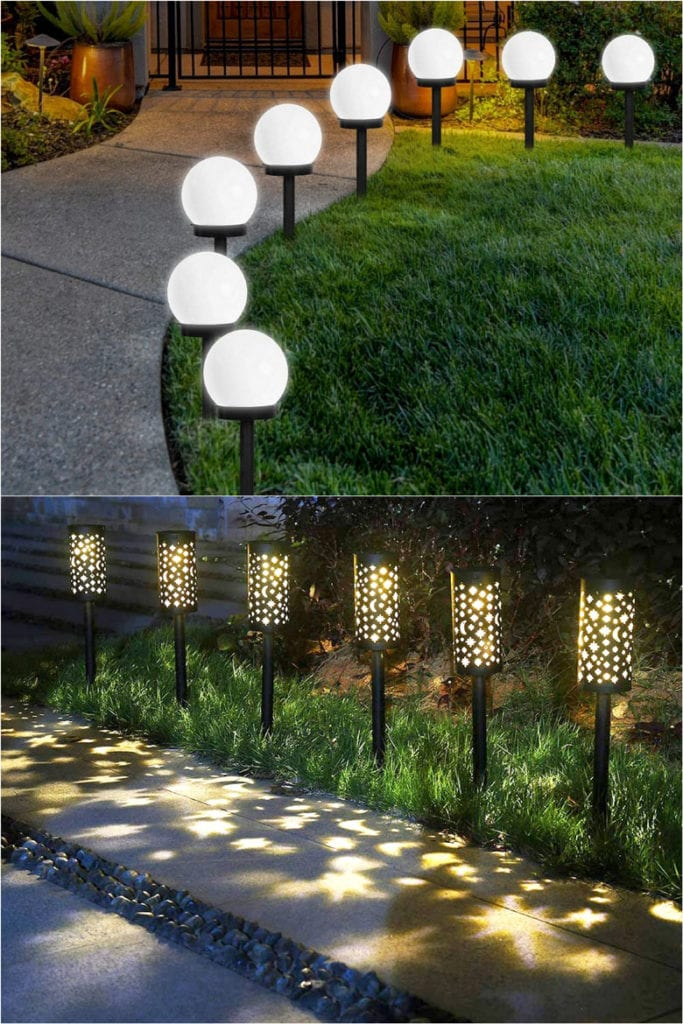
Not all lights are created equal. This is where many people stumble. They buy cheap solar stakes from a big-box store, stick them in the ground, and wonder why their garden looks spooky instead of sophisticated. While solar tech has improved massively by 2026, for true uplighting, you usually need something with a bit more punch. Something wired or using high-capacity battery systems.
First, consider the beam angle. This is the spread of the light. A narrow beam (around 15 degrees) is great for tall, thin trees. It shoots the light high up without spilling everywhere. A wider beam (40 to 60 degrees) is better for shrubs or wide-spreading trees. If you use a narrow beam on a bush, it’ll look like a single bright spot with darkness around it. Not ideal. You want wash, not a dot.
Then there’s the fixture itself. You want something low-profile. The best landscape lighting is invisible during the day. Look for fixtures that can be buried slightly or hidden behind mulch and rocks. Brass and copper are popular choices because they age well. They develop a patina that blends into the garden. Plastic fixtures tend to crack and fade, leaving you with ugly white scars in your flowerbeds. Spend a little more here. It pays off.
Also, think about durability. Your lights will face rain, snow, lawn mowers, and maybe even a curious dog. Look for an IP rating of at least IP65. This means they’re dust-tight and protected against water jets. It sounds boring, but trust me, pulling wet, broken lights out of the mud in January is not a fun weekend activity. Get it right the first time.
Placement and Angle: The Art of Subtlety
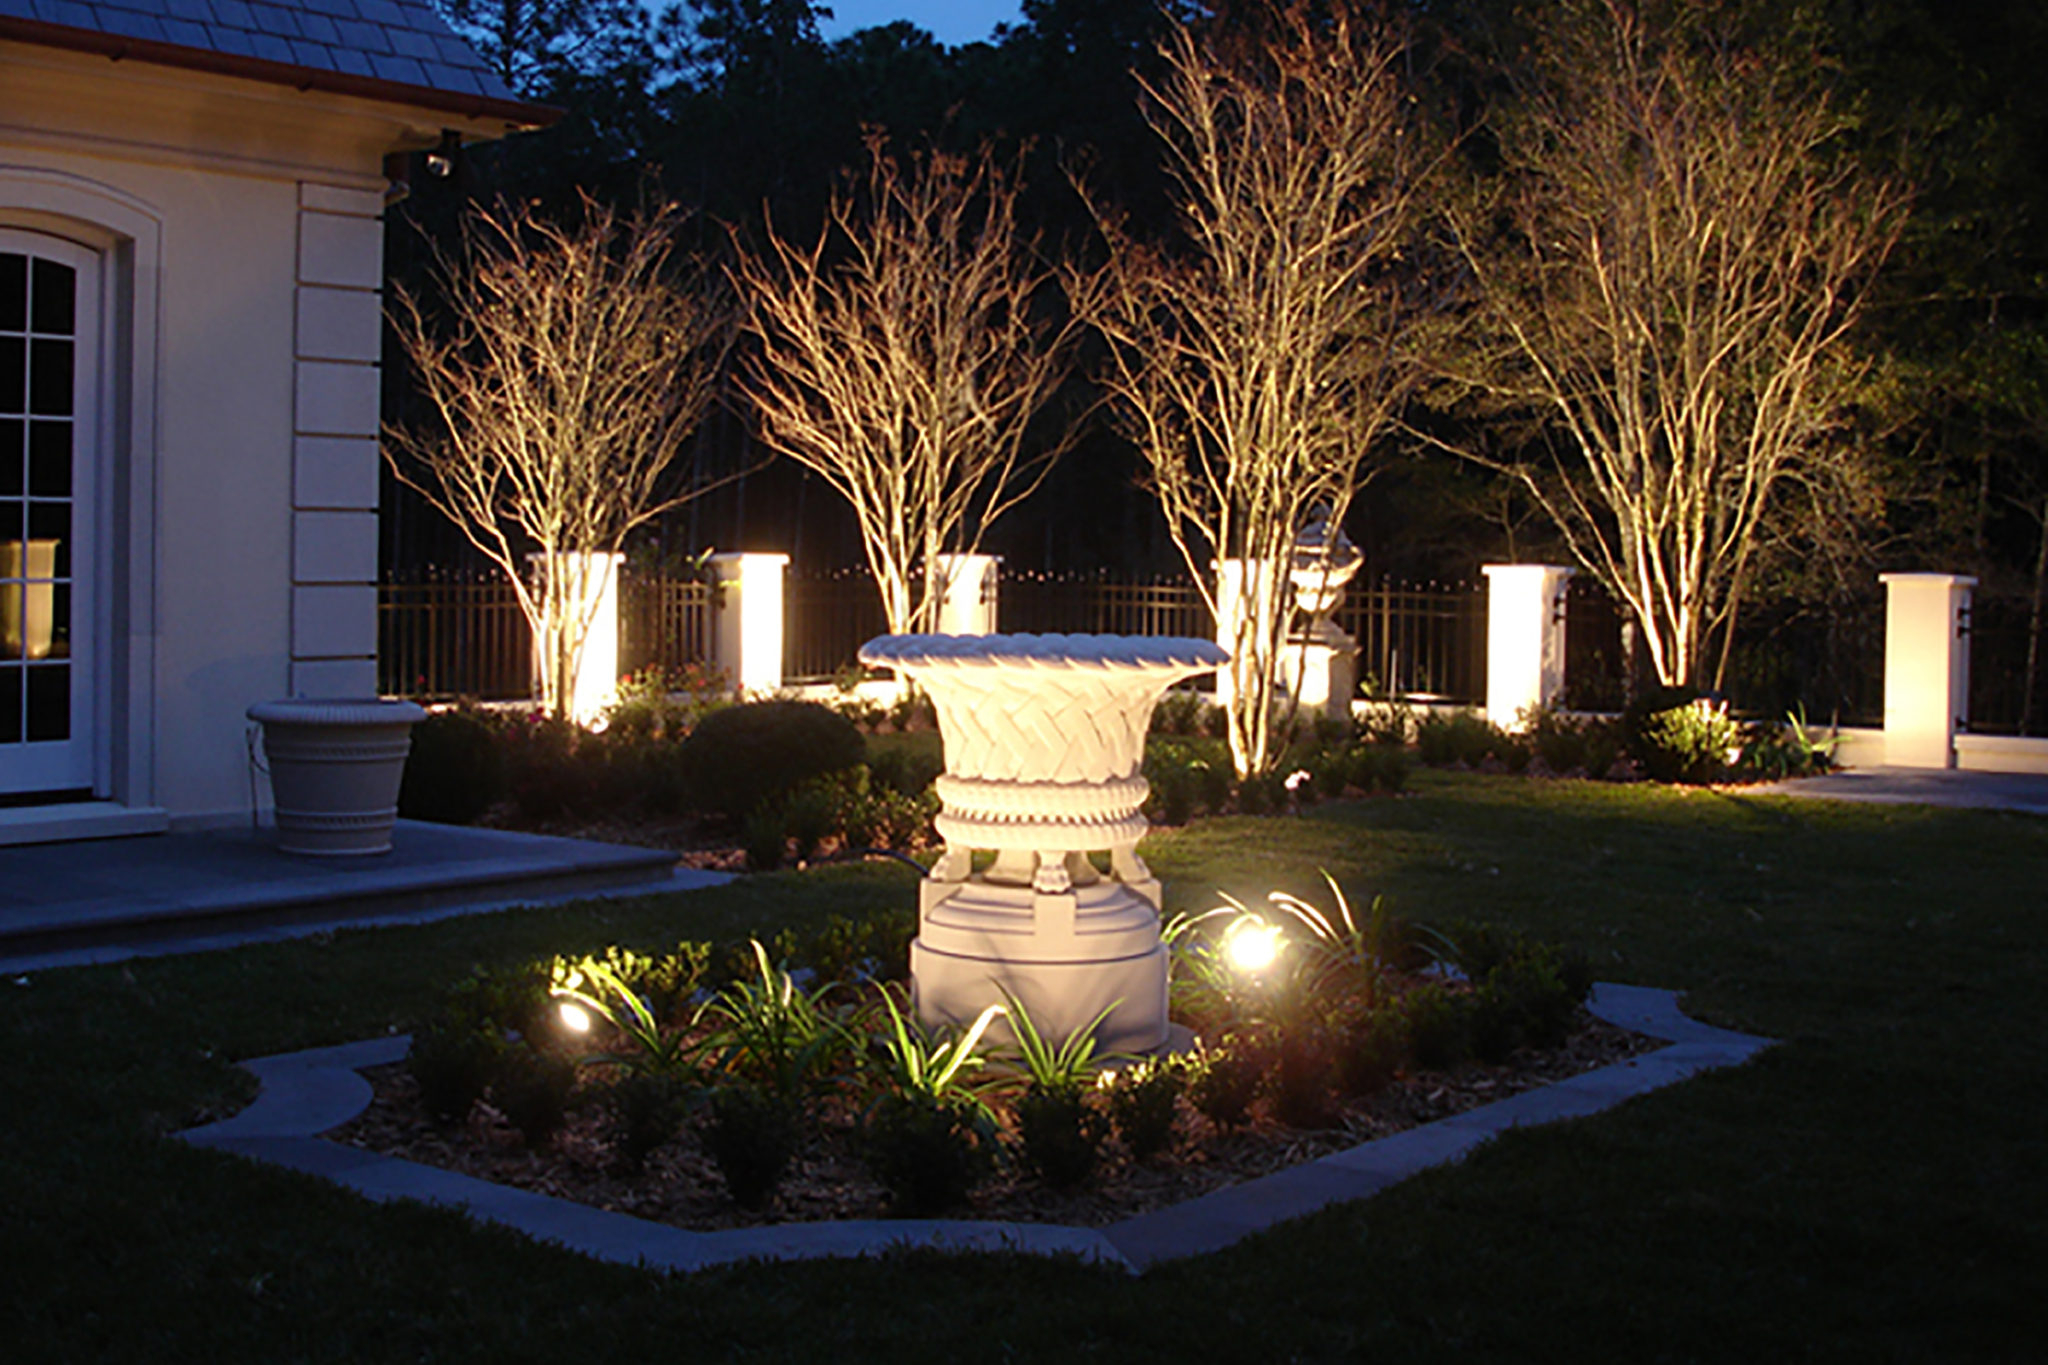
Where you put the light matters more than the light itself. A common mistake is placing the fixture too close to the trunk. This creates a harsh glare and casts long, weird shadows that look more like horror movie sets than serene gardens. You want to step back. Usually, placing the light about one-third to one-half the height of the tree away from the trunk is a good starting point.
Experiment with angles. If you place the light directly in front, the tree looks flat. Try offsetting it slightly to the side. This creates shadows within the branches, adding three-dimensional depth. It’s called "grazing" when you do this on walls or textured surfaces, and it works wonders on tree bark too. The shadows reveal the texture. They make the surface feel rough and real.
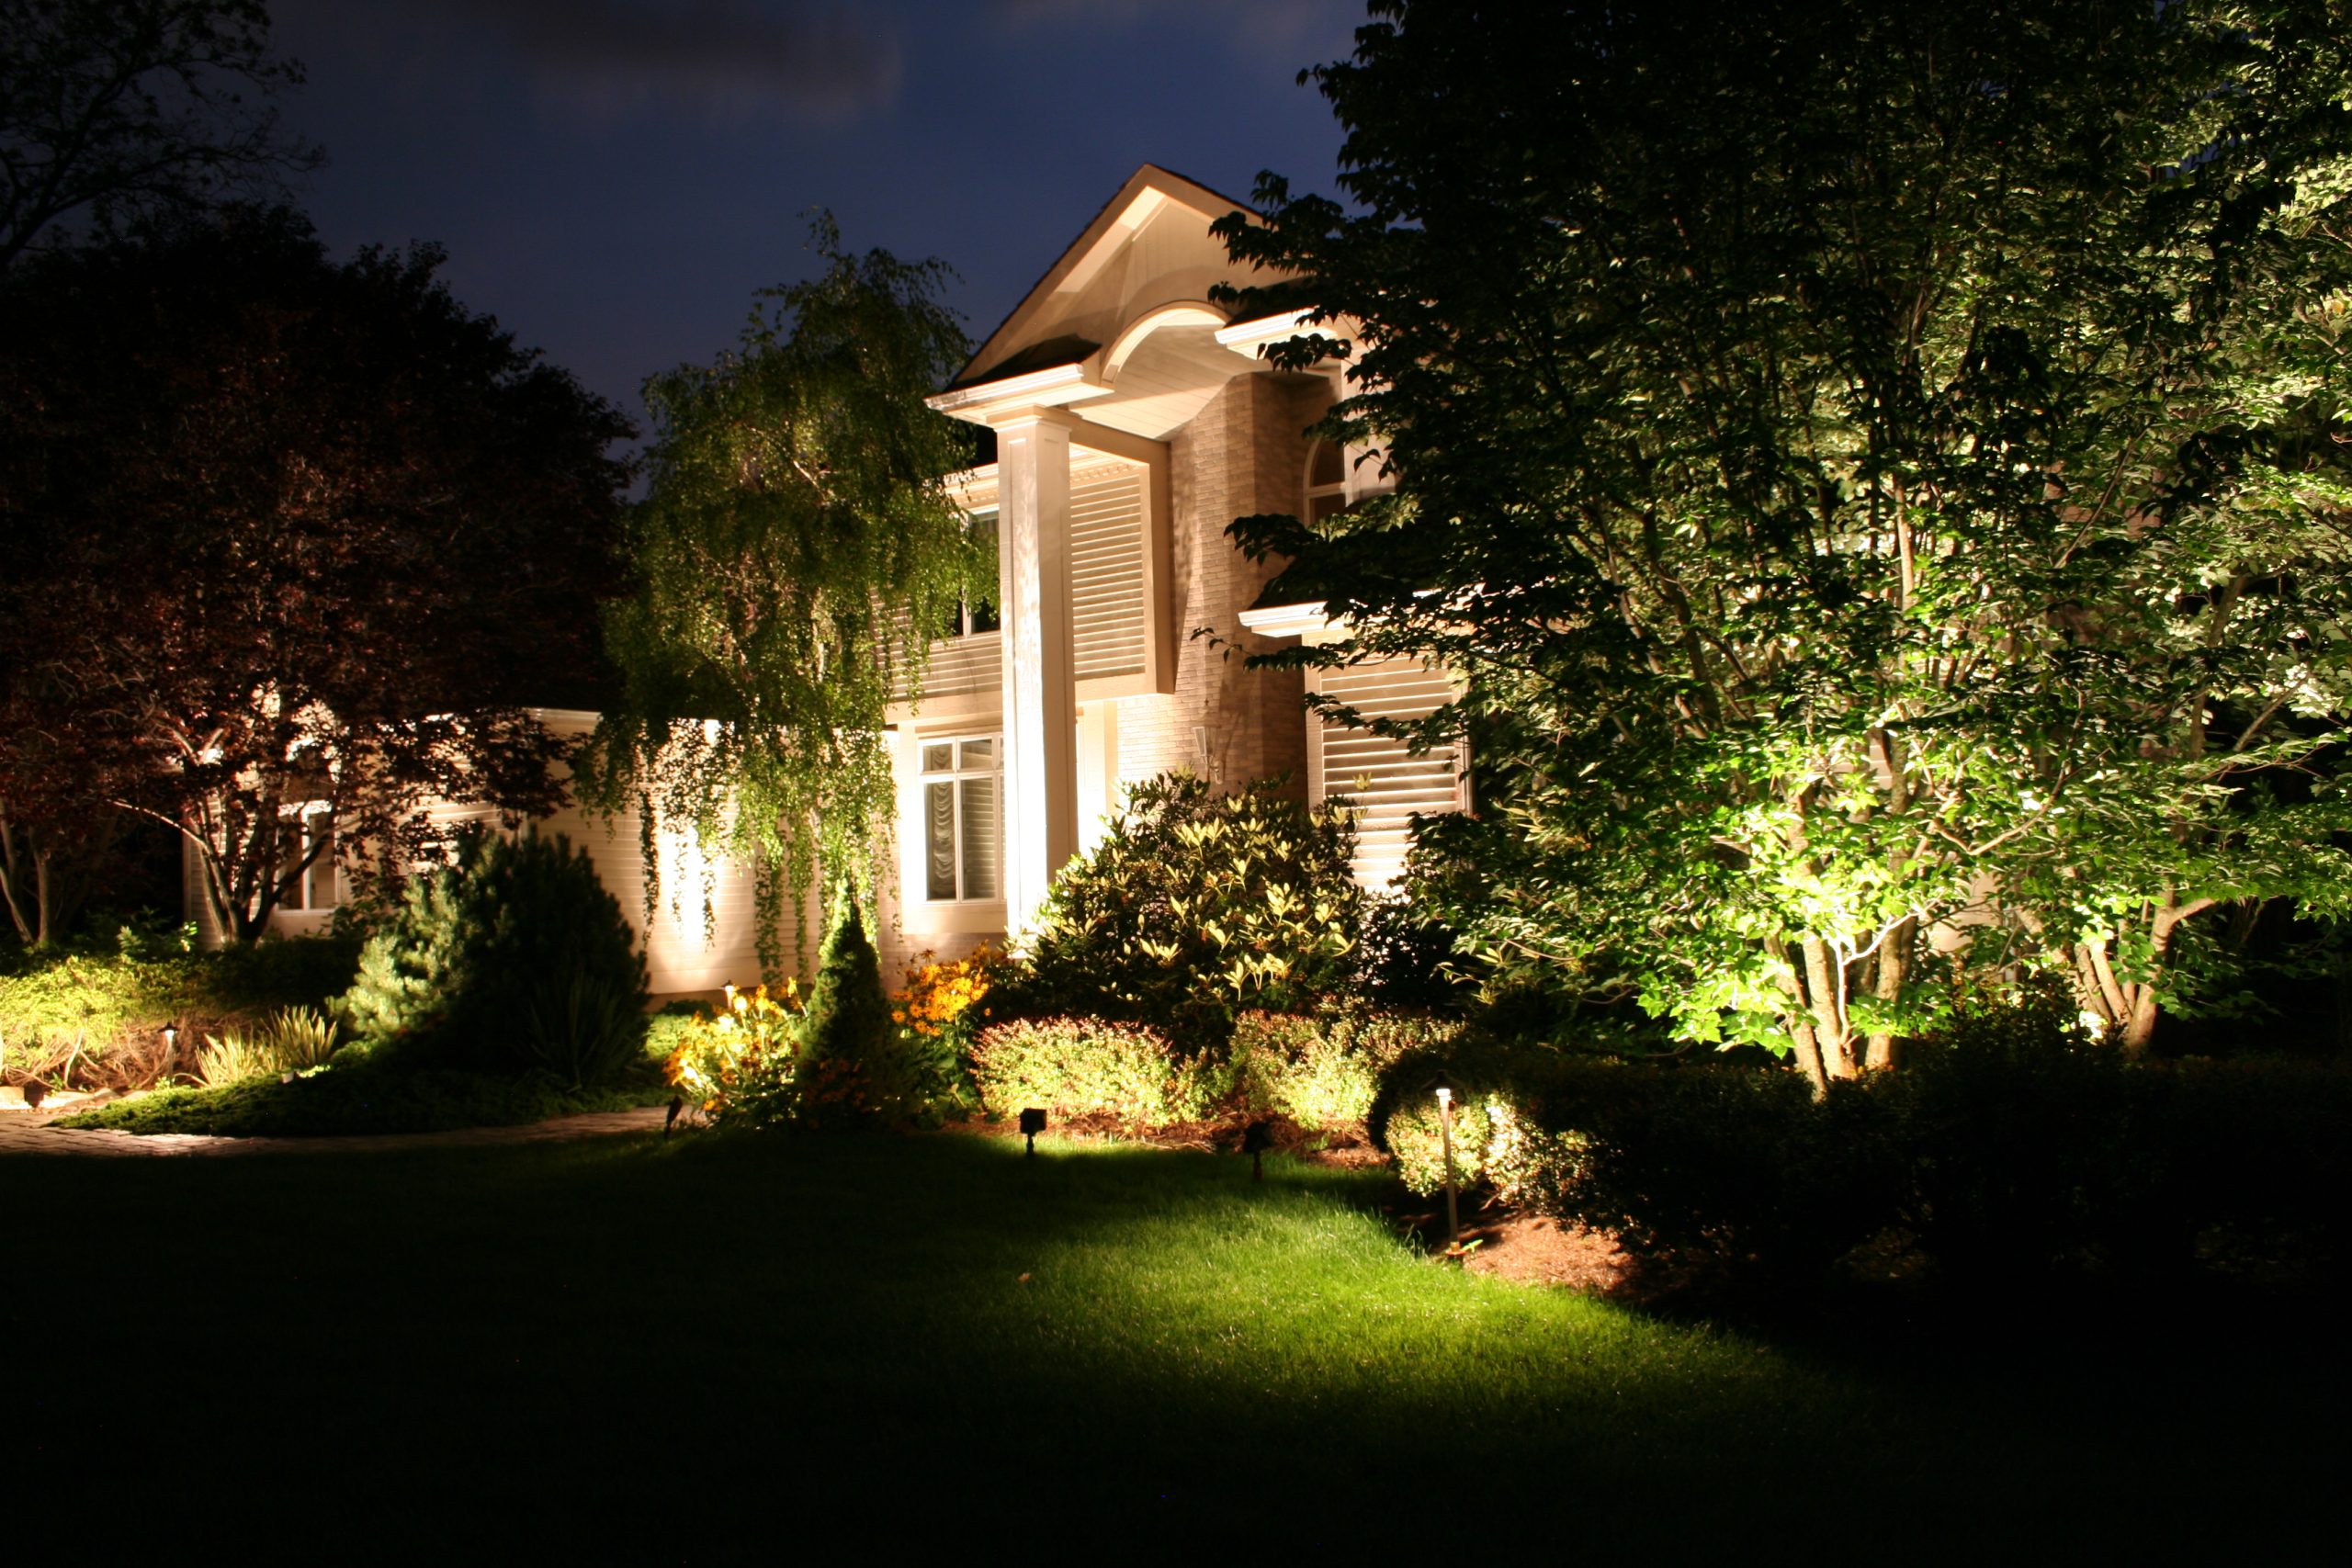
Don’t forget about the moon. Yes, the actual moon. If you have a large tree, consider "moonlighting." This is a form of downlighting, but it pairs beautifully with uplighting. You place a light high up in the branches, pointing down. It mimics the soft, dappled light of the moon filtering through leaves. Combine this with subtle uplighting at the base, and you get a complex, naturalistic look. It’s not just one source of light; it’s a conversation between different layers.
And please, avoid the "runway effect." This happens when you line up lights perfectly along a path or row of trees. It looks rigid. Artificial. Nature is messy. Your lighting should be too. Stagger the heights. Vary the distances. Let some areas remain darker. The contrast between light and dark is what creates the magic. Without darkness, light has no meaning.
Color Temperature and Brightness Control
Remember those blue-white lights that were everywhere a decade ago? Let’s leave them in the past. In 2026, the standard for residential outdoor lighting is warm. We’re talking 2700K to 3000K on the Kelvin scale. This mimics the color of incandescent bulbs or candlelight. It’s cozy. It invites relaxation. Cool white light (4000K and above) feels clinical. It’s better for security cameras or commercial buildings, not for your hydrangeas.
Warm light makes greens look richer and browns look deeper. It flatters skin tones too, which matters if you’re hosting dinner parties outside. Nobody wants to look like a corpse under blue-ish light. Stick to warm whites. If you have modern architecture with lots of concrete and steel, you might lean toward 3000K for a crisper look. For traditional gardens with lots of plants, 2700K is usually the sweet spot.
Brightness is another tricky one. Less is more. Seriously. Start dim. You can always add more light, but you can’t take it away once it’s installed. Use lumens, not watts, to measure brightness. For most uplighting tasks, 100 to 300 lumens is plenty. You don’t need to blind your neighbors. The goal is ambient glow, not a stadium searchlight.
Dimmers and smart controls are your friends. Modern systems allow you to adjust brightness based on the time of night. Maybe you want it brighter at 8 PM when people are arriving, and dimmer at 11 PM when everyone is winding down. Some systems even sync with sunset times, automatically adjusting as the seasons change. This flexibility ensures your garden always looks appropriate, never overwhelming.
Layering for Depth and Dimension
Uplighting is powerful, but it shouldn’t stand alone. The best gardens use layering. This means combining uplighting with other techniques to create a full picture. Think of it like painting. You need background colors, mid-tones, and highlights. Uplighting is often your highlight.
Pair your uplights with path lighting. But keep the path lights low and subtle. They should guide feet, not eyes. Use shielded fixtures so you don’t see the bulb directly. This prevents glare and keeps the focus on the surrounding plants. When you walk down a path lit this way, you feel enveloped by the garden, not just illuminated by it.
Consider cross-lighting too. This involves placing two lights on opposite sides of a feature. It eliminates harsh shadows and creates a very even, sculptural look. It’s great for specimen plants or statues. But be careful. Too much cross-lighting can look flat. Mix it with single-source uplighting to keep things dynamic.
Water features benefit hugely from layering. Uplight a fountain from below to make the water sparkle. Then, add some soft ambient light around the pond’s edge to reflect the sky. The combination of moving water and static light creates a mesmerizing effect. It’s calming. Meditative. In a world that’s always rushing, having a spot in your garden that encourages stillness is invaluable.
Don’t forget vertical gardens or fences. As urban spaces get smaller, vertical planting is huge in 2026. Lighting these tiers requires precision. Small, targeted spots at each level can turn a green wall into a living tapestry. It draws the eye up, making the space feel taller and more luxurious.
Installing the lights is only half the battle. Keeping them looking good requires a bit of upkeep. Plants grow. Trees expand. That perfect angle you set in spring might be blocked by new foliage in July. Check your lights seasonally. Trim back any branches that are casting unwanted shadows or blocking the beam. It’s a quick task, but it makes a huge difference.
Clean the lenses. Dirt, pollen, and spider webs accumulate quickly outdoors. A cloudy lens reduces light output significantly. Wipe them down with a soft cloth every few months. It’s surprising how much brighter things look after a simple cleaning. While you’re at it, check for any damage. Cracked housings or loose wires need immediate attention to prevent safety hazards.
Winter brings its own challenges. Snow can bury fixtures. Ice can damage lenses. If you live in a cold climate, consider using fixtures rated for extreme temperatures. Or, simply turn them off during heavy storms. There’s no shame in letting your garden sleep during the harshest weather. In fact, the silhouette of bare branches against a snowy sky can be beautiful without any artificial light at all.
Finally, rethink your layout every few years. Your garden changes. You might plant a new tree. Remove an old shrub. Your lighting should evolve with it. Don’t be afraid to move a fixture. Experiment. Maybe that corner that looked dark last year now needs a touch of light because you added a bench. Lighting is not a set-it-and-forget-it project. It’s a living part of your landscape design.
So, where do you start? Pick one tree. Just one. Buy one good quality uplight. Install it. Step back. Watch how the shadows play. See how the texture of the bark emerges. Feel the shift in atmosphere. Once you see the transformation, you’ll understand. It’s not just about seeing your garden at night. It’s about feeling it. And that’s a feeling worth staying up for.