
Ever stood in your garden at dusk, hose in hand, watching water pool on the surface while the roots below stay bone dry? It’s frustrating. We’ve all been there. You want lush tomatoes and crisp lettuce, but hand-watering feels like a part-time job you didn’t apply for. That’s where drip zones come in. They aren’t just pipes and emitters; they’re the silent partners in your gardening success. By designing smart, efficient zones, you stop guessing and start growing.
In 2026, water conservation isn’t just a buzzword; it’s a necessity. But beyond saving resources, precise watering means healthier plants. No more soggy stems inviting rot. No more stressed veggies producing bitter fruits. This guide breaks down exactly how to map out your raised beds for maximum efficiency. We’ll look at layout strategies, emitter choices, and the little tricks that make a big difference. Let’s dig in.
Understanding the Basics of Drip Zone Logic
Before you buy a single foot of tubing, you need to think like water. Water wants to move down and out. In a raised bed, the soil structure is usually looser and drains faster than ground soil. This is great for roots but tricky for irrigation. A "zone" is simply a group of plants with similar water needs connected to the same water source. Mixing thirsty cucumbers with drought-tolerant herbs in one zone is a recipe for disaster. One gets drowned, the other gets parched.
Think of your raised bed as a series of micro-climates. The center might dry out faster than the edges. Tall plants shade the soil, keeping it moist longer. By grouping plants strategically, you simplify your plumbing. You don’t need a complex manifold for a small bed. Often, a single line running down the middle or two lines flanking the rows is enough. The key is consistency. Once you define your zones, stick to them. It makes troubleshooting leaks or clogs much easier later on.
Also, consider the soil type. Even in raised beds, you might have a sandy mix or a heavy compost blend. Sandy soil spreads water narrowly and deeply. Clay-heavy mixes spread it wider but shallower. Knowing this helps you decide emitter spacing. If you’re unsure, do a simple test. Run your system for ten minutes, dig a small hole, and see how far the moisture penetrated. It’s the best data you’ll get.
Mapping Your Bed for Maximum Coverage
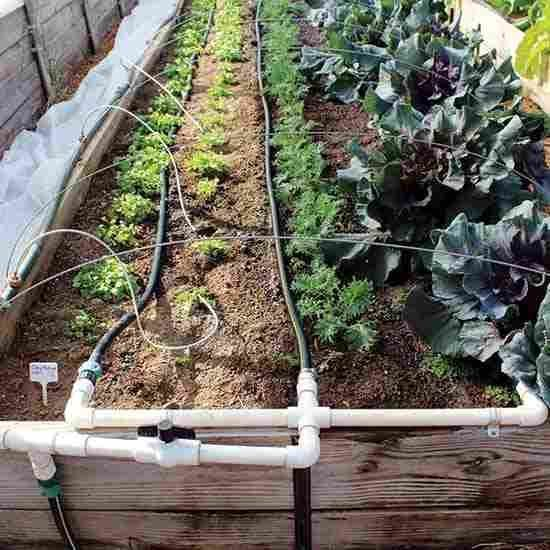
Grab some graph paper or open a notes app. Sketch your raised bed dimensions. Most standard beds are 4×8 feet, but yours might be different. Mark where your plants will go. Don’t just guess; look at seed packets for mature spread. A zucchini plant needs way more room than a carrot. This map is your blueprint. It prevents the common mistake of placing emitters too far from the root zone.
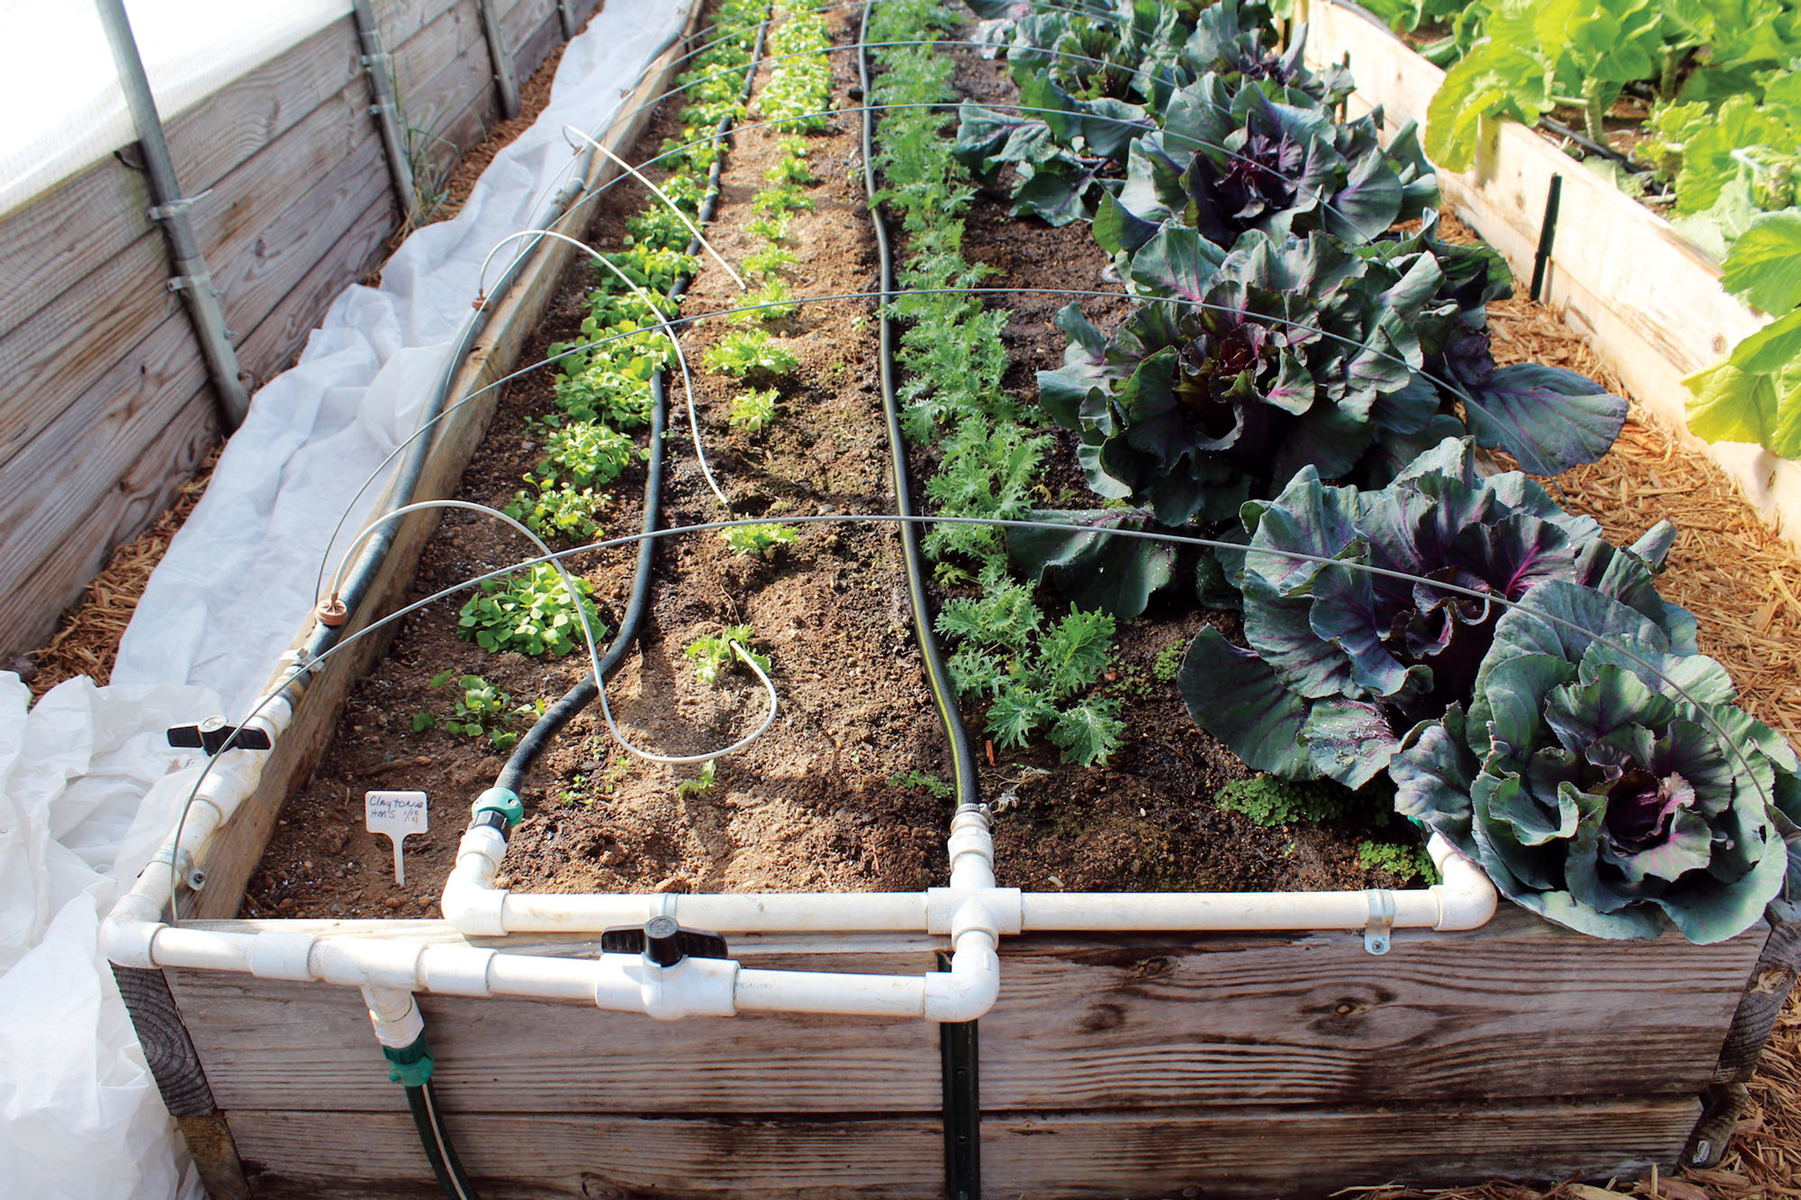
For row crops like beans or peas, a single drip line down the center works wonders. Place emitters every 12 inches. For larger plants like tomatoes or peppers, use a loop or a double line. This ensures the entire root ball gets wet. Some gardeners swear by spiral patterns around individual plants. It’s effective but uses more tubing. For most home growers, straight lines are easier to maintain and less prone to kinking.
Don’t forget the edges. Plants near the wall of the raised bed dry out faster because the wood or metal heats up. You might need an extra emitter there. Or, consider mulching heavily on the sides to retain moisture. Mapping also helps you calculate materials. Measure the total length of tubing needed and add 10% for waste. It’s better to have a little left over than to run short mid-project. Precision here saves money and headache.
Choosing the Right Emitters and Tubing
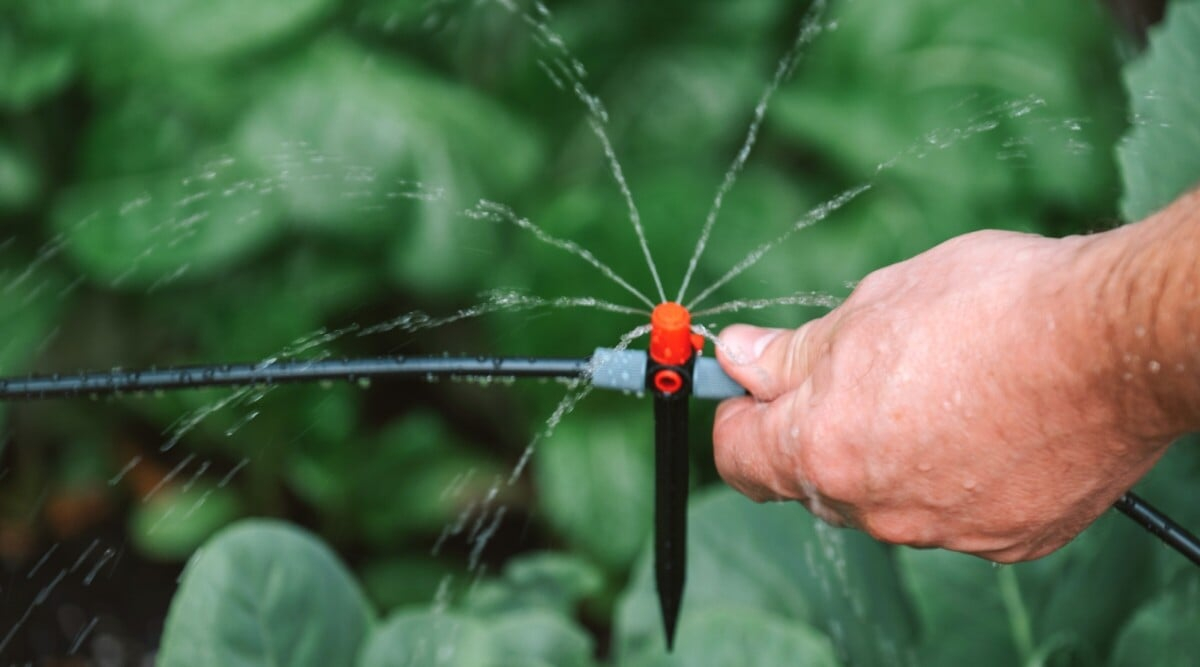
Not all drip parts are created equal. In 2026, pressure-compensating (PC) emitters are the gold standard. Why? Because they deliver the same amount of water regardless of pressure changes. If your bed is on a slope or far from the spigot, regular emitters might dribble at the end and gush at the start. PC emitters fix that. Look for ones rated at 0.5 or 1 gallon per hour (GPH). Veggies like steady, slow drinks.
Tubing choice matters too. Half-inch polyethylene tubing is standard for main lines. It’s stiff enough to hold its shape but flexible enough to curve around corners. For connecting to individual plants, use quarter-inch spaghetti tubing. It’s easy to punch into the main line and position exactly where you need it. Avoid cheap, thin-walled tubing. It cracks under UV light and gets chewed by squirrels. Invest in quality. It lasts longer.
Filtering is non-negotiable. Even if your city water is clean, tiny particles can clog emitters. Install a simple mesh filter at the source. It’s cheap insurance. Also, consider a pressure regulator. Most drip systems operate best at 25-30 PSI. Household water pressure is often double that. Too much pressure blows out connections. A regulator keeps things calm and steady. These small components make the system reliable.
Installing the System Step-by-Step
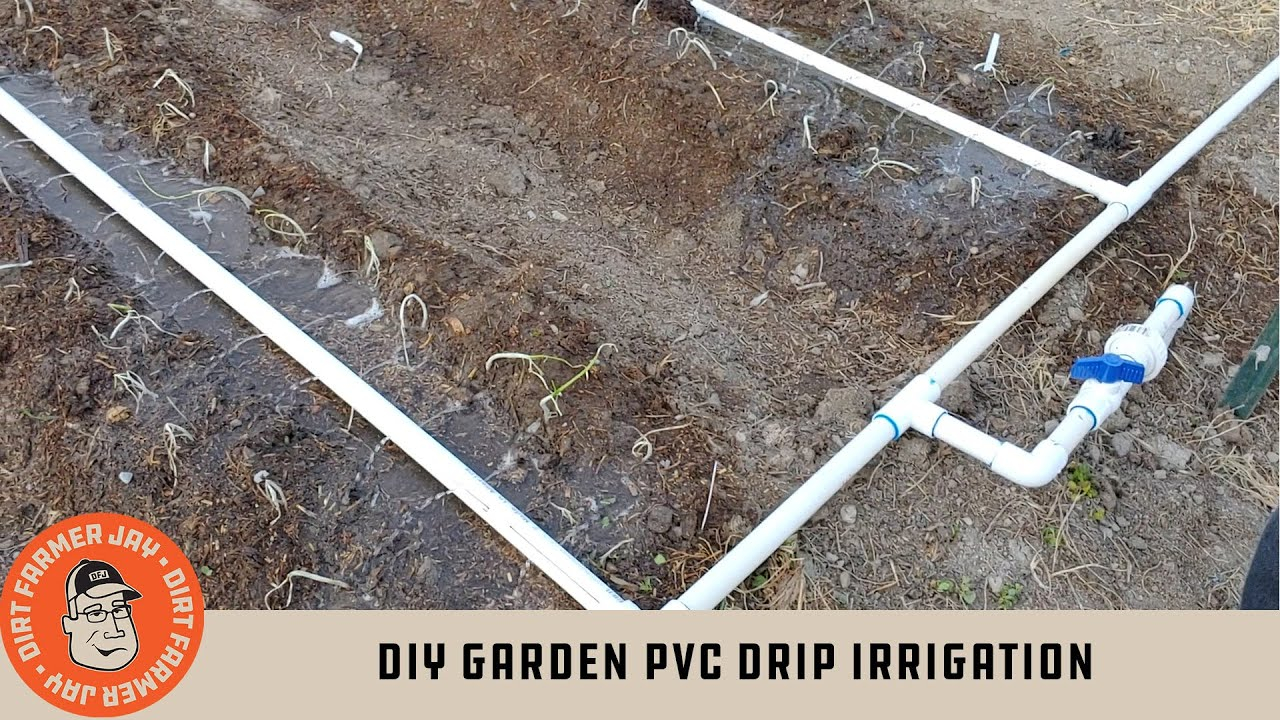
Start at the water source. Attach your timer, filter, and pressure regulator. Then, connect the main half-inch tubing. Lay it out along your planned path. Don’t cut it yet. Let it sit in the sun for an hour to soften up. It’ll be easier to work with. Use stake holders or landscape pins to secure the tubing every few feet. This prevents it from shifting when you’re weeding or harvesting.
Next, punch holes for your emitters. Use a proper hole punch tool, not a nail. Nails create ragged edges that leak. Insert the emitters firmly. If you’re using spaghetti tubing, cut it to length and attach it to the emitter. Route it to the base of each plant. Bury the tubing slightly under mulch to protect it from sun damage. It also looks neater.
Turn the water on slowly. Check for leaks at every connection. A small drip now becomes a flood later. Walk the line and ensure every emitter is dripping. Adjust any that are blocked. Once everything looks good, cover the tubing with 2-3 inches of mulch. Straw, wood chips, or shredded leaves work well. Mulch keeps the soil cool and reduces evaporation. It’s the final touch that ties the system together.
Managing Water Schedules and Zones
Setting up the hardware is half the battle. The other half is timing. Veggies don’t need daily soaking. They need deep, infrequent watering. This encourages roots to grow downward. In cooler spring weather, twice a week might be enough. In the heat of July, you might need to water every other day. Listen to your plants. Wilting in the morning is a sign of thirst. Wilting in the afternoon is normal heat stress.
Use a smart timer if you can. Modern timers in 2026 can adjust based on local weather data. If it rains, they skip the cycle. This saves water and prevents overwatering. If you’re on a budget, a basic digital timer works fine. Just remember to adjust it seasonally. Don’t set it and forget it. Your garden changes as the seasons progress.
Group your zones by water needs. Leafy greens like lettuce and spinach have shallow roots and need frequent, light watering. Fruiting plants like tomatoes and squash have deeper roots and prefer heavier, less frequent drinks. If you have them in the same bed, you might need to split the zone or use different emitter flow rates. It’s a balancing act. Observe your soil moisture. A finger test is still the best tool. Stick your finger two inches down. If it’s dry, water. If it’s damp, wait.
Even the best systems have issues. Clogged emitters are the most common problem. If a plant looks sad, check its emitter first. Sometimes a bit of sediment blocks the flow. You can soak the emitter in vinegar to clear it. If that doesn’t work, replace it. They’re cheap. Leaks usually happen at connections. Tighten them up or use a goof plug to seal unused holes. Don’t ignore small leaks. They waste water and create muddy spots.
At the end of the season, flush your system. Remove the end caps and let water run through to push out debris. This prevents buildup over winter. If you live in a freezing climate, drain the system completely. Water expands when it freezes and cracks tubing. Store your timer indoors. It’s sensitive to cold and moisture. Taking these steps extends the life of your setup significantly.
Inspect your tubing for critter damage. Squirrels and mice love chewing on soft plastic. If you notice bites, consider using protective conduit or switching to harder tubing. Also, check your filters. Clean them regularly. A clogged filter reduces pressure and affects the whole system. Maintenance doesn’t take long. Ten minutes a month keeps everything running smoothly. It’s a small effort for a big reward.
Designing efficient drip zones transforms your gardening experience. It frees up time. It saves water. And most importantly, it gives your veggies the consistent care they crave. You’re not just installing pipes; you’re building a foundation for abundance. Start small. Map one bed. Get it right. Then expand. Your future self, relaxing with a homegrown tomato, will thank you. Happy gardening.