
That sinking feeling when you look out your back window after a heavy rain? Yeah, we’ve all been there. You watch as precious topsoil—the stuff you spent months nurturing—slides down the slope, taking your petunias with it. It’s frustrating. It feels like nature is working against you. But here’s the good news: you don’t need a contractor’s budget or a degree in civil engineering to fix it.
Retaining walls often get a bad rap for being expensive, complicated projects reserved for luxury estates. That’s just not true anymore. In 2026, homeowners are getting creative, using repurposed materials, smart DIY techniques, and affordable options that look great and hold firm. Whether you have a slight incline in your garden or a steep drop-off behind your patio, there’s a solution that fits your wallet. Let’s dig into how you can keep your ground where it belongs, without draining your savings account.
Understanding the Slope: Why Walls Matter More Than You Think
Before we start stacking stones, let’s talk about why this matters. A retaining wall isn’t just a pretty border for your flower beds. It’s a structural necessity in many yards. When soil erodes, it doesn’t just disappear. It clogs drains, creates muddy messes, and can even undermine the foundation of your home or deck over time. In residential settings, these walls support driveways, patios, and garden beds, especially in sloped yards where gravity is constantly pulling earth downward.
Think of it like this: your yard is a living thing. The roots of plants help hold soil together, but on steep slopes, that’s often not enough. Water runoff acts like a bulldozer, stripping away nutrients and stability. By installing a barrier, you’re essentially giving your landscape a backbone. It stops the slide. It creates flat, usable space where there was once just a slippery hill. And honestly? It adds value to your property. A well-built wall turns a problematic slope into a feature, not a flaw.
The key is understanding the pressure. Soil weighs a lot, especially when wet. A cheap wall that isn’t built right will bulge, crack, or topple over within a year. That’s why “affordable” doesn’t mean “cutting corners on physics.” It means choosing materials and designs that work with the land, not against it. You need drainage. You need a solid base. And you need to know your limits. If your wall is going to be taller than three or four feet, it’s probably time to call a pro. But for most garden-level projects? You’ve got this.
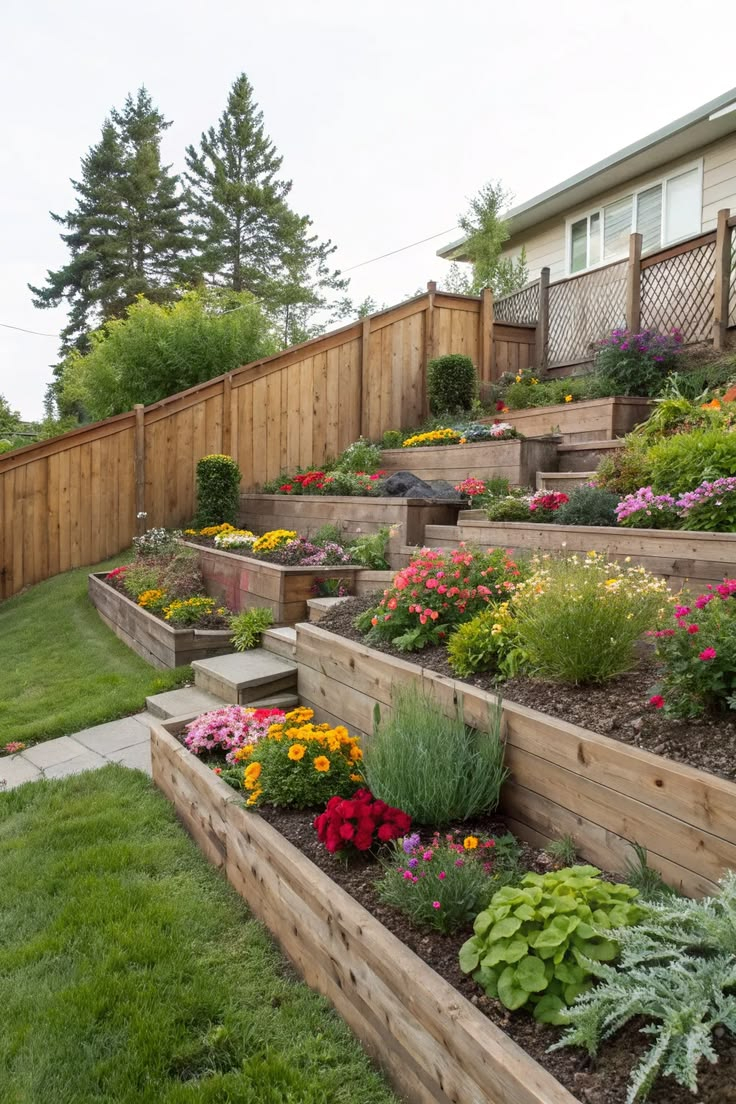
Reclaimed Timber and Railroad Ties: Rustic Charm on a Dime
If you’re looking for that warm, natural look without the price tag of stone, wood is your best friend. Specifically, reclaimed timber. Old railroad ties, salvaged barn wood, or even treated landscape timbers from local suppliers can cost a fraction of what new masonry blocks do. There’s something undeniably charming about the weathered texture of aged wood. It blends seamlessly into garden settings, making the wall feel like it’s always been there.
Railroad ties are particularly popular because they’re heavy, durable, and often available for free or cheap if you know where to look. Just be careful with older ties treated with creosote, as this chemical can leach into the soil and harm plants. For vegetable gardens or areas where kids play, stick to newer, safer treated woods or naturally rot-resistant species like cedar or redwood. While cedar costs more upfront, it lasts longer and doesn’t require chemical treatments, which might save you money in the long run.
Installation is straightforward. You dig a trench, lay a bed of gravel for drainage, and stack the timbers. For stability, you’ll want to stagger the joints like bricks and use rebar or deadmen (anchors buried in the soil behind the wall) to lock them in place. It’s labor-intensive, sure, but the tools required are basic: a shovel, a level, and maybe a sledgehammer. The result? A sturdy, rustic barrier that holds back earth and looks incredible. Plus, wood is easier to cut and shape than stone, making it ideal for curved walls or irregular spaces.
Gabion Baskets: Industrial Strength Meets Modern Design
Gabion walls might sound fancy, but they’re actually one of the simplest and most cost-effective solutions around. What’s a gabion? It’s basically a wire mesh cage filled with rocks. That’s it. No mortar, no precise cutting, no specialized skills needed. You buy the cages (or make them from galvanized wire), fill them with whatever stone is locally available, and stack them up. It’s modular, flexible, and incredibly strong.
Why are they so great for budgets? First, you can use cheap fill material. Instead of buying expensive cut stone, you can use fieldstone, rubble, or even recycled concrete chunks. In some areas, you can find free fill material from construction sites or quarry leftovers. Second, the installation is forgiving. Because the wire mesh flexes slightly, gabion walls can settle and shift without cracking. They’re perfect for areas with poor soil conditions or high water tables, as the gaps between the rocks allow water to pass through freely, reducing pressure buildup.
Aesthetically, gabions have a modern, industrial vibe that’s very much in style in 2026. They look clean and structured. You can customize the look by choosing different colored rocks or even mixing in glass bottles or wood logs for a unique artistic touch. They’re also eco-friendly since they use local materials and require minimal processing. Just remember to use galvanized or coated wire to prevent rust, and ensure the cages are securely tied together. It’s a weekend project that yields professional-looking results.
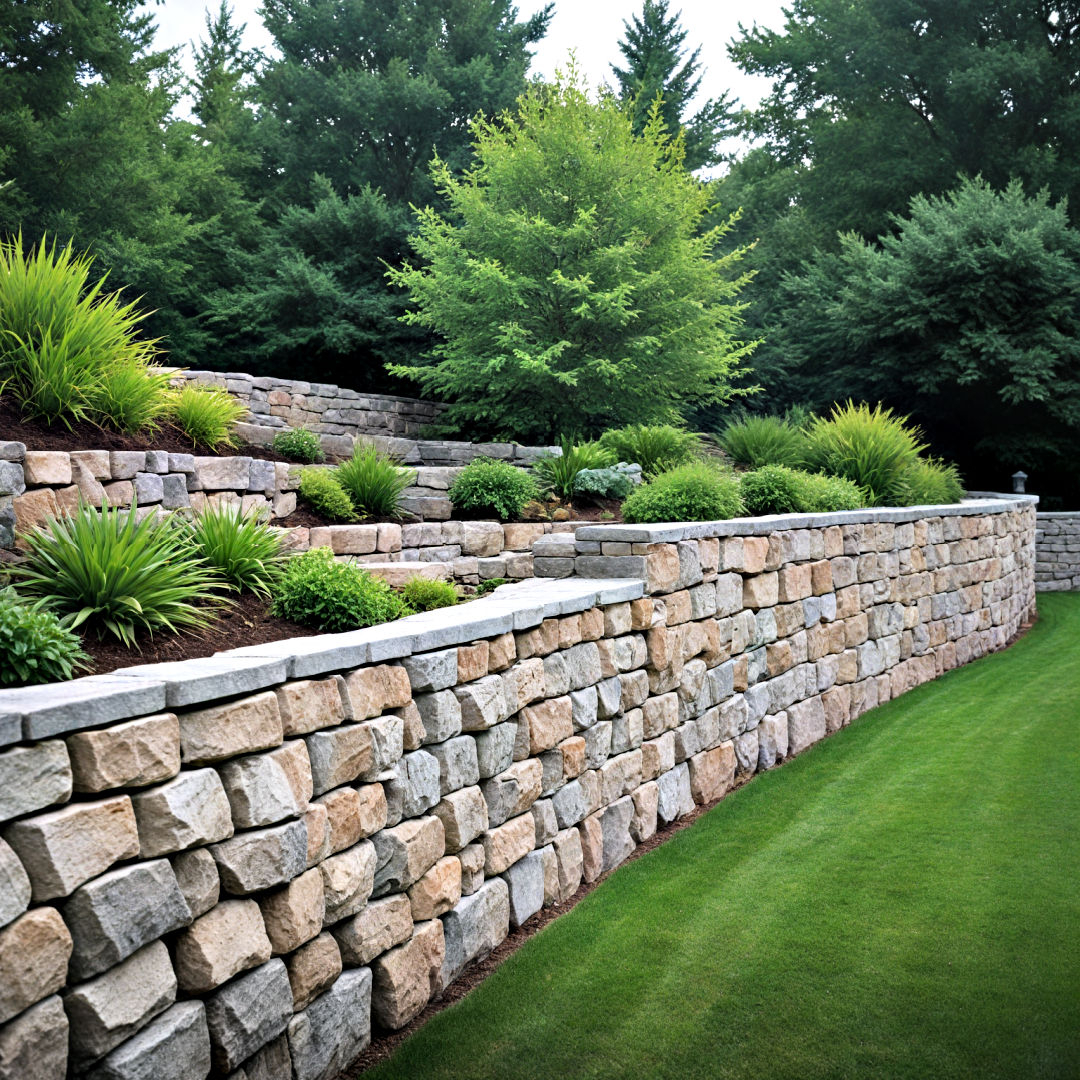
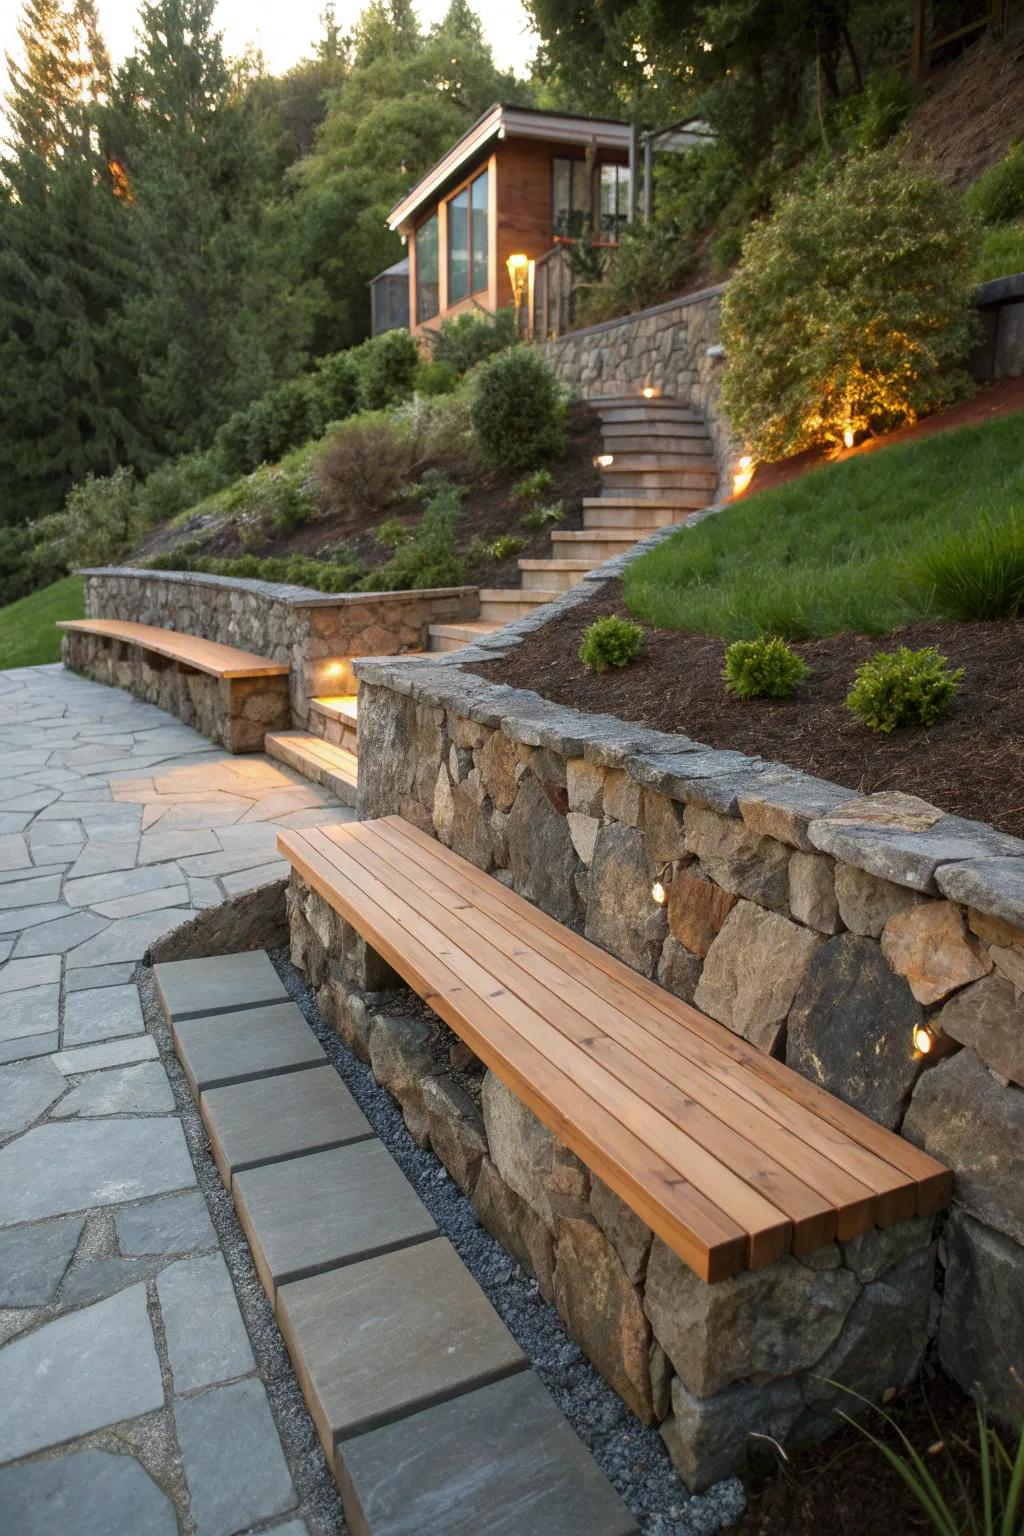
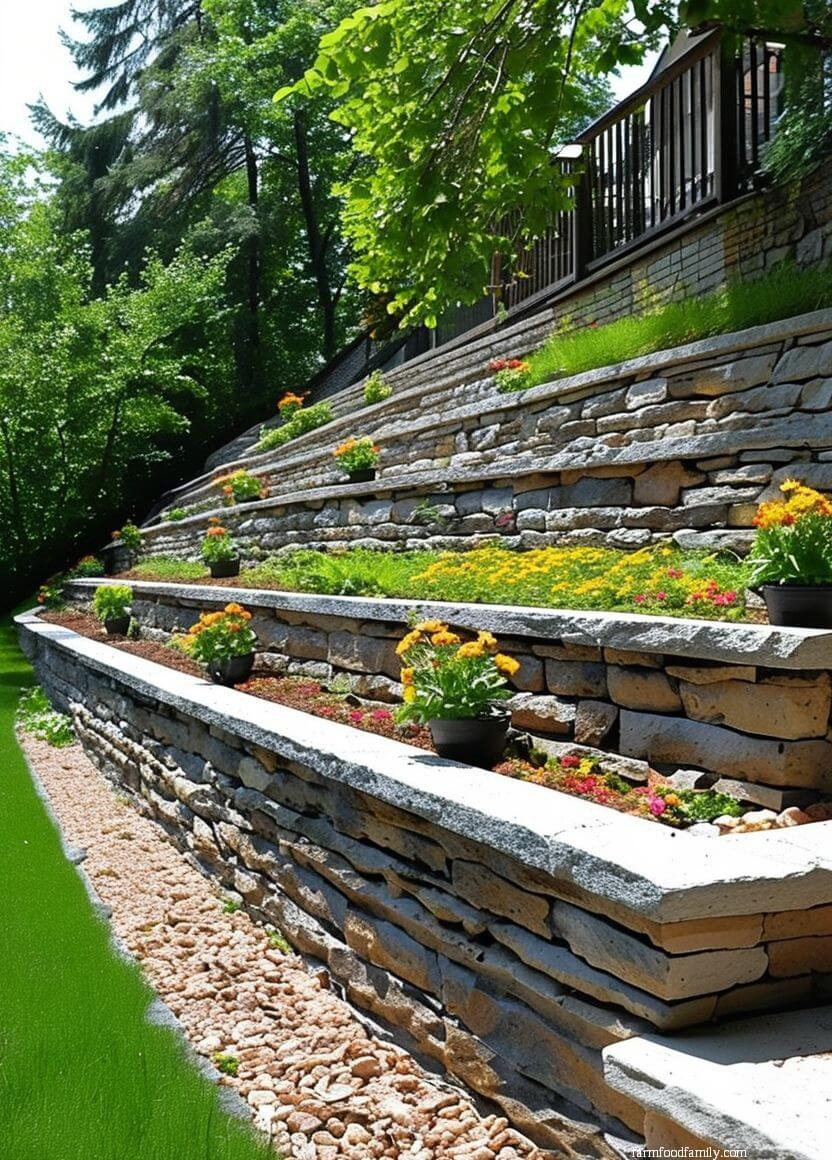
Dry Stack Stone: Timeless Beauty Without the Mortar Bill
There’s something magical about dry stack stone walls. They’ve been around for centuries, built by farmers and villagers who had plenty of rocks and no money for cement. The technique relies on gravity and friction. You carefully select and fit stones together so they lock in place, creating a stable structure without any mortar. This method is not only affordable because you skip the cost of concrete and masonry labor, but it’s also environmentally friendly and permeable.
The secret to a successful dry stack wall is patience and selection. You don’t need perfect, uniform stones. In fact, irregular shapes often interlock better. Start with a wide, solid base of large, flat stones buried slightly below ground level. As you build up, lean each layer slightly back into the slope (this is called battering). This angle helps counteract the pressure of the soil behind it. Use smaller stones, called chinking, to fill gaps and stabilize larger ones. It’s like a giant, heavy-duty puzzle.
While it takes time to learn the knack of fitting stones, the skill is easy to pick up with practice. Watch a few tutorials, start small, and you’ll get the hang of it. The beauty of dry stack is that it ages gracefully. Moss and lichen will eventually grow in the crevices, softening the look and blending the wall into the landscape. It’s perfect for cottage gardens, woodland settings, or anyone who loves a natural, handcrafted aesthetic. Just keep the wall under three feet tall unless you’re experienced, as taller walls require more engineering precision.
Concrete Blocks and Interlocking Pavers: The DIY Friendly Option
If you want speed and consistency, concrete block systems are the way to go. These aren’t the ugly gray cinder blocks you see in basements. Modern landscaping blocks come in various colors, textures, and shapes designed specifically for retaining walls. Many feature a lip or pin system that locks each course into the one below, making alignment easy and ensuring structural integrity. They’re widely available at home improvement stores like Lowe’s, often with detailed instructions for DIYers.
The cost varies depending on the brand and style, but they’re generally mid-range in price. However, the real savings come from the ease of installation. Because the blocks are uniform, you don’t spend hours searching for the right-shaped stone or mixing mortar. You just lay them down, check the level, and move to the next row. Most systems also include built-in drainage channels or recommend specific backfill methods to manage water pressure. This reduces the risk of failure due to poor drainage, a common issue with amateur-built walls.
For a budget twist, consider using standard concrete blocks and facing them with a thin veneer of stone or stucco. This gives you the structural strength of concrete with the custom look of natural stone at a lower cost. Or, mix and match. Use blocks for the main structure and cap the top with nicer, decorative stones. It’s a practical approach that balances function and form. Just remember to compact the base thoroughly and use gravel backfill. A solid foundation is non-negotiable, no matter how easy the blocks are to stack.
Living Walls and Vegetative Solutions: Green Infrastructure on a Budget
Sometimes the best wall is no wall at all—or at least, not a traditional one. Vegetative retaining structures, often called “living walls” or bio-engineered slopes, use plants and natural materials to stabilize soil. This approach is gaining huge traction in 2026 as homeowners look for sustainable, low-impact solutions. It’s not just about planting grass; it’s about using deep-rooted native plants, shrubs, and even woven branches to hold the earth in place.
One popular method is using coir logs (coconut fiber rolls) or jute netting along the slope. These biodegradable materials provide immediate erosion control while plants establish their roots. You plant native grasses, ferns, or groundcovers through the netting or around the logs. Over time, the roots knit the soil together, creating a natural, self-repairing barrier. It’s incredibly cheap compared to hardscaping, and it boosts biodiversity. Plus, it looks lush and vibrant, turning a bare slope into a green oasis.
Another option is the “brush layering” technique, where you bury live branches of willow or dogwood horizontally into the slope. These branches root quickly and create a dense network that holds soil. It’s an ancient technique that’s making a comeback because it works. While it might not give you a flat patio area like a stone wall would, it’s perfect for stabilizing steep banks where access is difficult or budgets are tight. Combine this with a small toe wall of rocks at the bottom for extra support, and you have a hybrid solution that’s both effective and beautiful.
Building the wall is only half the battle. To ensure your affordable retaining wall stands the test of time, you need to think about maintenance and planning from day one. Water is the enemy of most retaining walls. If it builds up behind the structure, the pressure can push it over. That’s why drainage is critical. Always include a perforated drain pipe at the base of the wall, surrounded by gravel. This allows water to escape rather than accumulate. It’s a small cost that saves huge headaches later.
Also, consider the long-term care. Wood walls may need resealing or replacing every 10-15 years. Stone walls might need occasional repointing or resetting of loose stones. Gabion cages should be checked for rust or damage to the wire. Living walls need watering and pruning until established. By choosing a material that fits your willingness to maintain it, you’ll avoid surprise repairs down the road. Don’t just pick the cheapest option; pick the one that fits your lifestyle.
Finally, check local regulations. Some municipalities have rules about wall height, setbacks, and permits. Ignoring these can lead to fines or having to tear down your hard work. A quick call to your local building department can save you time and money. And remember, if you’re ever unsure about the stability of a slope or the complexity of a design, consult a professional. It’s better to spend a little on advice than a lot on repairs. With smart planning and the right materials, you can stop erosion effectively and affordably.
So, there you have it. You don’t need a massive budget to tackle soil erosion. Whether you choose the rustic charm of timber, the modern strength of gabions, the timeless appeal of dry stack stone, the convenience of concrete blocks, or the green benefits of living walls, there’s a solution for you. The key is to understand your site, choose materials wisely, and build with care. Your yard—and your wallet—will thank you. Now, go out there and hold that ground.