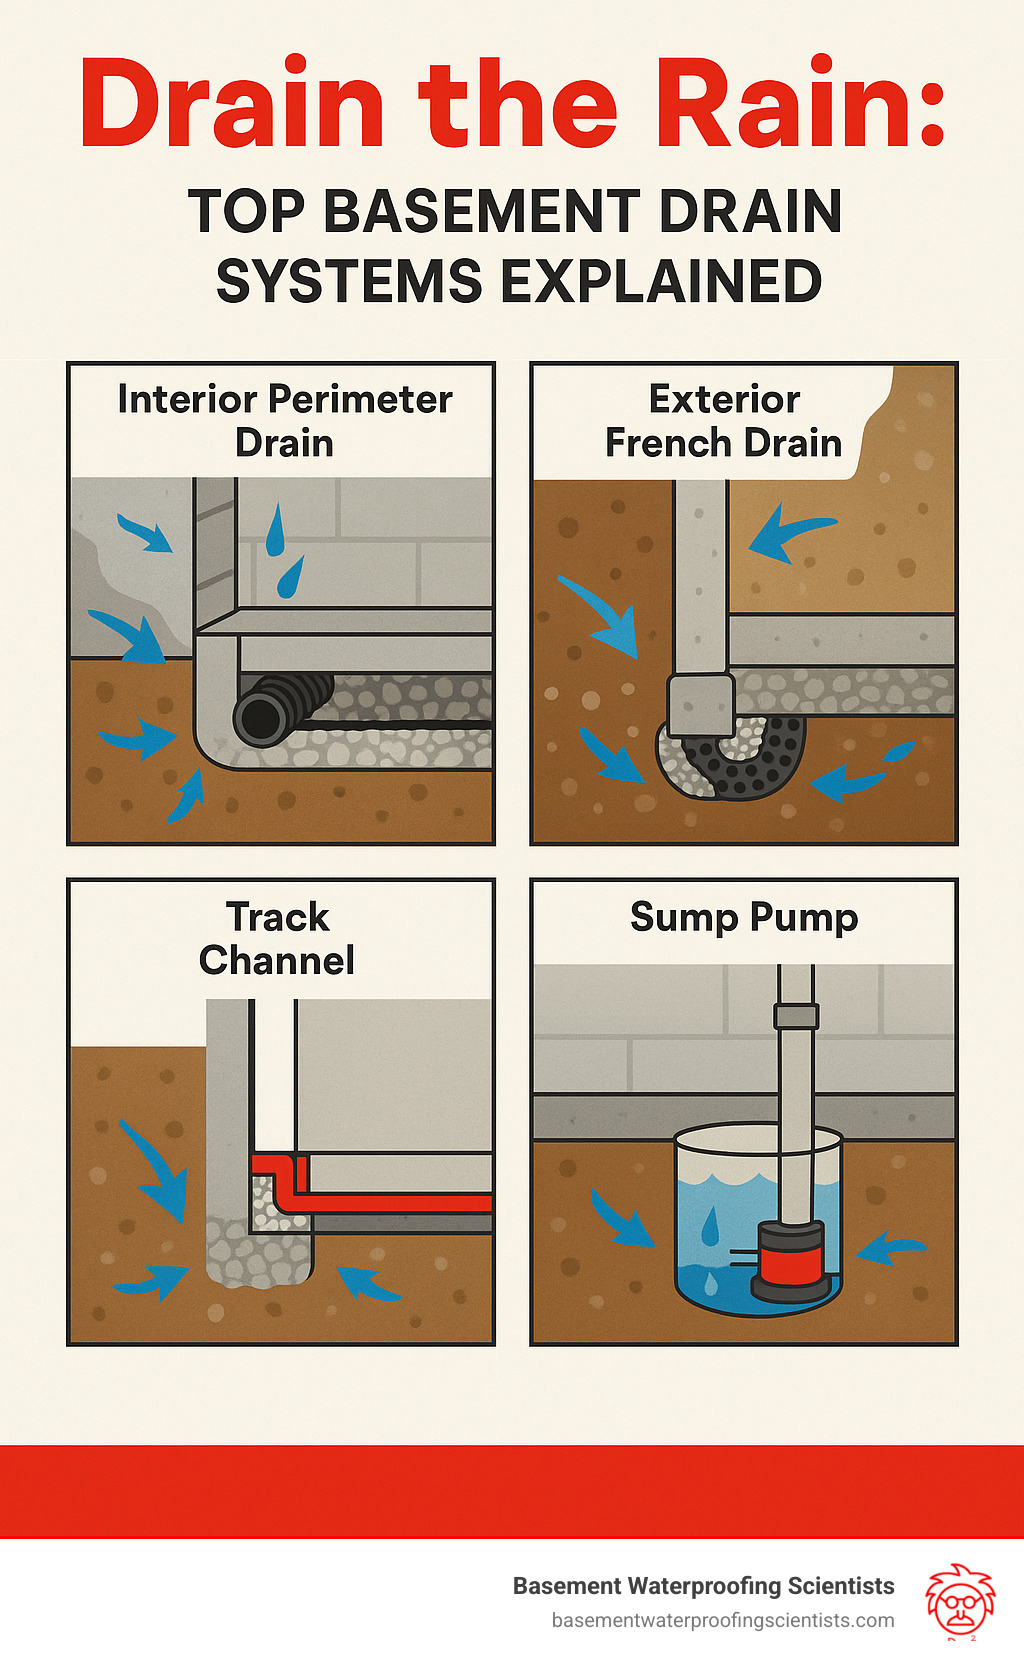

Water is relentless. At three in the morning during a severe spring cloudburst, you can hear it: the ominous, heavy gurgle of a downspout violently overflowing into a flowerbed, followed by the silent, creeping anxiety of moisture pressing against your basement walls. You wake up, pull on a pair of rubber boots, and step outside into a yard that has transformed into an overnight marsh. The patio is a pond. The mulch is floating. Worst of all, the grade of the soil—which builders promised was pitched away from the house—seems to funnel every single drop of rain straight toward the foundation footer.
For generations, homeowners have treated yard drainage as a mystery best left to expensive grading contractors who arrive with backhoes and five-figure estimates. Yet managing water on a residential property is not magic; it is simple physics. Water moves downhill. It obeys gravity with uncompromising exactness. When you understand how to harness that fundamental law, you can take control of your property’s hydrology, protect your structural investment, and reclaim soggy turf without draining your bank account.
The stakes are remarkably high. Unmanaged stormwater does not merely create muddy shoes; it erodes topsoil, drowns root systems, breeds mosquitoes, and exerts hydrostatic pressure against concrete foundation walls. Over time, that relentless pressure cracks masonry, forces water through hairline joints, and invites black mold into living spaces. Hiring an excavation crew can easily cost thousands of dollars, making a well-engineered do-it-yourself drainage system one of the highest-return home improvement projects you can possibly tackle. Armed with a shovel, a laser level, and a clear understanding of subsurface mechanics, you can permanently alter the way water behaves on your land.
The Physics of Flow and Why Gravity Is Your Only Partner
Every successful drainage project begins with an understanding of slope, grade, and hydraulics. Water is surprisingly lazy. It takes the path of least resistance, which means if your trench drops a mere fraction of an inch per foot, water will find it and follow it. Conversely, if your slope is too aggressive, water will rush through your pipe too quickly, dropping heavy silt, sand, and organic debris along the way until the conduit chokes itself out. Finding the sweet spot of engineering grade is the single most critical factor in system longevity.
The golden rule of residential gravity drainage is a drop of one-quarter inch per foot of run. For every four feet of trench you dig away from your problem area, the bottom of that trench must drop downward by one inch. On longer runs, an eighth of an inch per foot can suffice, but a quarter-inch is the gold standard for maintaining self-cleaning water velocity. If you drop water too steeply—say, an inch per foot—the liquid races ahead while leaving behind the sediment it carries. Over a few seasons, those trapped particles form sedimentary layers that completely block the pipe.
Measuring this drop requires more than a standard bubble level resting on a two-by-four. Experienced DIYers rely on string lines paired with torpedo levels, or better yet, rented rotary laser levels that cast a visible beam across the entire yard. By setting up the laser receiver on a grade rod, you can calculate exact elevations down to the millimeter across fifty feet of lawn. This eliminates the guesswork that ruins so many weekend drainage projects. When you establish a smooth, uniform descent from the high point of the inlet to the daylight discharge point, you create a hydraulic highway that functions invisibly for decades.
Decoding Subsurface Hydrology: When to Use French Drains Versus Surface Swales
Not all drainage problems require burying hundreds of feet of corrugated pipe beneath your lawn. Choosing the wrong system for a specific water issue is the fastest way to waste a weekend of heavy digging. Surface water—the sheets of rain that wash across your driveway or pool on a flat patch of turf—requires an entirely different engineering approach than subsurface water, which is the unseen moisture traveling underground through saturated soil layers.
Surface swales and catch basins are designed to intercept water before it pools. A swale is essentially a wide, shallow, grass-lined ditch engineered to guide surface runoff away from structures toward a designated discharge point. Catch basins, capped with plastic or cast-iron grates, sit flush with low spots in the yard, collecting pooling water and funneling it into solid underground pipes. These systems excel at handling sudden deluges from roof downspouts or torrential downpours that overwhelm the absorption capacity of clay-heavy lawns.
French drains, on the other hand, are subsurface vacuum cleaners. If your basement is damp or your yard stays spongy for days after a rainstorm, water is trapped underground. A French drain consists of a perforated pipe nestled in a trench filled with clean washed gravel, entirely wrapped in a geotextile fabric. The fabric acts as a filter, allowing water to pass freely while keeping out fine silt and clay roots that would otherwise clog the stone and pipe. The water sinks into the gravel trench, enters the pipe through the perforations, and is carried safely away by gravity. Recognizing whether your yard is suffering from surface flooding or subterranean saturation determines whether you need a surface catch basin or a deep French drain trench.
Excavation, Material Selection, and the Step-by-Step Installation Blueprint
Executing a professional-grade drainage installation requires patience, rigorous measurements, and respect for underground utilities. Before you strike a single spade into the turf, call your local utility protection service to mark gas, electric, and water lines. Once the green light is given, the real work begins. The following methodology outlines how to construct a durable, high-performance French drain system that will stand up to decades of seasonal freeze-thaw cycles.
- Step 1 (Trench Layout and Excavation): Mark your trench path using marking paint and mason’s string. Excavate the trench to a consistent width of roughly 12 to 18 inches. Dig down deep enough to accommodate your gravel bedding, your four-inch perforated pipe, and a final top layer of gravel or sod—typically a total depth of 18 to 24 inches near the start, maintaining your continuous drop toward the outlet.
- Step 2 (Geotextile Fabric Lining): Line the entire excavated trench with a heavy-duty, non-woven geotextile filter fabric. Ensure you leave enough excess fabric on both sides of the trench to fold completely over the top of the gravel later like a burrito. Never skip this step; native clay or silt mixing with your clean stone will destroy the drainage capability within two years.
- Step 3 (Gravel Bedding and Pipe Placement): Pour roughly two to three inches of washed, angular gravel (typically ¾-inch crushed stone, avoiding rounded pea gravel which compacts too tightly) along the bottom of the fabric-lined trench. Lay your rigid PVC or corrugated HDPE perforated pipe on top of this bed, making sure the drainage holes face downward at the 4 o’clock and 8 o’clock positions. This allows water entering from the bottom to rise up into the pipe.
- Step 4 (Stone Backfilling and Wrapping): Fill the remainder of the trench with washed crushed stone until it sits about two to three inches below the surrounding lawn grade. Fold the overlapping edges of the geotextile fabric securely over the top of the gravel. This completely encases the stone in a protective cocoon that prevents soil intrusion while letting water pour effortlessly into the aggregate.
- Step 5 (Surface Finishing and Discharge): Top the wrapped trench with decorative river rock for a clean landscape bed aesthetic, or cover it with a thin layer of topsoil and grass seed if it runs across open lawn. Ensure your outlet—whether it empties into a dry well, a street curb adapter, or daylight down a slope—is protected with a rodent grate and remains completely unblocked.
Navigating Field Obstacles, Design Flaws, and Common Installation Mistakes
Even with careful planning, DIYers routinely run into unexpected roadblocks halfway through a drainage project. Tree roots, utility crossings, and improperly planned outlets can turn a straightforward weekend project into a frustrating engineering puzzle. Anticipating these obstacles before you start digging saves time, money, and structural damage.
One of the most frequent errors homeowners make is connecting corrugated flexible pipe directly to roof downspouts without a solid-wall transition. Downspouts carry massive volumes of water loaded with roof granules, leaves, and organic debris. If you pump downspout water into a perforated French drain pipe, those granules and leaves will pour straight into the gravel bed, instantly clogging the system. Downspouts must always feed into solid, smooth-walled PVC pipes until they reach an area where it is safe to disperse the water into a dry well or daylight outlet.
Another major hazard is failing to provide a proper termination point. Discharging a drainage pipe onto your neighbor’s property line is not only legally risky; it can spark neighborhood disputes and property damage claims. If your yard lacks natural slope to daylight, you must engineer a dry well—a large, gravel-filled subterranean basin wrapped in fabric—to hold and slowly disperse the water back into the water table. Additionally, never ignore underground tree roots. Hacking through massive structural roots of a mature oak or maple can kill the tree or compromise your trench path; route your trench around major root zones whenever possible.
The Long-Term Economic Value and Environmental Impact of Water Management
Managing stormwater responsibly on your own property transcends simple home maintenance; it is an act of local watershed stewardship. Traditional suburban development relies heavily on impervious surfaces like asphalt driveways, concrete patios, and shingled roofs that shed water rapidly into municipal storm sewers, overloading public infrastructure and causing downstream erosion. When you capture, filter, and slowly infiltrate rainwater on your own land using a well-designed drainage system, you recharge local aquifers and prevent toxic street runoff from surging directly into natural creeks.
From a purely economic perspective, investing a weekend of labor and a few hundred dollars in materials pays immediate dividends when compared to future remediation costs. The average price of basement waterproofing, foundation underpinning, and mold remediation runs in the tens of thousands of dollars. A proactive French drain system acts as a cheap insurance policy for your home’s structural integrity. Furthermore, homes with dry, stable basements and well-drained, usable yards command significantly higher resale values. Buyers walking through a property during a heavy rainstorm will immediately notice—and appreciate—the dry foundation and lack of standing puddles near the back patio.
Beyond structural protection, improved drainage transforms how you experience your outdoor living space. Soggy patches that breed mosquitoes, turn into mud bogs, and ruin expensive lawn mowers become a distant memory. By restoring the natural percolation of water through your landscape, you create healthier root systems for trees, shrubs, and turfgrass. The soil breathes better, plants absorb nutrients more efficiently, and your entire yard transitions from a seasonal stressor into a thriving, resilient ecosystem.
Actionable Frameworks for Diagnosing and Planning Your Yard Drainage
Before committing to a specific design, approaching your property with an analytical, methodical mindset ensures your solution actually resolves the root cause rather than merely masking the symptoms. Use this structured framework during the next heavy rainstorm to map your property’s hydrology accurately.
- Conduct a Rainstorm Audit: Walk your property during or immediately after a heavy downpour while wearing proper rain gear. Take notes and photos of where water pools, how fast downspouts empty, and whether water is flowing toward or away from your foundation walls.
- Perform the Percolation Test: Dig a small test hole 12 inches deep in problematic areas of the yard, fill it with water, and monitor how quickly it drains. If the water drops less than one inch per hour, your soil is heavily compacted clay that requires a subsurface drainage network rather than relying on natural absorption.
- Map Elevation Extremes: Use a simple water level or rented laser level to determine the absolute highest point of water entry and your lowest potential discharge point. Calculate the total linear footage and determine if the natural drop meets the required one-quarter inch per foot threshold.
- Inventory Material Needs: Create an exhaustive parts list before visiting the hardware store. Account for perforated pipe, solid PVC downspout extensions, fittings, couplings, non-woven geotextile fabric, and tons of washed ¾-inch crushed stone. Renting a trenching machine for a day is often worth every penny compared to manual spade work.
- Establish Maintenance Protocols: Inspect your catch basin grates, pop-up emitters, and daylight outlets at least twice a year—ideally in late autumn after leaf fall and during early spring thaw—to clear out accumulated silt, mulch, and debris.
Taking control of your home’s water management is one of the most empowering projects a homeowner can undertake. It demands physical effort, patience with stubborn soil, and a strict adherence to the simple laws of gravity. Yet the reward—a dry basement, a healthy lawn, and the profound peace of mind that comes from knowing your home is structurally secure against the next major storm—is immeasurable.
As climate patterns continue to shift toward more volatile, high-intensity rain events, managing stormwater on a residential scale will only grow in importance. By stepping outside with a shovel, a laser level, and a thoughtful plan, you stop reacting to nature’s whims and begin actively shaping your environment. Water will always follow the path of least resistance; when you build that path yourself, you master the slope and protect your home for decades to come.