
You know that feeling when you walk past a neighbor’s house and their garden just looks… right? It’s not necessarily because they have rare orchids or a full-time landscaping crew. Often, it’s just the lines. The crisp edge where the mulch meets the grass. The way the eye is drawn to the blooms because the chaos of the lawn is held back by a simple border. It creates order out of nature’s wildness. But then you check the price tag on those plastic or metal edging rolls at the big box store, and your wallet flinches. Why does defining a few feet of dirt cost so much?
It doesn’t have to. In 2026, with material costs still fluctuating, homeowners are getting smarter about how they frame their green spaces. You don’t need a contractor. You don’t even need a trip to the garden center if you look around your own property first. Defining your flower beds is less about buying the "right" product and more about seeing the potential in what’s already there. Whether you have a pile of old bricks from a renovation, some leftover lumber, or just a shovel and some creativity, you can create borders that look intentional, stylish, and expensive—while spending next to nothing.
Let’s be honest, gardening is supposed to be therapeutic, not a financial stressor. When we strip away the marketing hype around landscape design, we find that the most charming gardens often use the simplest materials. This isn’t about cutting corners; it’s about cutting costs while boosting character. So, grab your gloves. We’re going to explore how to give your garden that polished look without breaking the bank.
The Beauty of Found Stones and Rocks
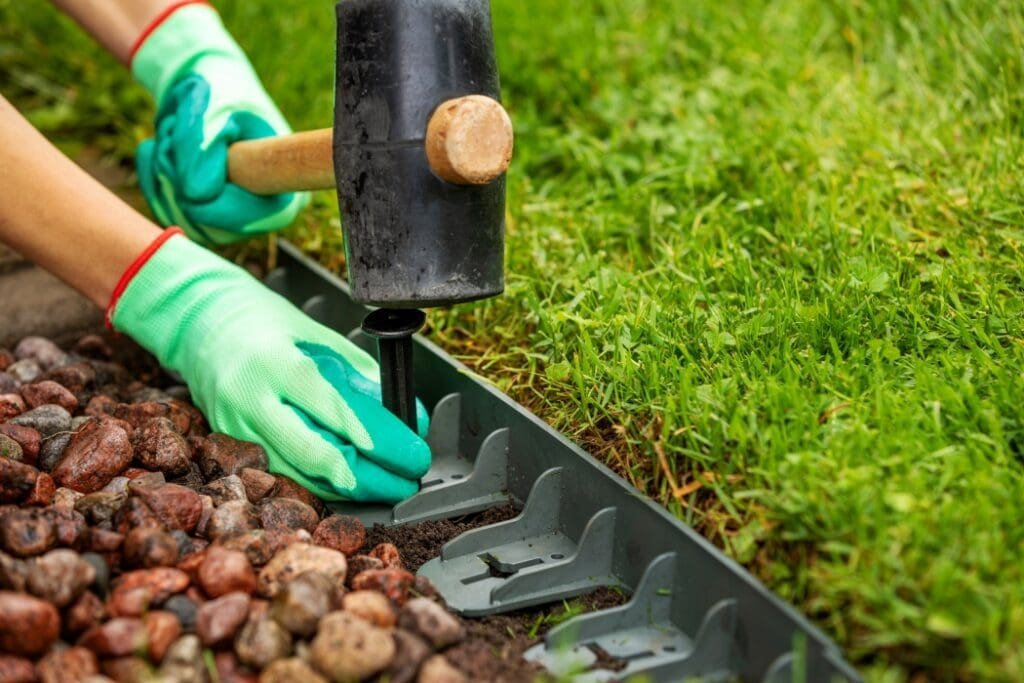
Nature provides the best building materials for free, if you know where to look. Using stones and rocks is arguably the most timeless way to edge a flower bed. It blends seamlessly with the soil and plants, creating a transition that feels organic rather than imposed. You might have rocks scattered around your yard that you’ve been tripping over for years. Or maybe there’s a local spot where land clearing has left piles of fieldstone available for the taking. Just make sure you have permission before hauling anything away.
The key here is consistency in size, not perfection. You don’t need uniform pavers. In fact, irregular shapes add more charm. Start by digging a shallow trench along the edge of your bed, about four to six inches deep. This gives the stones a place to sit so they don’t topple over when the ground freezes and thaws. Place the largest, flattest stones first, burying about half of each stone into the soil. This anchors them. Fill in the gaps with smaller stones or gravel. It’s like a puzzle, but one where there are no wrong pieces.
This method is incredibly durable. Unlike plastic edging that cracks in the winter sun or wood that rots after a few rainy seasons, stone lasts forever. It also helps with drainage, allowing water to flow freely between the cracks. If you want a more refined look, try stacking flat slate or limestone shards vertically. This creates a clean, linear edge that contrasts beautifully with soft, fluffy flowers like lavender or catmint. It’s labor-intensive, sure, but the only cost is your sweat equity. And honestly, there’s something satisfying about moving earth and stone with your own hands.
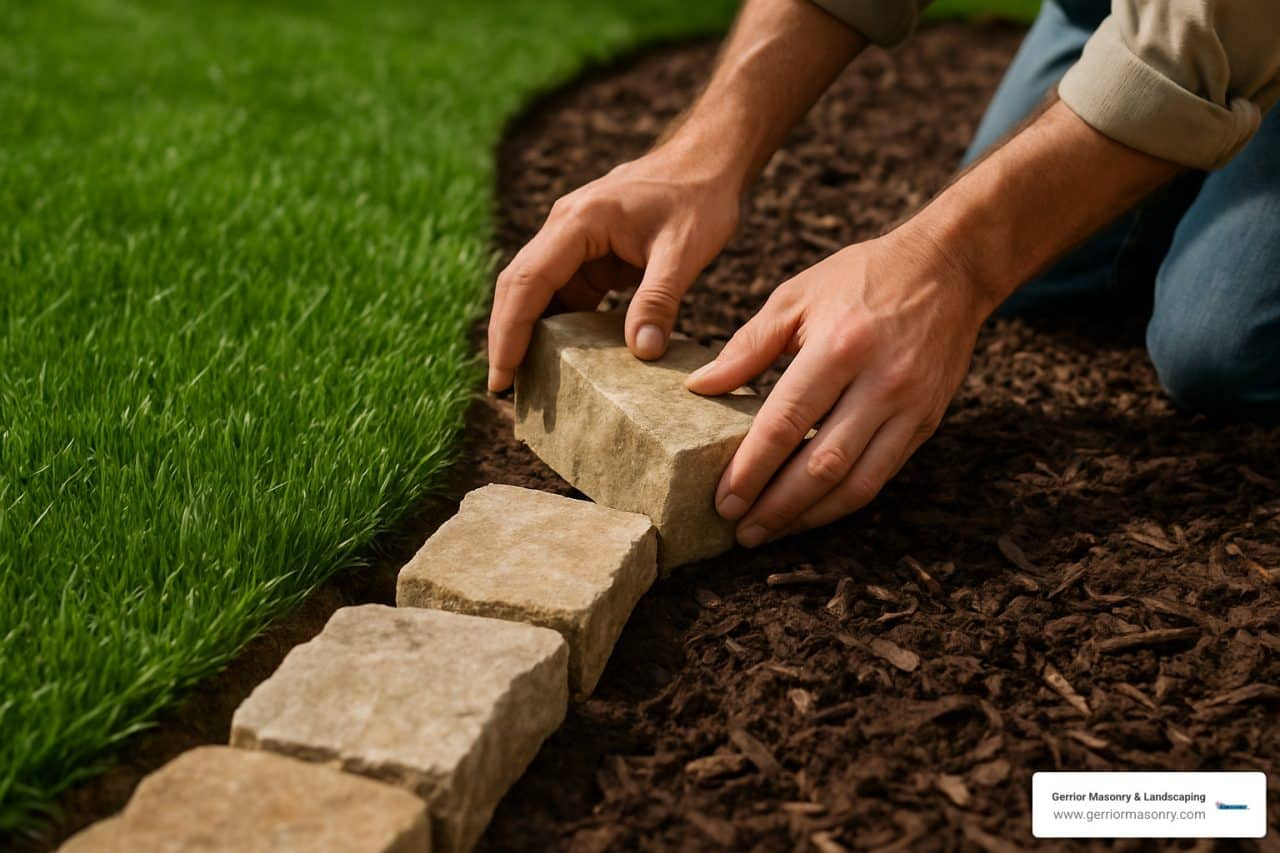
Repurposed Bricks and Concrete Chunks
Old bricks are having a major moment in 2026 design trends. They offer a rustic, warm aesthetic that pairs well with almost any plant palette. If you live in an older neighborhood, keep an eye out for demolition sites or renovation projects. People are often happy to give away old bricks rather than pay to haul them to the landfill. You can also check online marketplaces for "free bricks" listings. Just be prepared to do some cleaning. A stiff brush and a hose are usually enough to knock off decades of mortar and dirt.
Laying brick edging is straightforward. You can lay them flat for a low profile, which is great for wide borders where you might want to sit or place pots. Or, stand them on their ends (soldier course) for a taller, more defined barrier that keeps mulch firmly in place. For a casual look, try a herringbone pattern or just line them up in a slightly wavy row. Imperfection is part of the appeal. If you don’t have enough bricks for the whole bed, mix them with other materials. A section of brick leading into a patch of gravel looks intentional and eclectic.
Don’t overlook broken concrete either. Urbanite, as it’s sometimes called, is essentially free if you have access to construction waste. Break larger slabs into manageable chunks using a sledgehammer (safety glasses are a must). Like stone, these pieces can be buried partially in the ground to create a rugged, industrial-chic border. It’s particularly effective in modern or minimalist gardens where you want hard lines without the expense of new concrete pouring. Plus, recycling concrete keeps it out of landfills, making your garden project eco-friendly too.
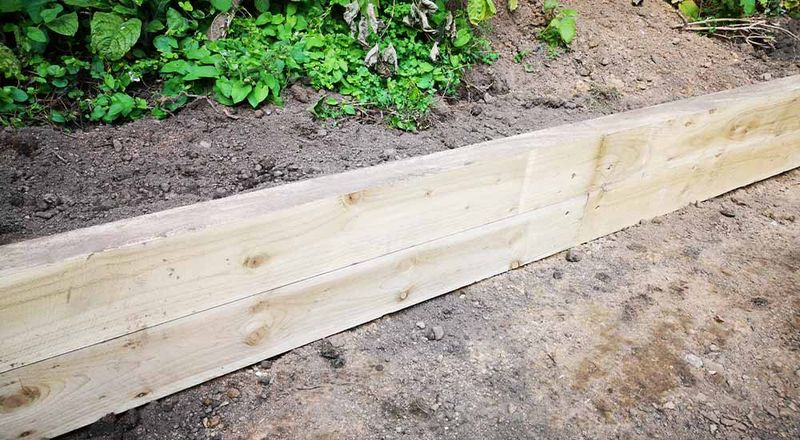
Wood Scraps and Log Rounds
Wood brings warmth and texture to a garden, but new lumber prices can be steep. The trick is to avoid buying new 2x4s if you can help it. Look for scrap wood from pallets, old fencing, or leftover decking materials. Pallet wood, in particular, is widely available and often free. Just make sure it hasn’t been treated with harsh chemicals if you’re growing edible plants nearby. For ornamental flower beds, though, it’s generally safe. Sand down rough edges to prevent splinters and extend the life of the wood by sealing it with a natural oil or exterior stain.
Another fantastic option is using log rounds. If you have trees that have been trimmed or fallen in storms, cut the trunks into sections of equal height. These can be stood upright in a trench to create a rustic picket-fence style edge. It’s charming, especially for cottage-style gardens filled with daisies and hollyhocks. The bark adds visual interest, and as the wood ages, it turns a silvery gray that blends nicely with the surroundings. To prevent rot, you can char the bottom ends with a torch or dip them in a wood preservative before installing.
For a softer, more flexible edge, consider using bent willow branches or hazel rods. These can be woven between stakes to create a living fence look. It’s a technique that dates back centuries and requires zero money if you have access to coppiced trees. It’s biodegradable, so you’ll need to replace it every few years, but that’s part of the cycle. It connects you to the seasons and the local environment. Plus, it’s lightweight and easy to install, making it perfect for renters or those who like to change their garden layout frequently.
Living Edges and Plant Borders
Who says your edging has to be hardscape? Plants themselves can define a space beautifully. This approach, often called "soft edging," uses low-growing, dense plants to create a natural barrier between the lawn and the flower bed. It’s softer on the eyes and provides habitat for pollinators. Think of plants like creeping thyme, sedum, or dwarf mondo grass. These spreaders knit together to form a carpet that holds back mulch and discourages weeds from creeping in from the lawn.
In 2026, there’s a huge push towards native plants, and many native groundcovers make excellent edgers. They are adapted to your local climate, meaning they need less water and care once established. For example, in cooler climates, creeping phlox creates a stunning spring display while acting as a border. In warmer zones, liriope or monkey grass offers year-round structure. The benefit here is dual-purpose: you get definition and beauty. Instead of a static line of plastic, you have a living, breathing element that changes with the seasons.
Maintenance is slightly different with living edges. You’ll need to trim them occasionally to keep them from invading the flower bed or the lawn. But this is gentle work, easily done with shears. It’s also easier to repair. If a dog digs a hole or a section dies back, you just plug in a new plant. There’s no need to dig up heavy stones or replace rotted wood. It’s forgiving. And let’s face it, a garden that invites bees and butterflies to its borders is a garden that feels alive. It blurs the line between cultivated and wild, which is exactly where many of us want to be.
Upcycled Household Items and Bottles
Sometimes the best ideas come from looking at trash with fresh eyes. Glass bottles, for instance, have been used for garden edging for decades, and they’re making a comeback. Wine bottles, beer bottles, even colorful soda bottles can be buried neck-down in a trench. The bases stick up, catching the light and adding a splash of color. Blue and green glass looks particularly striking against green foliage. It’s whimsical and personal. You can collect them over time from your own recycling bin or ask friends to save theirs for your project.
Tires are another controversial but effective option. While some people dislike the look, painted tires can be surprisingly chic if done thoughtfully. Cut them in half horizontally and bury the curved side up to create a scalloped edge. Paint them in muted tones like slate gray, terracotta, or sage green to blend with the garden, rather than bright primary colors which can look tacky. They are incredibly durable and hold back soil effectively. Just ensure they are clean and perhaps lined with landscape fabric if you’re worried about leaching, though studies in recent years have shown minimal risk in ornamental settings.
Don’t forget about old roof tiles, shingles, or even broken ceramics. Mosaic edging using broken plates or tiles can turn a mundane border into a piece of art. It takes time to arrange the pieces, but the result is unique to your home. Similarly, corrugated metal sheets, often left over from construction, can be cut into strips and sunk into the ground for a sleek, modern industrial look. They rust naturally over time, developing a patina that many designers covet. The point is to look at what you have—or what others are throwing away—and see its potential. Creativity is free, after all.
If you truly have zero budget and zero materials, don’t despair. You can define a flower bed with nothing but a shovel and gravity. This method is called "trench edging" or "V-edge." You simply dig a V-shaped trench along the perimeter of your bed, removing the sod and creating a clear drop-off between the lawn and the mulch. The vertical face of the soil acts as the barrier. It’s clean, sharp, and costs absolutely nothing. It requires maintenance, though. Grass will try to creep back in, and rain will erode the edge, so you’ll need to re-cut it once or twice a season.
To enhance this simple trench, you can create a mulch berm. Pile your mulch slightly higher at the edge, sloping it down into the bed. This physical bulk helps hold the line. Using a dark, rich mulch like shredded bark or compost creates a strong visual contrast with the green lawn. The darkness makes the colors of your flowers pop. It’s a classic look that never goes out of style because it relies on contrast and cleanliness rather than decorative elements.
For a slightly more permanent version of this, consider using a spade to create a "grass lip." Leave a narrow strip of grass (about 2-3 inches wide) between the main lawn and the flower bed. Keep this strip neatly trimmed with edging shears. It acts as a buffer zone. This technique is common in English gardens and formal landscapes. It requires regular clipping, but it avoids the need for any hard materials entirely. It’s subtle and sophisticated. Sometimes, the best definition is just a well-maintained line of sight. It reminds us that gardening is largely about attention and care, not just consumption.
So, where does this leave us? With a lot of options and very little excuse for bare, undefined dirt. Whether you choose the permanence of stone, the warmth of wood, the life of plants, or the simplicity of a well-dug trench, the goal is the same: to create a space that feels cared for. You don’t need to spend hundreds of dollars to achieve that. In fact, some of the most beautiful gardens I’ve seen were built with scraps, sweat, and a bit of imagination.
Start small. Pick one bed. Try one method. See how it feels. Maybe you’ll love the tactile nature of stacking stones. Maybe you’ll prefer the quick fix of a trench. The beauty of these budget-friendly approaches is that they are low-risk. If you don’t like it, you can change it without having wasted a fortune. Gardening is an experiment, after all. Let your edges reflect your personality, your resources, and your values.
Remember, a garden is a living thing. It changes. Materials weather, plants grow, and tastes shift. By choosing flexible, affordable edging solutions, you give yourself the freedom to evolve with your space. So go ahead, look at that pile of bricks or those empty wine bottles differently. They aren’t clutter. They’re the beginning of your next garden project. Happy digging.