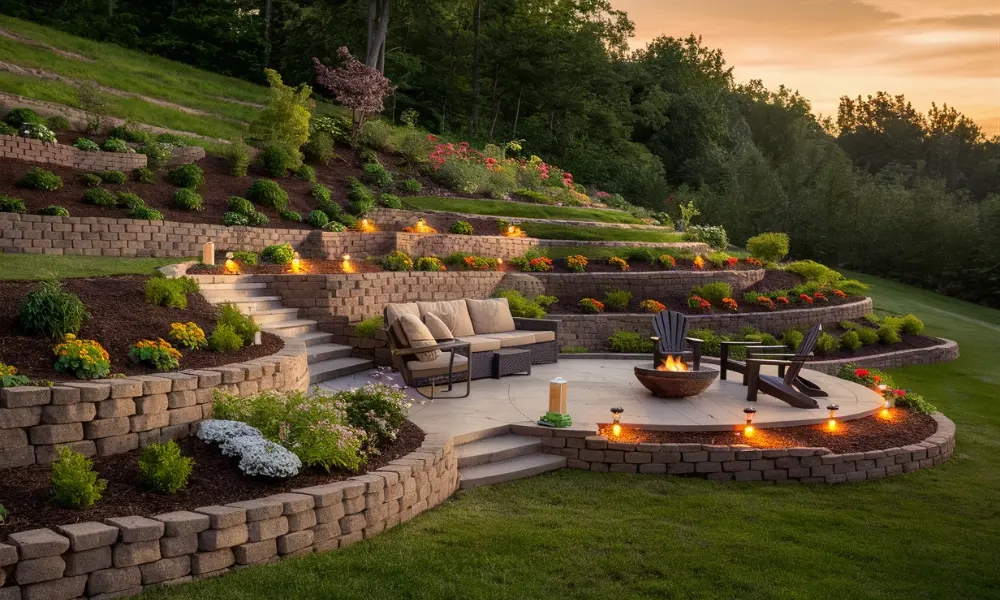

That patch of sloping dirt behind your house isn’t a yard; it’s an ongoing environmental grievance. Every time a heavy summer storm hits, you watch helplessly as topsoil cascades across your patio, turning your outdoor living space into a muddy obstacle course. Mowing the grass requires mountaineering gear and a prayer, and trying to pull weeds on a forty-degree incline feels like a punishing leg-day workout engineered by a sadistic personal trainer. You bought the house for the view, but the backyard has quietly become an untameable liability that you actively avoid looking at.
The fundamental mistake most homeowners make when facing a vertical drop is treating it as a flat surface turned sideways. They try to slap down standard landscaping tricks, plant fragile annuals that wash away with the first drizzle, or throw money at contractors who quote small fortunes for monolithic concrete retaining walls. Gravity always wins this fight unless you change your tactical approach. Instead of trying to flatten the earth or fight the grade, the secret lies in working with the slope—breaking that intimidating vertical drop into manageable, human-scaled increments of stone, timber, and living roots.
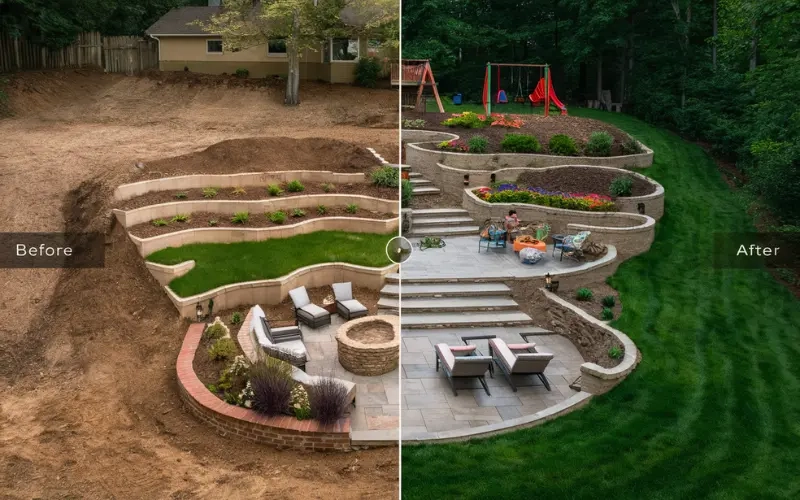
Transforming an aggressive backyard incline into a gorgeous series of planting steps requires a blend of structural engineering logic and botanical selection. It is a project that tests your patience, muscles, and problem-solving abilities. Yet, when executed correctly, it completely reclaims dead outdoor space, halts soil erosion in its tracks, and turns an eyesore into the crown jewel of your property. You do not need a degree in civil engineering to pull this off, but you do need a clear blueprint, realistic expectations, and an understanding of how earth, water, and plants interact on a grade.
The Anatomy of a Slope: Understanding Soil Mechanics, Water Flow, and Gravity
Before you touch a single shovel to the dirt, you have to understand what is happening beneath the surface of your hillside. Gravity is a constant, unyielding force pulling downward, and water is its accomplice. When rain hits a bare slope, it doesn’t just sit there; it accelerates, picking up momentum and carrying precious organic matter down toward your foundation or your neighbor’s fence. If you build steps or retaining walls without factoring in hydrostatic pressure—the crushing weight of water-logged soil pushing against a structure—your hard work will literally slide down the hill during the next major thaw or rainstorm.
Soil composition dictates your entire strategy. Clay soil holds water like a sponge, expanding when wet and shrinking when dry, which exerts immense lateral pressure on retaining elements. Sandy soil, on the other hand, lacks cohesion and shifts constantly, making it prone to sudden collapses if cut into vertical vertical faces. Most residential hillsides feature a mixed loam, but you must dig test holes across different elevations to evaluate what you are actually dealing with. If your soil is heavy clay, you will need to incorporate generous amounts of coarse gravel and organic compost behind your step risers to facilitate proper drainage.
Water management is the invisible backbone of any successful hillside transformation. You cannot simply block water; you must guide it. Without designated drainage paths, French drains, or strategically placed weep holes, water will pool behind your newly constructed steps, liquefying the backfill and blowing out your risers. Think of your slope as a dynamic watershed system. Every terrace you build acts as a speed bump for water, slowing its descent, encouraging deep soil infiltration, and safely routing the overflow away from your primary structural foundations.
Evaluating your grade’s steepness requires more than guesswork. A slope rising one foot for every three feet of horizontal run (a 3:33 grade) is vastly different from a 1:1 precipice where you practically need climbing ropes. For gentle slopes, simple timber edging and shallow earth-filled steps suffice. For steep, aggressive inclines exceeding a 45-degree angle, you are looking at true terracing—constructing interlocking structural tiers where the steps themselves act as retaining walls. Recognizing your specific grade constraints early saves you from building a staircase that is either too steep to safely climb or too shallow to make a meaningful dent in the elevation change.
Designing for Human Movement and Botanical Impact: The Golden Ratios
A staircase outdoors operates under entirely different psychological and ergonomic rules than an indoor staircase. Indoors, uniform, sterile steps are expected. Outdoors, on a rugged hillside, steps should feel like an organic discovery—a natural path carved through a living landscape. However, human biomechanics remain stubbornly consistent. If your risers are too tall or your treads are too narrow, walking up and down your new garden steps becomes a clumsy, exhausting chore rather than a therapeutic stroll.
The golden rule of landscape stair design balances riser height (the vertical drop) and tread depth (the flat walking surface). A comfortable formula used by professional landscape architects is that two risers plus one tread should equal roughly 26 inches. If your riser is a standard 6 inches, your tread needs to be at least 14 inches deep. On a steep slope, people naturally take shorter, more deliberate strides, but skimping on tread depth is a critical mistake. If the tread is too narrow, your heel hangs off the back, creating a severe tripping hazard, especially when carrying garden tools or balancing baskets of harvested vegetables.
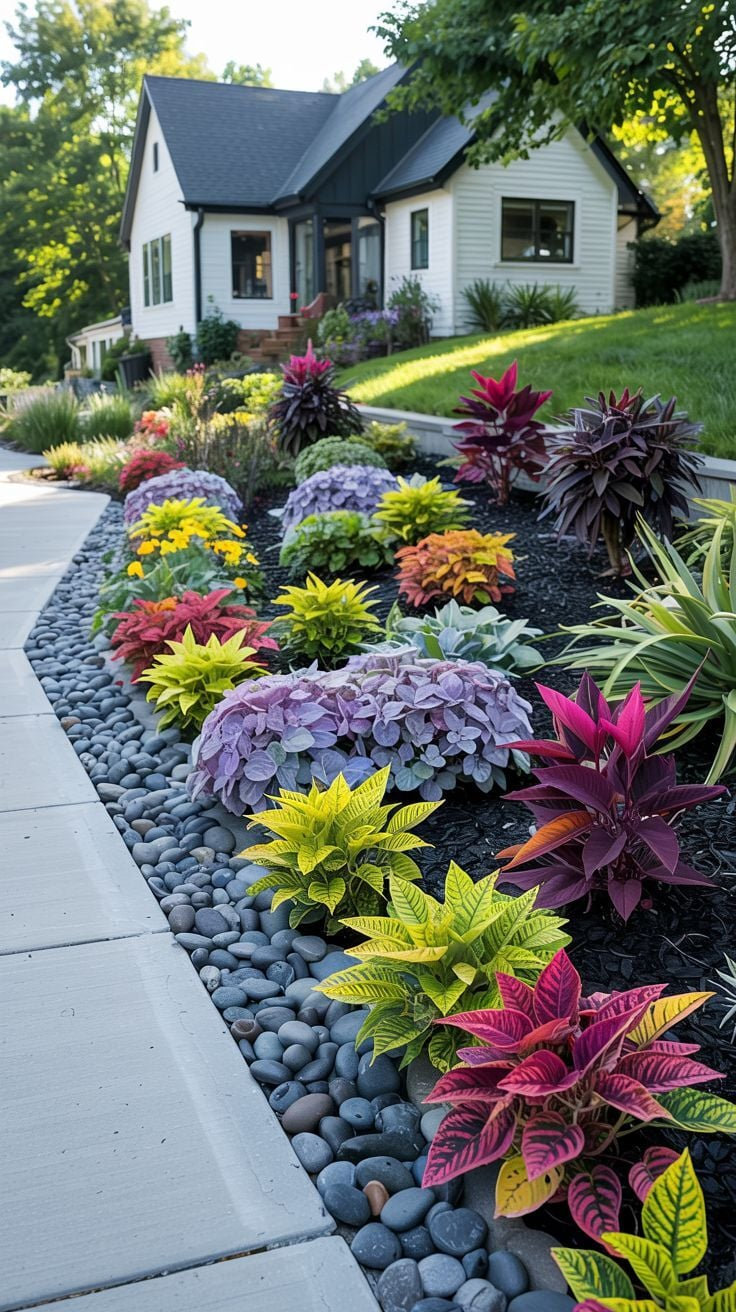
Simultaneously, you must design the planting beds that flank or integrate into these steps. A set of sterile stone steps floating in a sea of bare mulch looks harsh and uninviting. The magic happens when architecture and botany merge. Plan for wide, generous planting pockets directly adjacent to the risers, and consider creating intermediate landing platforms—small, flat plateaus where a bench can sit, or where a dramatic specimen plant like a weeping Japanese maple or a clustering birch can anchor the visual weight of the hillside.
Visual rhythm is another critical design layer. Avoid making your steps run in one endless, monotonous straight line straight up the hill unless you want your backyard to resemble a fire escape. Instead, incorporate switchbacks, gentle curves, or slight jogs. These directional shifts not only make the climb less physically daunting by breaking up the verticality, but they also create varying microclimates. One corner of your slope might catch blistering afternoon sun, while a recessed nook five feet away remains damp and shaded, allowing you to curate an astonishingly diverse palette of plants that would never survive side-by-side in a flat yard.
The Arsenal of Materials: Choosing Between Stone, Timber, and Concrete
Choosing the right material for your steps and retaining edges dictates the aesthetic personality of your yard, your budget requirements, and your physical endurance during installation. Each material category brings distinct structural trade-offs, installation quirks, and long-term durability metrics that demand careful evaluation before you drop thousands of dollars at a stone yard or lumber mill.
Natural stone—such as flagstone, fieldstone, or modular blocks of granite and limestone—represents the gold standard for hillside landscaping. Stone weathers gracefully, looks as though it belongs naturally in the earth, and is virtually impervious to rot, insects, and decay. Dry-stacked stone walls and heavy slab steps have an immense mass that resists shifting. The catch? Natural stone is brutally heavy. Moving 150-pound granite treads up a steep incline without heavy machinery will test your marriages and your lumbar spine. It also requires a high degree of masonry skill to achieve level, stable surfaces that won’t rock underfoot.
Pressure-treated lumber, railroad ties, or rugged rot-resistant hardwoods like cedar, redwood, and black locust offer a more forgiving, budget-friendly entry point for DIY builders. Timber is easier to cut, maneuver, and secure using heavy-duty rebar driven deep into the subgrade. Wood steps lend a warm, rustic, cottage-garden aesthetic that softens severe slopes. However, timber has a biological expiration date. Even the best-treated wood will eventually succumb to moisture, fungal decay, and insect damage, typically requiring replacement or heavy maintenance after 10 to 15 years of continuous ground contact.
Pouring concrete or using precast interlocking concrete modular blocks provides a middle ground that prioritizes structural predictability. Concrete blocks are engineered with interlocking lips that make alignment foolproof, while poured-in-place concrete stairs offer ultimate modern clean lines and unyielding strength. While concrete can sometimes feel stark or overly urban for a natural garden setting, modern manufacturing offers textured finishes that mimic natural quarried stone at a fraction of the cost and weight.
Beyond structural steps, consider the infill materials for your treads. Will you cap your stone risers with solid stone slabs, or fill wooden frames with compacted gravel, crushed slate, or even groundcovers like creeping thyme and dwarf mondo grass? Permeable treads made of crushed stone or pea gravel are fantastic for drainage, allowing rainwater to filter straight down rather than rushing off the surface. However, they require occasional raking and weed suppression to keep them looking pristine.
Field-Tested Step-by-Step Installation Methodology
Building garden steps on a steep incline is a sequential puzzle where skipping a single step guarantees catastrophic failure down the road. You cannot improvise foundational work when gravity is working against you. Treat this installation guide as your non-negotiable operational manual.
- Step 1 (Site Excavation and Profiling): Clear all existing brush, roots, and loose topsoil from the footprint of your proposed stairway down to undisturbed, stable subgrade. Starting from the bottom of the slope and working your way up, rough-cut your slope into a series of massive, stepped bench cuts using a mattock, shovel, and, if accessible, a compact tracked skid steer.
- Step 2 (Foundation Bed Preparation): Compact the exposed soil of each cut step using a mechanical plate compactor or a heavy hand tamper. Lay down a minimum 4-inch compacted base of crushed angular gravel (¾-inch minus stone) topped with a layer of non-woven geotextile fabric to prevent native soil from migrating into your stone base and causing settling.
- Step 3 (Setting the Base Riser): Install your lowest structural riser—whether it is a heavy stone block or a treated timber secured with 3-foot lengths of #4 rebar driven through pre-drilled holes into the earth. Check for level both front-to-back and side-to-side using a 4-foot spirit level. A single out-of-level base stone will compound errors all the way up the hill.
- Step 4 (Backfilling and Compacting): Backfill behind the installed riser using clean, coarse gravel up to the height of the tread. This crushed stone zone acts as a critical chimney drain, preventing hydrostatic pressure buildup. Compact this backfill thoroughly in 3-inch lifts to ensure no future sinkholes form beneath your treads.
- Step 5 (Laying Treads and Subsequent Risers): Set your tread material onto the compacted base, pitching it forward by roughly one-eighth of an inch per foot to ensure water drains away from the riser. Repeat the sequence—riser, gravel backfill, compaction, tread—moving steadily upward until you reach the top of the slope, finishing with a seamless transition landing that meets your upper yard grade.
Common Pitfalls and Field-Tested Workarounds
Every seasoned landscape builder has horror stories of hillside projects sliding down into a neighbor’s yard after a torrential downpour. These expensive disasters usually stem from predictable shortcuts and hubris. Recognizing these traps before you break ground will save you thousands of dollars and endless psychological distress.
- Pitfall 1 (Neglecting Subsurface Drainage): Building solid, watertight walls or tightly packed stone steps without a drainage path traps water behind the structure, turning the backfill into liquid mud that eventually blows out your risers. Workaround: Always install a perforated corrugated drain pipe wrapped in filter fabric at the base of your slope behind the lowest retaining elements, routing daylight outlets safely away to the sides of the stair run.
- Pitfall 2 (Skimping on Base Compacting): Laying heavy stone treads directly onto loose, uncompacted hillside soil guarantees that your steps will shift, sink, and tilt within a single winter freeze-thaw cycle. Workaround: Never rush the foundation prep. Excavate deeper than you think you need to, lay a thick crushed stone bed, and rent a mechanical plate compactor to lock the aggregate particles together permanently.
- Pitfall 3 (Ignoring Frost Line Realities): In cold climates, shallowly anchored posts or thin stone layers will heave violently when moisture in the ground freezes and expands. Workaround: Extend your structural anchoring elements below your local regional frost line, and use free-draining gravel backfill that prevents water from pooling directly beneath structural freezing zones.
- Pitfall 4 (Making Steps Too Steep or Narrow): Designing steep, narrow risers to save space results in an unusable, dangerous goat path that nobody in your family will want to walk down. Workaround: Stick strictly to comfortable ergonomic ratios—keep risers between 5 and 7 inches high, and ensure treads are at least 12 to 15 inches deep, even if it means extending the horizontal run of your staircase further out into the yard via switchbacks.
- Pitfall 5 (Planting the Wrong Roots on Fresh Fills): Planting heavy, aggressive trees or shallow-rooted annuals immediately on newly cut and filled slopes leads to immediate soil erosion or root systems that compromise your structural retaining walls. Workaround: Stabilize fresh earth with deep-rooted perennial groundcovers, ornamental grasses, and shrubs that knit the topsoil together, keeping major woody trees well back from retaining edges.
Botanical Armor: Choosing Plants That Lock Soil and Elevate Aesthetics
Once your structural steps are locked into place, the raw earth flanking them looks stark and vulnerable. This is where botanical engineering takes over. Plants are not merely decorative afterthoughts on a steep slope; they function as living rebar. Their root systems weave through the subsoil like an underground web, anchoring loose particles and absorbing excess moisture that would otherwise compromise your hardscaping.
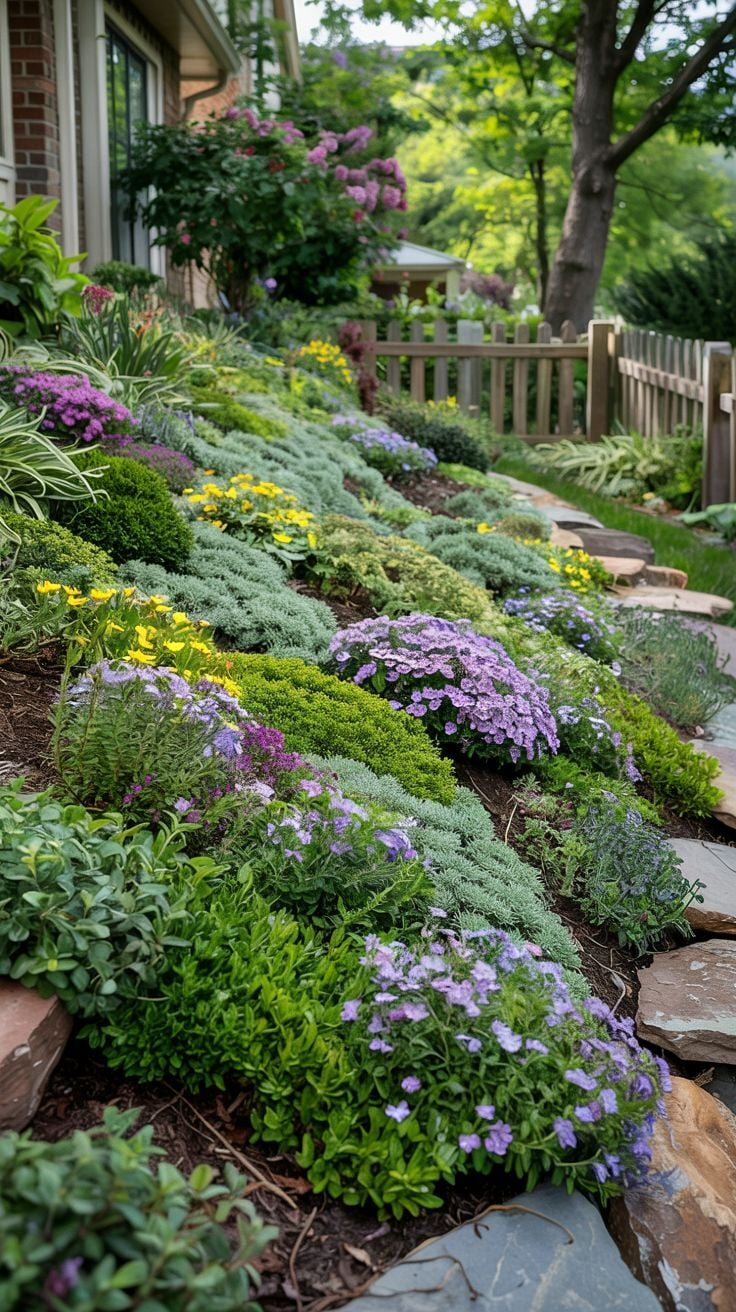
When selecting plants for a sloped garden, prioritize species with fibrous, spreading root systems over taprooted specimens. Creeping junipers, cotoneaster, ornamental grasses like fountain grass and switchgrass, and spreading perennials such as creeping thyme, vinca minor, and sedums form dense, mat-forming canopies that intercept heavy raindrops before they can dislodge soil granules. These plants act as a green sponge and a physical shield simultaneously, dramatically reducing surface erosion.
Layering your plantings by height and root depth creates a resilient, multi-tiered ecological defense system. Place deep-rooting shrubs—like dwarf conifers, potentilla, or fragrant sumac—along the upper tiers and behind retaining edges to stabilize the core mass of the slope. Fill the intermediate pockets and narrow strips between steps with medium-height perennials that spill gracefully over the edges of stone or timber risers, softening the harsh geometry of the steps with cascades of foliage and seasonal blooms.
Maintenance on a slope requires a shift in perspective. Traditional weeding and pruning on a steep incline can strain your knees and back. Mitigate this by planting densely from the start, leaving zero bare soil exposed. Nature abhors a vacuum; if you don’t plant dense groundcover, weeds will happily colonize the slope. Once your chosen perennials and shrubs establish their root networks over the first two growing seasons, they will crowd out weeds entirely, transforming a high-maintenance erosion hazard into a self-sustaining botanical tapestry that requires minimal intervention.
Embarking on a major hillside terracing project demands a significant upfront investment of sweat equity, physical stamina, or financial capital. It is messy, physically demanding work that will leave your muscles sore and your patience frayed. Yet, viewing this endeavor purely as a landscaping chore misses the profound transformation it brings to your property’s fundamental value and your daily lifestyle.
Financially, an unmanaged, eroding slope represents a lingering liability. Real estate appraisers and structural engineers view steep, unstable yards with deep suspicion due to the constant threat of foundation damage, sliding earth, and loss of usable property. Transforming that liability into a professionally terraced garden with navigable steps and stable planting beds instantly converts unusable acreage into functional, highly desirable outdoor living space, significantly boosting your home’s market equity.
Beyond the numbers on a real estate assessment, the lifestyle dividend is immeasurable. That once-forbidden zone at the back of your property becomes an inviting destination rather than a wasteland you ignore. You suddenly find yourself walking down your new stone steps with a morning coffee to check on emerging blooms, harvesting fresh herbs from elevated planting pockets, or pausing on an intermediate landing to watch the sunset over the valley.
By respecting the physics of the earth, choosing the right materials, and marrying structural integrity with lush, living botany, you reclaim control over your environment. The steep incline ceases to be an adversary dictated by gravity and erosion, transforming instead into a stunning, multi-dimensional masterpiece that defines the character of your entire home.