
Ever felt like your neighbors were watching your every move while you tried to enjoy your morning coffee? It’s a common feeling. We all crave that little slice of solitude in our own backyards. But let’s be honest, installing a solid wooden fence or a fancy composite barrier can cost a small fortune. In 2026, with material prices still fluctuating, many homeowners are looking for smarter, cheaper ways to block prying eyes without breaking the bank.
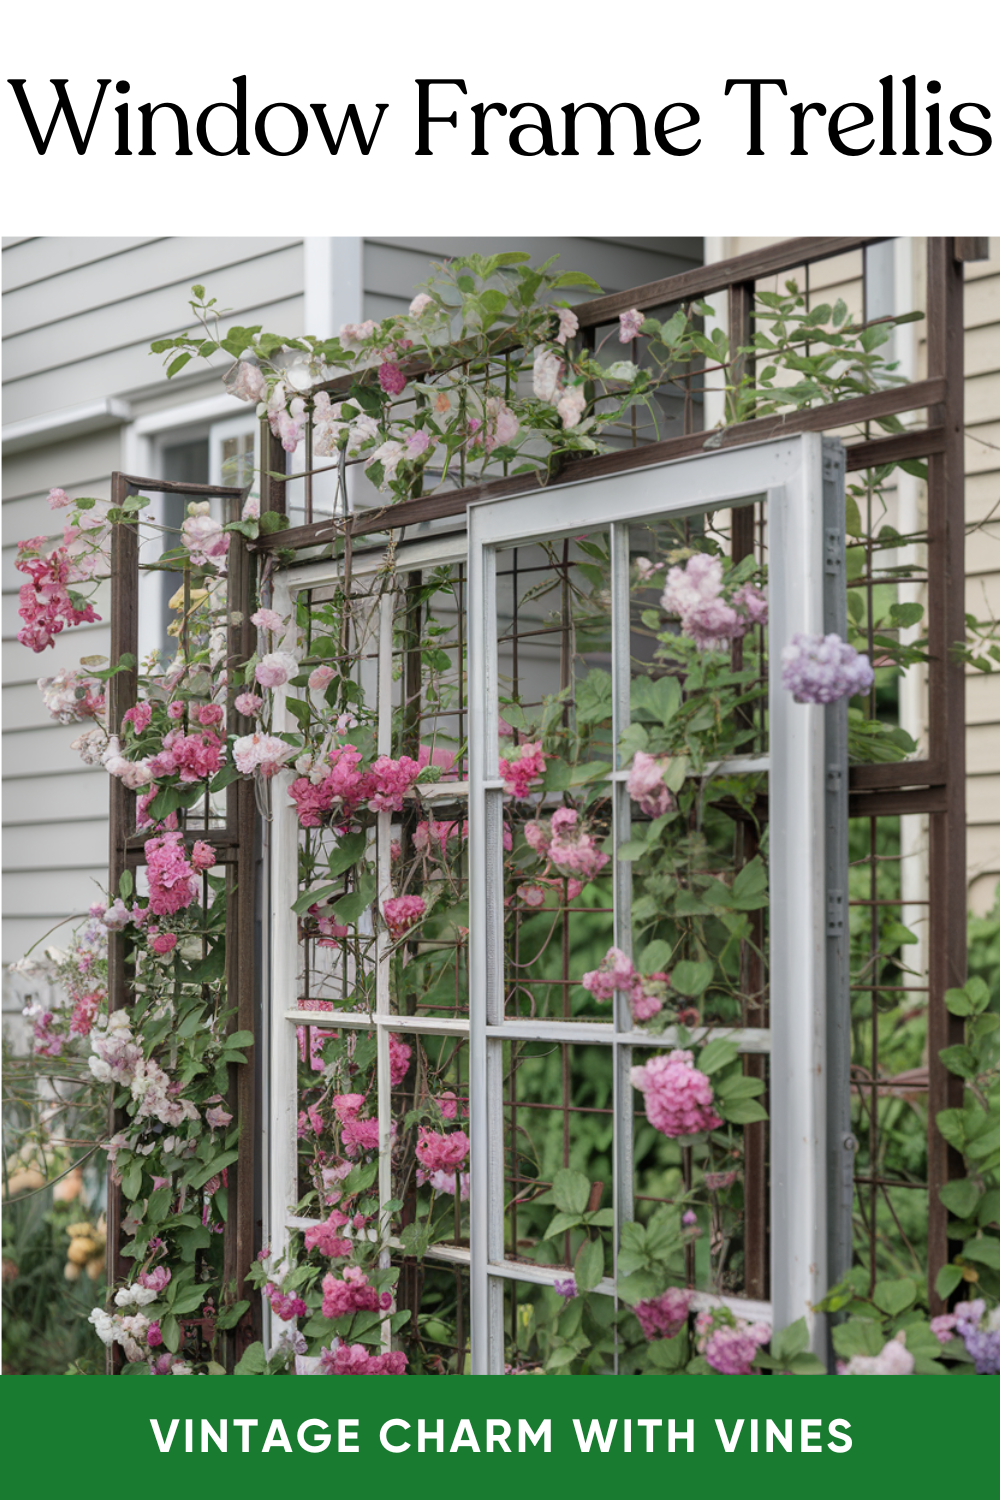
Enter the humble privacy screen made from wood and vines. It’s not just about hiding; it’s about creating something beautiful. Imagine a lattice structure that starts as simple timber but transforms over a single summer into a lush, green wall. It breathes. It changes with the seasons. And best of all? It costs a fraction of what a traditional fence does. If you’ve got a weekend, a basic toolkit, and a bit of patience, you can build this yourself. No heavy machinery needed. No permits (usually). Just you, some wood, and nature doing the heavy lifting.
Choosing the Right Wood for Your Frame
The backbone of your privacy screen is the wood frame. You don’t need expensive cedar or redwood, though they last longer. For a budget-friendly approach, pressure-treated pine is your best friend. It’s resistant to rot and insects, which is crucial since this structure will be outside year-round. In 2026, you can find standard 2x4s and 1x4s at any local hardware store for reasonable prices. Look for "ground contact" rated lumber if the bottom will touch soil, but for a raised screen, standard treated pine works fine.
Avoid warping by letting the wood acclimate. Buy your lumber a few days before you plan to build. Stack it flat in your yard with spacers between the boards. This lets the moisture content equalize with the air. If you skip this step, your pretty straight boards might twist into pretzels once you screw them together. Also, check each piece for cracks or large knots. A few small knots are character; big ones are structural weaknesses. Sand down any rough spots now to save your hands later.
If you want to go even cheaper, look for reclaimed wood. Pallets can be sourced for free or very cheap, but be careful. Not all pallets are safe. Look for the "HT" stamp, which means heat-treated, not chemically treated. Avoid pallets marked "MB" (methyl bromide). Reclaimed wood has charm, but it takes more work to clean and prep. For most beginners, new pressure-treated pine is the safest, easiest bet. It’s predictable. It’s straight. And it won’t give you splinters from old nails.
Selecting Vines That Actually Work
Not all climbers are created equal. Some are aggressive monsters that will eat your house. Others are shy and take five years to cover a square foot. For a privacy screen, you want speed and density. In 2026, gardeners are loving fast-growers that are also pollinator-friendly. Honeysuckle is a classic choice. It grows fast, smells amazing, and attracts hummingbirds. Just make sure you pick a non-invasive variety suitable for your region. Check with your local extension office if you’re unsure.
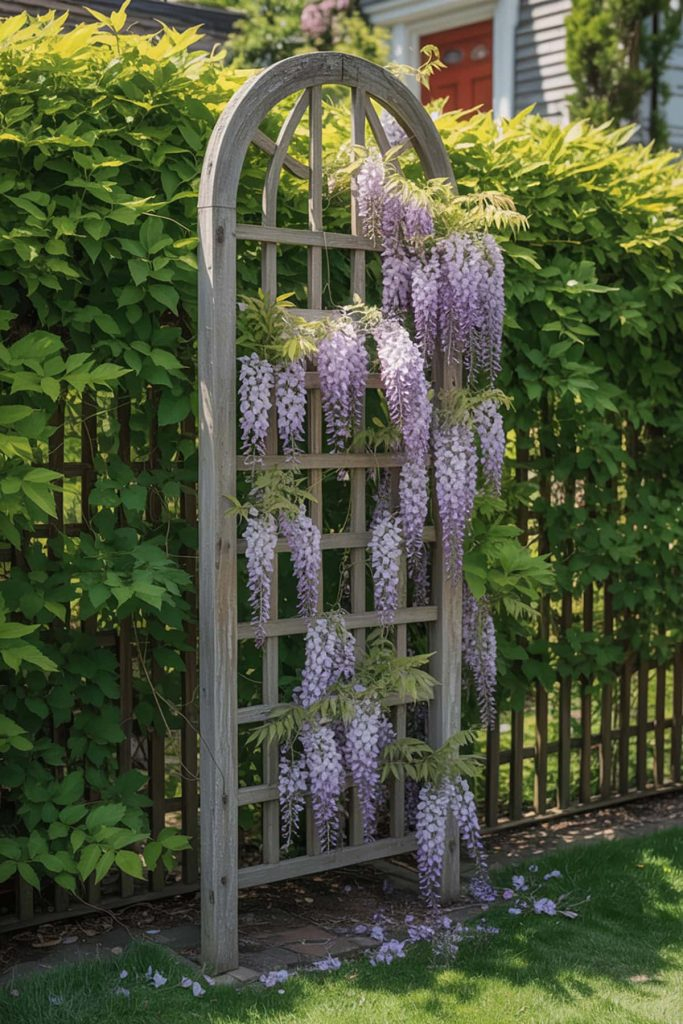
Clematis is another fantastic option. It’s not as dense as honeysuckle, but the flowers are stunning. You can mix different varieties to have blooms from spring through fall. Jasmine is great for warmer climates. It stays green year-round in mild winters, giving you privacy even when other plants are dormant. If you live in a colder zone, consider annual vines like Morning Glories or Moonflowers. They die back in winter, yes, but they grow incredibly fast in summer and create a thick wall of leaves and flowers in just months.
Avoid English Ivy unless you want a lifelong commitment. It’s hard to remove and can damage wood over time. Instead, look for vines that cling with tendrils or twine, like peas or beans. These are gentler on your wood frame. You can even grow edible vines! Pole beans or hops provide privacy and a harvest. Hops, in particular, grow vigorously and have a lovely texture. Just remember, whatever you choose, match it to your sunlight. Most flowering vines need full sun. If your screen is in shade, stick to foliage-focused plants like Virginia Creeper (but keep it trimmed).
Designing the Structure for Maximum Coverage
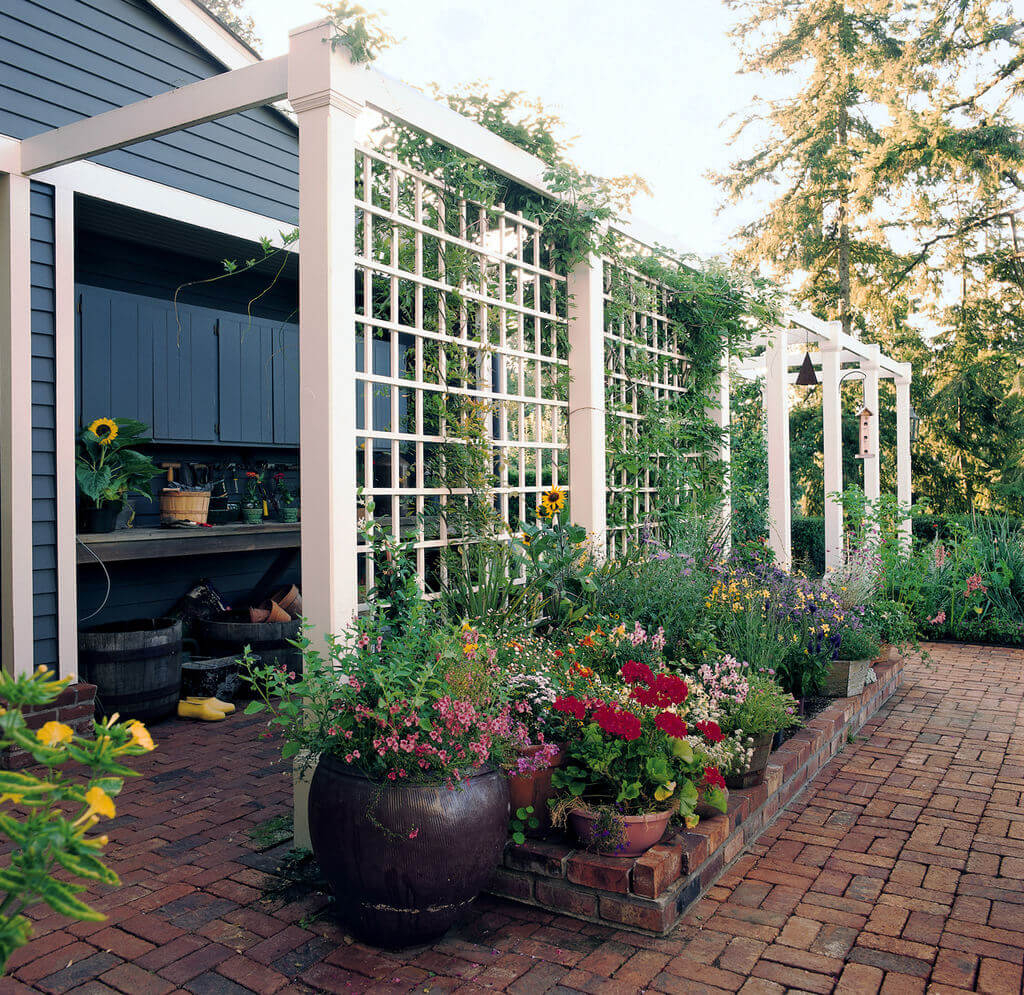
A solid wall of wood blocks view but also blocks light and air. A vine screen needs airflow to keep the plants healthy and prevent mold. The secret is the lattice. You don’t need to buy pre-made lattice panels, which can be flimsy and expensive. Build your own. Use 1×2 or 1×3 strips of wood. Create a diamond or square pattern with gaps about 4 to 6 inches apart. This gives the vines enough room to weave through but is tight enough to obscure vision once the leaves fill in.
Think about height and width. For privacy, aim for at least 6 feet tall. Standard lumber comes in 8-foot lengths, so you can cut two 4-foot sections for vertical posts or use full 8-footers for a taller screen. Width depends on your space, but 4-foot wide panels are easy to handle and install. You can connect multiple panels if you need a longer barrier. Make sure the frame is sturdy. Use exterior-grade screws, not nails. Nails pop out over time as wood expands and contracts. Screws hold tight.
Consider adding a trellis layer on top of the frame. If your main frame is just vertical posts and horizontal rails, add a separate trellis panel attached with spacers. This creates a gap between the wood and the vine. Why? Air circulation. It prevents the leaves from sitting directly against damp wood, which reduces rot. It also makes it easier to prune behind the vines if needed. A simple design is two vertical posts, three horizontal rails, and then a lattice panel screwed onto the front. Simple, effective, and cheap.
Step-by-Step Assembly Guide
Start by cutting your wood to size. Measure twice, cut once. It’s a cliché because it’s true. Cut your vertical posts, horizontal rails, and lattice strips. Lay out the frame on a flat surface. Assemble the outer rectangle first using corner brackets or pocket holes if you have a jig. Pocket holes are great for a clean look, but exterior screws through the face are stronger for outdoor use. Pre-drill your holes to prevent splitting. This is crucial with treated wood, which can be brittle.
Attach the lattice strips. Start from one corner and work your way across. Keep the spacing consistent. You can use a scrap piece of wood as a spacer to ensure each gap is the same. Screw each intersection where the strips cross. This takes time, but it’s worth it. A loose lattice will sag under the weight of wet vines. Once the panel is built, sand any rough edges. Apply a sealant or stain if you want extra protection and color. Let it dry completely before planting.
Installation is next. If the screen is freestanding, you’ll need to anchor it. Dig holes for post anchors or use concrete footings for stability. Wind can knock over a tall, leafy screen if it’s not secure. If attaching to an existing fence or wall, use heavy-duty brackets. Make sure there’s a slight gap between the screen and the wall for airflow. Plant your vines at the base. Give them room to spread. Water well. Mulch around the base to retain moisture and suppress weeds. Now, wait. And watch.
Training and Maintaining Your Living Wall
Vines don’t always know where to go. You have to help them. In the early weeks, gently tie the young shoots to the lattice using soft garden twine or plant ties. Don’t use wire; it cuts into stems. Guide the growth horizontally as well as vertically. This encourages bushier growth and faster coverage. If you only let them go up, you’ll get a skinny line of green. Spread them out. Pinch off the tips of young shoots to encourage side branching. It feels counterintuitive to cut growth, but it makes the plant fuller.
Watering is critical, especially in the first year. Vines have shallow roots initially. Deep, infrequent watering is better than daily sprinkles. Check the soil moisture. If it’s dry an inch down, water. In hot summers, you might need to water every few days. Mulch helps immensely here. It keeps the roots cool and moist. Fertilize sparingly. Too much nitrogen gives you lots of leaves but few flowers. A balanced slow-release fertilizer in spring is usually enough. Compost is a great natural alternative.
Pruning keeps things manageable. Don’t be afraid to cut back. In late winter or early spring, prune dead or weak stems. Shape the vine to fit your screen. If it’s getting too thick, thin it out to allow light to reach the inner leaves. This prevents disease. Watch for pests. Aphids love new growth. Blast them off with a hose or use insecticidal soap. Ladybugs are your friends; they eat aphids. Encourage biodiversity. A healthy ecosystem keeps pests in check naturally. Enjoy the process. It’s therapeutic.
Let’s talk money. A typical 8×4 foot wood frame might cost $50-$80 in lumber and screws, depending on local prices in 2026. Lattice strips add another $20. So, roughly $100 per panel. Compare that to a vinyl or composite privacy panel, which can run $200-$400 installed. The savings are significant. Plus, the vines cost maybe $15-$30 each. You might need 2-3 plants per panel. Total initial investment: around $150 per section. That’s budget-friendly.
But the real value is long-term. Wood rots eventually. Even treated pine lasts 10-15 years. But vines? They come back every year. Perennial vines get bigger and denser over time. Your privacy improves with age. The aesthetic value is huge. A green screen adds curb appeal. It can increase property value. It also helps the environment. Vines absorb carbon dioxide, provide habitat for birds and bees, and cool the air around your home. In summer, a leafy screen can lower temperatures near your patio by several degrees.
Maintenance costs are low. Water, occasional fertilizer, maybe some new twine. No painting every few years like a wooden fence. No power washing. Just gardening. And if a board rots, you can replace just that board without tearing down the whole structure. It’s modular. It’s flexible. It’s alive. In a world of static, expensive barriers, a living screen offers a dynamic, affordable solution. It connects you to your yard. It makes you look outside. It turns a chore into a hobby. And honestly, isn’t that what a backyard should be?
Building a privacy screen with wood and vines isn’t just about hiding from the neighbors. It’s about creating a sanctuary. It’s about watching life unfold on your own terms. You start with bare wood and small plants. Months later, you have a whispering wall of green. It’s imperfect. Leaves might drop. Bugs might visit. But it’s real. It’s yours. And it didn’t cost a fortune. So grab your saw, pick your vines, and start building. Your private paradise is waiting.