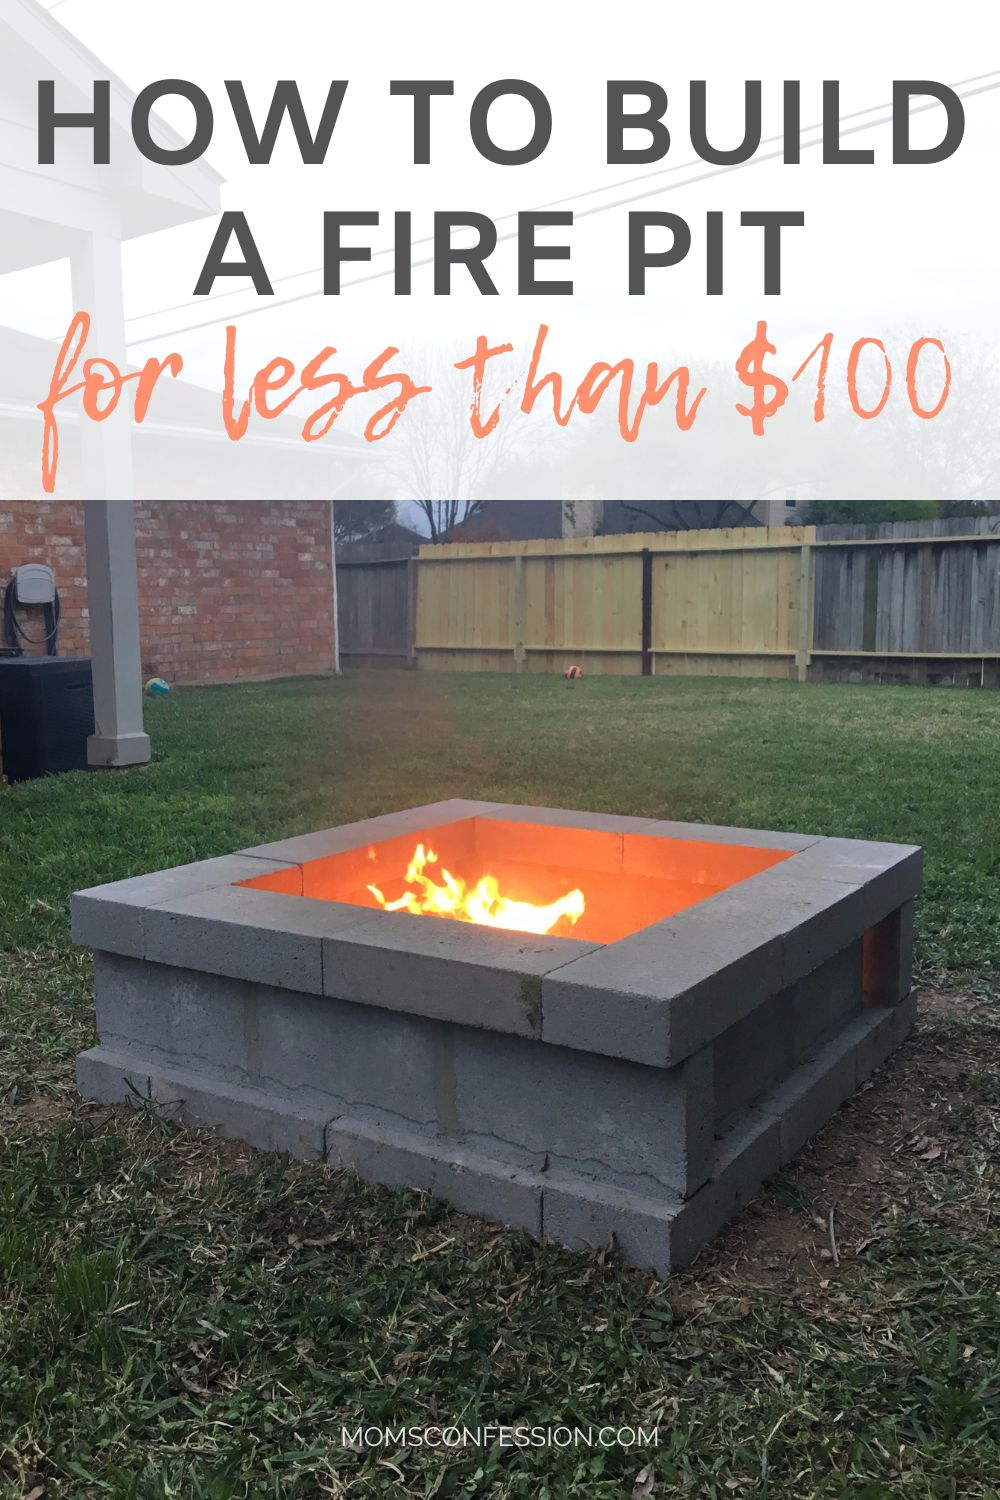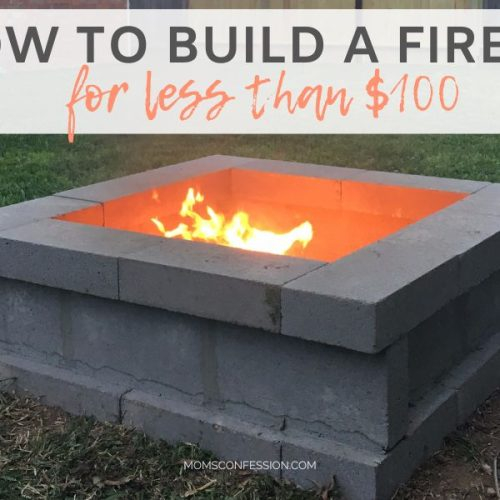

There is something primal about sitting around a fire. It pulls people together. The crackle of burning wood, the smell of smoke mixing with cool night air, the way faces glow in the flickering light—it’s magic. But when you look at pre-made fire pits online or visit home improvement stores, the price tags can feel like a bucket of cold water on that warm feeling. Hundreds of dollars? For a hole in the ground with some rocks? It feels wrong.
But here is the secret nobody tells you: you don’t need a contractor. You don’t even need new materials. In fact, some of the most beautiful, character-rich fire pits are built from things other people threw away. Old bricks from a demolished chimney. Concrete blocks left over from a neighbor’s project. Even an old washing machine drum. With a little elbow grease and some creativity, you can build a cozy centerpiece for your backyard that costs next to nothing. And honestly? It’ll have more soul than anything you could buy off a shelf.
Let’s talk about how to make it happen. We’re going to walk through finding materials, picking a safe spot, and stacking it all up so it lasts. By the end of this guide, you’ll be ready to roast marshmallows under the stars, knowing you built the whole thing yourself for less than the cost of a nice dinner out.
Scavenging for Gold: Where to Find Free Materials
The first step isn’t buying anything. It’s looking around. Your neighborhood is likely full of hidden treasures if you know where to look. Start with online community groups. Facebook Marketplace, Nextdoor, and local Buy Nothing groups are goldmines. People often give away leftover pavers, bricks, or landscape stones just to clear space in their garages. Search terms like "free bricks," "leftover pavers," or "demolition debris" can yield surprising results. In 2026, sustainability is huge, so many folks are eager to pass along materials rather than pay dump fees.
Don’t overlook construction sites either. Always ask permission first, of course, but many contractors have piles of broken or cut bricks and blocks they consider waste. A polite conversation can lead to a truckload of free materials. Also, keep an eye out for curbside pickups during bulk trash days. You’d be amazed at what people discard. An old metal ring from a defunct barrel? Perfect liner. A stack of cracked concrete slabs? Great for the base. Just remember to wear gloves and inspect everything for structural integrity. You want sturdy pieces, not crumbling dust.
If you’re really stuck, check with local masonry suppliers. Sometimes they have "seconds" or slightly damaged stock they sell for pennies on the dollar. These imperfections often add rustic charm to a fire pit anyway. The goal here is resourcefulness. Every brick you salvage is money saved and waste diverted from a landfill. It feels good, doesn’t it? Knowing your cozy evening spot is also an act of environmental care.
Safety First: Choosing the Right Spot and Base
Before you stack a single stone, you need to think about safety. A fire pit is beautiful, but it’s also a hazard if placed poorly. The general rule is to keep it at least 10 feet away from your house, fences, trees, and any overhanging branches. Check your local ordinances too; some cities have specific rules about open flames or permanent structures in backyards. You don’t want to build your dream pit only to get a fine from the city.
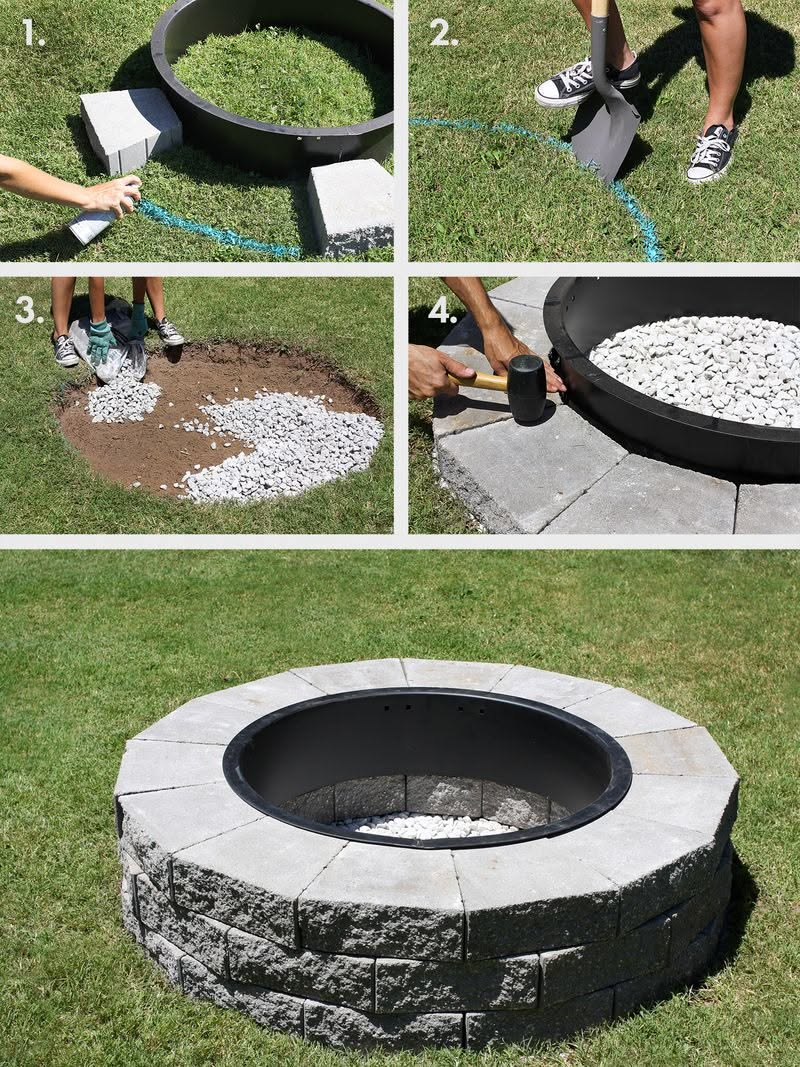
Ground preparation is crucial. Never build a fire pit directly on grass or dirt without a proper base. The heat can kill the grass underneath and potentially spread underground roots or cause uneven settling. Start by marking a circle about 36 to 44 inches in diameter. Dig down about 4-6 inches within that circle. Fill this hole with gravel or crushed stone. This layer provides drainage and a stable foundation. Compact it well. You want it solid. If the base shifts, your walls will crack.
Consider wind direction too. Set up your pit so the prevailing breeze blows smoke away from your seating area and your neighbors’ windows. Nobody wants to choke on smoke while trying to relax. If your yard is small, think vertical. A taller, narrower pit can contain sparks better than a wide, shallow one. And always keep a bucket of water or a garden hose nearby. Accidents happen. Being prepared isn’t paranoid; it’s smart.
Design Choices: From Rustic Rings to Modern Minimalism
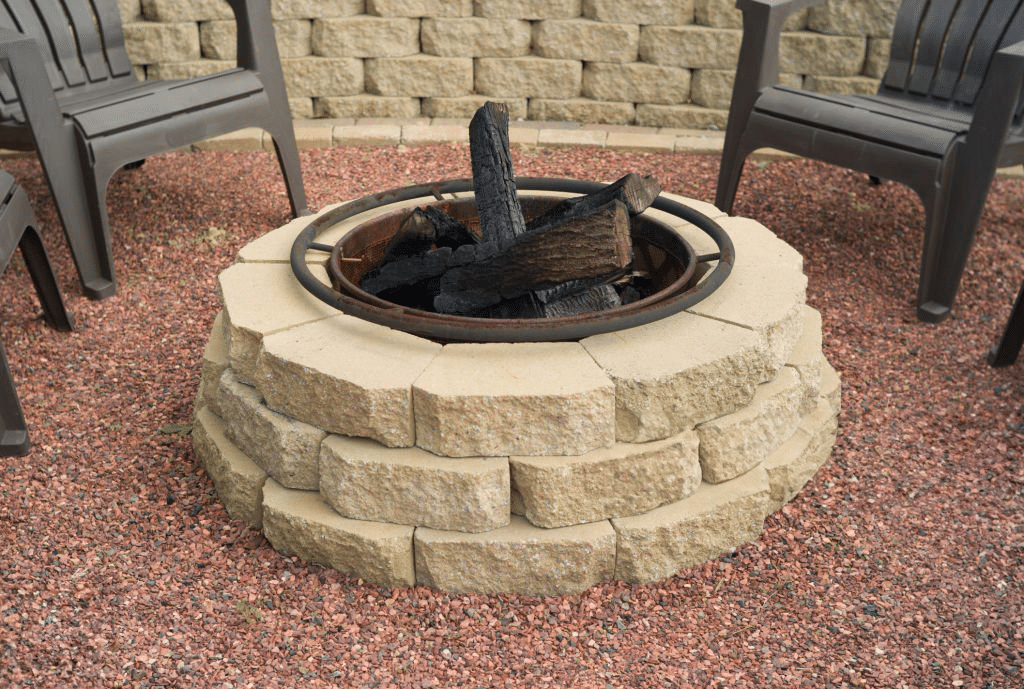
Now for the fun part: design. What kind of vibe do you want? Rustic and rough? Clean and modern? The materials you found will largely dictate this, but you have options. The simplest design is a dry-stack ring. This means stacking your bricks or stones without mortar. It’s forgiving for beginners because if a piece isn’t perfect, you just adjust it. Use large, flat stones or uniform bricks for a cleaner look. For a more organic feel, mix sizes and shapes of river rocks.
If you have cinder blocks, you can create a surprisingly stylish industrial look. Stack them in a circle, alternating the orientation of each layer to lock them together. The hollow cores can even be filled with decorative stones or used to plant small succulents (when the fire isn’t lit, obviously). Another popular option is the "sunken" pit. Instead of building up, you dig down deeper and line the walls with reclaimed bricks. This contains the fire naturally and creates a cozy, enclosed feeling.
For those with very limited space, consider a tabletop version. Take an old metal bowl or a repurposed tire rim, clean it thoroughly, and place it on a sturdy stand. Add some lava rocks and a gel fuel canister for a smokeless option. It’s not the same as a wood-burning pit, but it offers that same visual warmth on a patio or balcony. The key is matching the scale of the pit to your space. A massive stone structure might overwhelm a tiny urban yard, while a tiny metal ring might look lost in a sprawling lawn. Think proportion.
Step-by-Step: Building Your Dry-Stack Wall
Let’s get building. Assuming you’ve chosen a dry-stack method with bricks or stones, start with your first layer. Place your materials around the perimeter of your gravel base. Make sure they are level. Use a rubber mallet to tap them into place. If there are gaps, fill them with smaller stones or gravel. Stability is key here. The first layer bears the weight of everything above it, so take your time.
For the second layer, stagger the joints. This means placing a brick so it covers the seam between two bricks below it. This technique, called running bond, adds significant strength to the wall. Continue this pattern for each subsequent layer. Most DIY fire pits are 3 to 5 layers high. Any higher, and you might need mortar or a different engineering approach to prevent collapsing. As you go up, check for level frequently. A slight lean can become a big problem later.
If you’re using irregular stones, fit them together like a puzzle. Look for natural flat surfaces to rest on. Don’t force pieces that don’t fit; find ones that do. It’s slower, but the result is much more secure. Once you reach your desired height, cap the top with flat flagstones or pavers if you want a finished look. This also provides a handy ledge for setting down drinks or plates. Just ensure these caps are heat-resistant and stable.
Adding Comfort: Seating and Atmosphere
A fire pit is only half the equation. The other half is the experience around it. You need somewhere to sit. Built-in benches made from the same reclaimed materials create a cohesive look. Stack extra bricks or stones to form low walls around the pit, then top them with wooden planks or cushions. If you don’t want to build permanent seating, arrange existing patio chairs in a circle. Keep them far enough back to be safe from heat and sparks, but close enough to feel the warmth.
Lighting matters too. While the fire provides the main glow, subtle ambient lighting enhances the mood. String lights overhead or solar-powered path lights around the perimeter can guide guests safely to their seats. Avoid bright floodlights; they kill the cozy vibe. Instead, opt for warm-toned, dimmable options. Lanterns with LED candles placed on the surrounding ground add a nice touch without the fire risk of real flames.
Think about storage for wood and tools. A simple crate or a small shelf built from leftover pallets can hold kindling, matches, and poker tools. Keep it organized and within arm’s reach. Nothing ruins the relaxation of a fire night like having to hunt for the lighter in the dark. Add some throw blankets in a weatherproof basket nearby. As the night cools, your guests will thank you. These small touches transform a simple hole with fire into a true outdoor living room.
Your fire pit is built, but the work isn’t quite done. Regular maintenance ensures it stays safe and looks good for years. After each use, let the ashes cool completely. Then, scoop them out. Accumulated ash can retain moisture, which leads to cracking in stone or rust in metal components. Dispose of ashes in a metal container, never in plastic bins or compost piles, as they can stay hot for days.
Inspect the structure periodically. Look for loose bricks or stones. If you notice any shifting, restack those sections. Check for cracks in the base material. Small cracks can be filled with heat-resistant mortar if needed. If you used metal parts, watch for rust. A wire brush and a coat of high-heat paint can refresh old metal rings or drums. Keeping the area around the pit clear of dry leaves and debris is also essential to prevent accidental fires.
In winter, if you live in a freezing climate, consider covering the pit. Water can seep into cracks, freeze, and expand, causing damage. A simple tarp or a fitted cover works wonders. When spring arrives, give it a good clean-out and inspection before your first fire. With minimal care, your reclaimed fire pit can last decades. It becomes a witness to countless conversations, laughter, and quiet moments. That’s the real value. Not just the fire, but the memories it helps create.
Building a fire pit from reclaimed materials is more than a DIY project. It’s a statement. It says you value resourcefulness over convenience. You appreciate history and character in objects. And you understand that comfort doesn’t have to come with a hefty price tag. So go ahead. Scout those curbs. Talk to your neighbors. Get your hands dirty. The warmth you create will be worth every bit of effort. And when you sit down that first night, watching the flames dance against stones that once lay forgotten, you’ll feel a deep sense of satisfaction. That’s the beauty of building it yourself.